Reveena: Brian is in the STEM studio today to show us the halfpipe module.
Brian: A good halfpipe is unpredictable, but still reliable.
Hallelujah!
Hallelujah!
Hallelujah!
Haaaaa!!!!!
Woooooo!
Woohooo!
OOooooo!!
-------------------------------------------
Runners Make Final Preps For Marathon - Duration: 1:44. For more infomation >> Runners Make Final Preps For Marathon - Duration: 1:44.
 -------------------------------------------
How To Make Your Lips Soft and Pink Naturally at Home Easy tips - Duration: 5:20.
Put a spell in milk and give some time to the thief
. When Zafaran stole the color, then it was sliced on the lips. The lips become pink (pink)
The lips are made of glycerine, which will survive at the top of this one and every one will survive.
Use the rose lips, make the lip or pink a lip
-------------------------------------------
Easy Apple Cake Recipe - How to Make the Easiest Apple Cake - Duration: 7:15.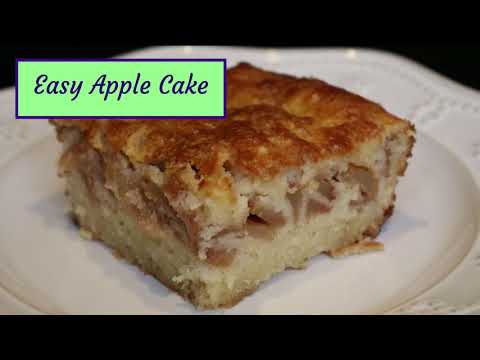
Hi everyone, welcome to Delights to Share
and today I'll be making a very easy and delicious Apple Cake.
It's an old family reciped that comes out perfect every time.
It's easy because
You simply prepare 3 parts to the recipe and then you assemble it all in the pan.
Let me show you the 3 parts: First we have the Dry Ingredients,
we'll use 1 1/2 cups of flour, 1 1/2 cups of sugar, 2 teaspoons of baking powder
and 4 tablespoons of butter or margarine.
Second part of the recipe are the Wet Ingredients
which consists of 1 Cup of Milk, 2 eggs and
1 tsp of vanilla Extract.
Finally the 3rd part of the recipe is the Apple Filling, I like to use 2 sour apples
like Granny Smith, a tablespoon of lemon juice, 1 tablespoon of sugar,and a half of a teaspoon
of cinnamon.
So lets get started with the first part of the recipe: the dry ingredients:
in a medium bowl, I put flour, sugar, and baking powder
and then I give it a good mix with a wire whisk.
Next I add the cubed butter, preferably cold,
And then I squeeze the butter into the flour with my fingers
until it's well mixed and all the big pieces of butter disappear,
leaving the flour a little bit more yellow in color
and grainy. OK, this is what it should look like and we set it aside,
in the upper right corner of the screen
Now comes the second part of the recipe: the Wet Ingredients.
In a smaller bowl I place 2 eggs
, and they need to be beaten for a good 3 to 5 minutes,
until they turn a lighter yellow color and they are completely blended.
This step is VERY important because you don't want
chunks of egg yolk or chunks of egg white in your cake.
I speed up the video a little bit.
This is what it should look like, lighter in color and frothy.
Now I add the vanilla,
and I beat some more.
Finally I add the milk slowly
while I continue beating
so it all gets well blended.
Once I'm done,
I set the bowl on the upper middle part of the screen.
Finally here comes the 3rd part of the recipe: the Apple Filling.
In a medium bowl, the first ingredient I add is the lemon juice.
Next I start peeling and slicing the first green apple.
As you can see the slices should be
about a fourth of an inch thick at its outer edge.
Quickly I give the apples a stir with the lemon juice until they are well coated;
this prevents the apples from turning brown.
Now I do the same with the second apple, peeling and slicing it,
and giving it a good stir with the lemon juice.
Once it's all coated with lemon juice, I add the cinnamon,
and the sugar,
and I continue stirring until everything is coated
Alright, so this is the Apple Filling,
and I'll set it aside on the upper left corner of
the screen.
I preheat the oven to 350 degrees Fahrenheit.
And I have the 3 parts of my cake here in front of me; the dry ingredients, the wet ingredients,
and the apple filling.
And I prepare my baking dish, I butter it and I flour it.
And we're ready to assemble:
I grab the dry ingredients
and I run a knife a little less than halfway down the dry ingredients.
This smaller portion will be the bottom layer of my cake.
I lightly spoon this smaller portion of dry ingredients into the baking dish.
Once this is complete,
I lightly even it out with a fork,
And when I even it out, I try not to press it down.
The second part of the assembly of the cake is adding the apple filling, in this case the
apple slices coated with cinnamon and sugar.
I like to place them a bit on top of each other so there are plenty of apples in each serving.
This is what it should look like at the end.
And no need to press the apples down.
And now we are at the third part of the assembly:
we add the remainder of the dry ingredients on top of the apple filling,
again I spoon the dry ingredients lightly over the apples,
making sure I coat everything,
and without pressing the dry ingredients down at all.
I give the baking dish a good jiggle
and the cake evens out and the dry ingredients fall into
the cracks of all the apple slices.
The fourth and final part of the assembly of the cake is to add the wet ingredients,
but first I give it a good stir and then I pour gently over the entire cake.
At this point, it's VERY important to let the cake sit for 10 minutes
so the liquids can get all soaked up into the dry ingredients.
This is what it should look like and off to the oven it goes
for 55 minutes at 350 degrees Fahrenheit.
Here's the baked cake,
very nice!
I like to let it cool in the same dish for about 45 minutes
before serving.
Alright, I'm ready to serve, here I go.
Look at all those apples
well baked and nicely packed
in the center layer of the cake.
You can see that the cake is moist, and the batter was well blended
without ever beating the wet and dry ingredients together.
I'm ready to give it a taste, and believe me,
this cake tastes as delicious as it looks.
Every piece is packed with apples.
Absolutely delicious
I'm going to have to go for another
piece.
It's just so good
If you enjoyed this video, please give it a thumbs up, and don't forget to subscribe
to my channel so I can share more great recipes with you.
Any questions or comments, please let me know in the comment section below.
Thanks for coming, and bye for now.
-------------------------------------------
Make Bitcoin with Bitcy.biz - Duration: 17:07.
Hello everybody
Today I want to talk to you about a website
www.bitcy.biz
Where can you make bitcoin
If you want to make investments
Here are the following investment plans
The first investment plan is called ° casual °
Where the minimum investment is 0.005 Bitcoin
And the maximum investment is 0.25 Bitcoin
The next plan is called ° optimal °
Where the minimum investment is 0.25 Bitcoin
And the maximum investment is 2.5 Bitcoin
and so for
you have more investment plans according to your possibilities
if you do not allow yourself to make an investment for the moment
This site allows you to make Bitcoin and no investment
I'll explain in a few minutes what this is
But for starters let's talk about investments
Suppose we choose the first investment plan
Which is 15 days and we have a profit of 2.3%
and we decide to invest 0.1 Bitcoin
We have a 0.0023 day profit
and totally returned after 15 days
0.1345 Bitcoin
1 Bitcoin = 4,591.34 USD
It's a relatively new site, But the company is old
Right now it's only 10 days
Already has 6550 registered members
Total withdrawals, 5.6 Bitcoin
And total deposits of 63.8 Bitcoin
The site is based in England
In London, exactly
You have here details about the location of the website
About As,
Here you will find information on the website
And people who handle the site
and all that
For more information go here.
How we can create an account.
Go here Open Account
Where to fill in all the boxes
To begin with, we must choose a username
Which you will use when logging in to the site
enter a password
re Enter the password
Enter a secret question
The answer to the secret question introduced
Then
Enter the full name in your ID card
A valid email address
Re Enter your email address
And the last time we put in Bitcoin Address
if you are at the beginning
and you do not already have a bitcoin address,no problem
You can enter this website
www.coinbase.com
My opinion is that it is one of the best
I'll put the link in the description of the video
And if you have any questions and need help
how to create an account and how to safely use it
you can leave a message and I will help you with pleasure
Suppose you already created an account
I do not do it because I already have one
I already have one and I will log in
If you do not want to make an investment, At least for now
But we want to win Bitcoin with no investment
no problem, the site offers us an alternative
Click BOUNTY
And here you can do various things
For this website, and be paid in bitcoin
To begin with, we need to complete some things
We have already registered and have an account
the next thing we have to do
is to enter the Telegram to register and choose an Account Name
You must subscribe to the official Facebook page
And the same thing on the Official Twiter page
After doing all of the above,
I'm going into the °Bitcy Bounty Program°
and here we introduce
Enter your username
Example
Then enter the Telegram User Name
Example
Enter the link to your Facebook profile
And link to your Twitter Profile
Then give SUBMIT
All these things are necessary to be checked when you do things on facebook and Twitter
Let's start with the first thing we can do
You can earn bitcoin if you make share to Facebook
and also on Twitter
They make certain posts on the official facebook page
Including on the official twitter webpage
And you have to distribute those posts that they do
with the hashtag #bitcynews
If you do that, for every share you make
you earn 0.00025 bitcoin
This signifies somewhere at $ 1.20 for each Share
If you made a share on Facebook and a share on Twitter
every day for 30 days you earn about $ 70
This also depends on the company's posts on Facebook and Twiter
If the company has more posts and your earnings will rise
The second thing you can do
It's a review of the company and the website
And tell your opinion and what you think about weebsite
Then post it on various websites
youtube, facebook, instagram, vimeo, etc
Depending on how well it is done and other things are paid
is paid from 0.00025 to 0.05 Bitcoin
The third thing you can do to win Bitcoin
If you have accounts on various forums
Examples: www.bitcointalk.org
Set your account signature to "Earn hourly together with Bitcy Limited"
(with your referral link) for this website
you will need to write 20 posts per week
And you will win for every week that you do
You will earn this amount of bitcoin
0.00075 BTC For each forum you do this
The next thing is very interesting
How everyone has a facebook and Twitter account
You can put your profile photo and the cover photo
With a logo you can download from here
Download logotype
I already downloaded them
Excuse me for two seconds
Picture of facebook or twiter profile
And here you have the cover Photo
If you decide to do this
you will be paid for each week in which you keep the profile picture and the cover photo
suppose we have profile picture for a week
You will be paid with 0.00125 bitcoin for each week you hold the profile picture
that signifies somewhere at $ 5 a week, but the bitcoin grows
if we do the same thing and twitter is another $ 5
You earn about $ 40 per month only from profile picture
The same thing with the cover photo is another $ 40
A total of $ 80 just from profile photo and cover photo
with the $ 70 raised from the share
You get $ 150
And we do not take into account the incomes from the forums if you decide to do it or not
Another thing you can do to win BITCOIN
If you have a website
if this site has over 1000 unique visitors per month
You must have very good traffic on your website
You can put a banner on your site if you meet the conditions
and you will be paid between 0.025 and 0.5 BITCOIN
It's a pretty big sum if we take into account the bitcoin valuation
which currently is $ 4,650.00
The 0.5 bitcoin you will earn $ 2,325
Very well, I say
And the last thing you can do
Win a bitcoin without an initial deposit
Write an objective comment about the company
containing at least 4 words under the news which have a hashtag #bitcynews
on the official pages on Facebook and Twitter
When posting something on the official page, you leave a comment in which you say a few words
About the company, the website, or the posting made which have a hashtag #bitcynews
you can do this on both Facebook and Twitter
and you will earn for every comment made this amount of bitcoin
Below we have ° Results List °
Where do We See Who Were Paid, Person Who Was Not Paid
And why did not those people get paid
And as we see we have here all the paid people
Among whom I am, as you see
My user name is this, Rokco999
Press CTRL & F and write our username
And I found 5 Shares made on facebook
Each Share was paid with 0.00025 Bitcoin
Same thing to comment
Here we find those who shared the Twiter
Comments on Twitter
As you can see, you have to enter the correct link
To comment or posting done
Because otherwise you will not be paid, I can not check you
If you did, share, comment, review or other stuff
And here we have the people who put the picture picture together with the referral link that downloaded picture
It was paid with 0.00125 Bitcoin
And here we find people who have review
As you can see, everyone is paid
but it differs depending on the review
And the last thing is banner on your site
As you can see
Those who do not have a traffic of 1000 unique users per month
They are not paid
It's a normal thing, it's the condition of the site
Again make sure to enter the correct link
For everything you do on this site
That being said, I have one thing to show you
The site is 100% safe and real
Although it is a new site is very good and pays
As you can see the balance of the account
made less than 4 days after registration
we are on 08.08.2017 and I have registered on 04.08.2017
And I've already done something bitcoin
That's somewhere at $ 12
I'm entering °Earning History°
facebook repost and Twitter Repost
And as you see here, I have all the gains I've made in a few days
And proof that he pays this site
We have here the proof of the first withdrawal, which came in a few minutes in my account
Withdrawal on 06.08.2017 two days after registration
we have withdrawn the amount of 0.0005 bitcoin
You can instead make your own community your own registered person
through your referral link, which will bring you a constant income passive
You can earn a certain amount of bonus bitcoin from what you refer to
For each person who logs in with your referral link
and make investments or earn money The site will give you a bitcoin bonus
They do not lose anything but in return you have to win,
As I said, you get a bonus for every referral that makes investments and earns bitcoin
Here you can find your own referral link
-------------------------------------------
How To Make Scentsy Wax Samples | Scentsy Wax Melts Sample Making - Duration: 2:26.
Hi Scentsy lovers this is how to make scentsy wax samples
I'm Nicola Franklin hello, Nicola. Hello, Jason Jason's behind the camera
and we're your independent Scentsy consultants and
We've shown you today how you can make your waxes
Go that little bit further. So it could be that you're already on Team Ninja in which case we're gonna help
You rock your sexy business, or it could be that you are
A satisfied customer and your lover new waxes, but you would like to see how they can go that a little bit further
So it's dead easy all we do we have a pack of wax
and
That's how it looks when it's empty because what we've done is we've put up a couple of cubes
into
The plastic jug and the plastic jugs gone into some hot water and it's melted it
There's no watering that in there nice pure wax
Okay, so we're gonna make that into little work samples that you can use for your customers
You can use if you don't need to phone, cube. If you have a customer
Just put it in your water and use it what you're gonna need is one of these
Silicon wax molds that we get from Scentsy, and they're really pretty you got butterflies
And it's a sentencing it it looks great all we need to do is pop that on the kitchen work surface
Pull out that melted wax, and then I want to do is pour it in to these moulds
So we've got one there, we've got two there
We've got three and out of those two cubes. You know what we've done. We have made ooh
Not quite five. We've made four and a half
Really, good little samples of sensi so what we do now is we pop them in the fridge
And we just allow them to cool off in the fridge and then tomorrow when we've got a minute
We've grab ourselves a couple of little bags
little muslin bag
Grab ourselves a card and we pop them into there
Along with a sensi wax sample and there to go out to your potential customers
If you don't need that you know what you just need to put those little samples in your wallet
And it will last you a little bit longer
Thank you for watching guys say goodbye Nicola
goodbye, Jason, ITA no that's
-------------------------------------------
how to make a paper butterfly easy origami butterflies for beginners making diy-paper crafts - Duration: 7:43.
PLEASE LIKE SUBSCRIBE AND COMMENT
-------------------------------------------
2 WAYS TO MAKE MONEY | ISHRAJ S. INDERJEET | DAILY MOTIVATIONAL VLOG 12 ✔️ - Duration: 6:34.
2 WAYS TO MAKE MONEY | ISHRAJ S. INDERJEET | DAILY MOTIVATIONAL VLOG 12 ✔️
YESERDAY's VLOG: https://goo.gl/nG51xD ✔️
-- ISHRAJ S. INDERJEET -- SUBSCRIBE AND CONNECT
WITH ME BELOW!!!
Facebook: https://www.facebook.com/ishrajinderjeet Instagram: https://www.instagram.com/ishrajinderjeet
Twitter: https://twitter.com/ishrajinderjeet LinkedIn: https://www.linkedin.com/in/ishderjeet
Snapchat: @ishderjeet About Me: https://about.me/ishrajsinderjeet
✔️
-- #GoodMorningLegends
TWO WAYS TO MAKE MONEY | ISHRAJ S. INDERJEET | DAILY MOTIVATIONAL VLOG 12 ✔️
PREVIOUS VIDEOS: https://goo.gl/nG51xD ✔️ MY FIRST VLOG | ISHRAJ S. INDERJEET | DAILY
MOTIVATIONAL VLOG 01 ✔️ The KEY to Success | ISHRAJ S. INDERJEET | DAILY
MOTIVATIONAL VLOG 02 ✔️ Dump Your Dumb Friends | ISHRAJ S. INDERJEET
| DAILY MOTIVATIONAL VLOG 03 ✔️ Start RIGHT NOW | ISHRAJ S. INDERJEET | DAILY
MOTIVATIONAL VLOG 04 ✔️ BE A GAZELLE, NOT THE LION | ISHRAJ S. INDERJEET
| DAILY MOTIVATIONAL VLOG 05 ✔️ IF NOT NOW, WHEN?
IF NOT ME, WHO?
| ISHRAJ S. INDERJEET | DAILY MOTIVATIONAL VLOG 06 ✔️
GO ALL THE WAY | ISHRAJ S. INDERJEET | DAILY MOTIVATIONAL VLOG 07 ✔️
THE ONLY BOOK YOU NEED TO READ | ISHRAJ S. INDERJEET | DAILY MOTIVATIONAL VLOG 08 ✔️
TAKE ACTION | ISHRAJ S. INDERJEET | DAILY MOTIVATIONAL VLOG 09 ✔️
You Are LUCKY ...If You Were Born POOR | ISHRAJ S. INDERJEET | DAILY MOTIVATIONAL VLOG 10
✔️ THE TWO TRUTHS | ISHRAJ S. INDERJEET | DAILY
MOTIVATIONAL VLOG 11 ✔️
TAGS: TWO , WAYS , TO , MAKE , MONEY , TWO WAYS
TO MAKE MONEY , WAYS TO MAKE MONEY , MAKE MONEY , MONEY , MONEY MONEY MONEY , ishrajinderjeet
, Ishraj , S. Inderjeet , Ishraj S. , Inderjeet , Ishraj Inderjeet , Ishraj S. Inderjeet , motivational
video , best , Daily Motivation , video , motivation , motivational , inspirational , inspiration
, YouTube , Vlogger , top , vlog , vlogs , Daily Vlogs , Vlogging , Daily Motivational Vlogs
, Motivational speech , Daily Inspiration , Mentor , inspirational video , morning motivation
, rich , Daily motivational vlog , ishrajinderjeet , Ishraj , S. Inderjeet , Ishraj S. , Inderjeet
, Ishraj Inderjeet , Ishraj S. Inderjeet , motivational video , TRUTHS BE TOLD , TRUTH , OR , LIES
, best , Daily Motivation , video , motivation , motivational , inspirational , inspiration
, YouTube , Vlogger , top , vlog , vlogs , Daily Vlogs , Vlogging , Daily Motivational Vlogs
, Motivational speech , Daily Inspiration , Money , Mentor , inspirational video , morning
motivation , rich , Daily motivational vlog . TWO , WAYS , TO , MAKE , MONEY , TWO WAYS
TO MAKE MONEY , WAYS TO MAKE MONEY , MAKE MONEY , MONEY , MONEY MONEY MONEY , ishrajinderjeet
, Ishraj , S. Inderjeet , Ishraj S. , Inderjeet , Ishraj Inderjeet , Ishraj S. Inderjeet , motivational
video , best , Daily Motivation , video , motivation , motivational , inspirational , inspiration
, YouTube , Vlogger , top , vlog , vlogs , Daily Vlogs , Vlogging , Daily Motivational Vlogs
, Motivational speech , Daily Inspiration , Mentor , inspirational video , morning motivation
, rich , Daily motivational vlog , TWO , WAYS , TO , MAKE , MONEY , TWO WAYS TO MAKE MONEY
, WAYS TO MAKE MONEY , MAKE MONEY ,
MONEY , MONEY MONEY MONEY , ishrajinderjeet , Ishraj , S. Inderjeet , Ishraj S. , Inderjeet
, Ishraj Inderjeet , Ishraj S. Inderjeet , motivational video , best , Daily Motivation , video , motivation
, motivational , inspirational , inspiration , YouTube , Vlogger , top , vlog , vlogs , Daily
Vlogs , Vlogging , Daily Motivational Vlogs , Motivational speech , Daily Inspiration
, Mentor , inspirational video , morning motivation , rich , Daily motivational vlog , TWO , WAYS
, TO , MAKE , MONEY , TWO WAYS TO MAKE MONEY , WAYS TO MAKE MONEY , MAKE MONEY , MONEY
, MONEY MONEY MONEY , ishrajinderjeet , Ishraj , S. Inderjeet , Ishraj S. , Inderjeet , Ishraj
Inderjeet , Ishraj S. Inderjeet , motivational video , best , Daily Motivation , video , motivation
, motivational , inspirational , inspiration , YouTube , Vlogger , top , vlog , vlogs , Daily
Vlogs , Vlogging , Daily Motivational Vlogs , Motivational speech , Daily Inspiration
, Mentor , inspirational video , morning motivation , rich , Daily motivational vlog , TWO , WAYS
, TO , MAKE , MONEY , TWO WAYS TO MAKE MONEY , WAYS TO MAKE MONEY , MAKE MONEY , MONEY
, MONEY MONEY MONEY , ishrajinderjeet , Ishraj , S. Inderjeet , Ishraj S. , Inderjeet , Ishraj
Inderjeet , Ishraj S. Inderjeet .
-------------------------------------------
[ENG SUB] Fall Make Up - Wine Inspired - Duration: 5:43.
Hello everyone!
So today I want to do "Wine Eye Make Up"
To make it short, I've done my base make up in advance
So let's just get right into it alright?
First I want to apply and eye shadow
Which inspired by the color of wine
And that is a purple-ish red
We will apply this on the outer corner of our eyes
This eye shadow is from Aritaum
If you watched my Korean Beauty Haul video
You'll know that I really really like this eye shadow
Because this eye shadow is really pretty
It's cheap and very pigmented
With the same color, we will apply this
On the outer third of our lower lash line
And then we will blend all of these until soft
This will be our transition color in our eye make up
The key of using eye shadows is always about blending
So don't ever get tired to blend
Always bleeeend
Next I'm going to use this shimmer shade
Which has a gold-brown color
I'm going to apply this in the middle of my eyes
This shimmer eye shadow will give our eyes dimension
I'm going to mix these 2 brown shades
One is darker and the other one is lighter
I'm going to apply this color on my eye socket
This will give an illusion of a deeper and bigger eyes
Next, using this shimmer champagne color
I'm going to apply this in the inner corners of my eyes
This will make your eyes seems brighter instantly
Back to the brown shades mix, I'm going to apply this
On the outer third of my lower lash line
As usual,
My eyeliner starts from the middle of the eye
Because I have a round and sleepy eyes
And this time I will draw my eyeliner longer than usual
To make an illusion of sharper and longer eyes
I usually draw my eyeliner downwards
That way, it'll make your eyes seems rounder
But this time, I want to make my eyes look sharper
That is why I draw it longer and a little bit upwards
As usual, curl your eyelashes before mascara
And then apply your mascara on your upper lashes
And lower lashes
Personally I don't really like wearing mascara
On my daily basis
I hate removing waterproof mascara
Because it's very hard to remove
And today we are using fake eyelashes
That is why we use that mascara
So our real lashes will blend nicely with the fake lashes
Because it's fake eyelashes duh
It's not real lol
(Just to make it seems more realistic)
((And not so fake))
Next using a warm pink lipstick
I will apply this on the inner part of my lips
And then blend it outwards to make a gradient lips
And that's it!
Because Fall/Autumn is right around the corner
And when it comes to Fall season,
I really like the color of Wine
Like a dark red color or maroon color
I actually wore this make up at an event
I wore it at Style Awards 2017, it's Elle's event
I was accompanying my friend a few days ago
This is actually not for daily make up
This is make up is more suitable
If you're going to an event or other businesses
I really like the color of wine and deep red colors
Especially when it is Fall because,
...it's just gorgeous
And I just realized that I own
Like, a decent amount of pink and red eye shadows
Because, if you watched my Make Up Swap video
The one that I did with my friend, Tipa
She's kinda shocked because I own
"A lot" of pink and red eye shadows
And i just realized that lol
I also love cute and useless stuffs, see?
So I hope you guys liked it
And don't forget to like, comment, and subscribe
-------------------------------------------
Make Money Online [How To Make Money Online] Work At Home Jobs - Duration: 4:29.
Yo, yo yo what's up guys
It's Christopher Ramirez, and I'm coming at you in this video because I know that you're looking for work in your specific area
Okay, you probably having a hard time finding work, or you just came out of school
Not really knowing what you're gonna do with your life, and I have great news for you, okay?
What I do to make a living and that is my job is I list build and I do email submissions, okay?
And what I mean is that I use a tool called Aweber okay? Weber is my email tool, and I want to do is I?
Connect prospects that are that are targeted to a specific
Thing that they're interested in that they would buy okay, and in this and in this case it's the make money online niche
Okay, there are many niches, but I don't want to go into much detail
I just want to go and show you some income proof that I made
we already nine days in the month, okay and
This account that I created for the specific video. I want to go ahead and show you that
first this month so far
As a second as well, I mean this could be a second job. If you were in a second job
I actually do work a job
But I want to help you guys are to have some kind of income if you are looking for a physical job
You know around your area, but in the meantime if you're having a hard time
I suggest you go ahead and do what I'm doing okay?
So I'm go ahead go ahead and show you some income proof of what I'm doing and so far. I've made about a hundred
Let's go ahead, and I'm sorry
I'll go ahead and zoom in I use a affiliate network called jvzoo as you can see it's right here and
So far on this month on in nine days
I generated a hundred and eighty four dollars and five cents, okay online
So that's roughly about almost a hundred dollars extra a week. I mean four hundred dollars um
Four hundred dollars extra a month, but you gotta understand this income
But the income potential it is is unlimited so Kay you pretty much give yourself a raise when you increase this number right here, okay?
This number right here right currently right now. I'm at
714 prospects in my specific make money online niche
And I want to go ahead and show you guys how you can make this income actually a full-time thought that a full-time income as
You grow your list size number right here like my first goal right now is to hit my first
10,000 prospects because but by then my first 10,000 prospects
I'll be able to go ahead and put my two weeks in at my current job. I work at I work at a restaurant
Uh-huh I work at home or in Steakhouse, and it's a great gig
And I'm especially where I live and I make this also on the side, and I'm giving myself 90 days so umm
90 days period I'll I'll be able put my two weeks in at my current job right now, okay?
But I want to help you start building your email list so you can start doing these email submissions and start building
Around these targeted prospects that by okay?
They actually buy alright, and I want to show you guys how to go ahead and start generating affiliate commissions
You know like even like this even if you know if you are jobless. What do what you got to lose?
You might as well go ahead and start generating affiliate commissions, so what I want you to do is
Go to the link in the description and you're gonna see this page right here, okay?
get paid up to three hundred and eighty four dollars and 26 cents per day using the simple code and 100% free traffic method so
Go ahead and fill out the form below. That's in the links will be in the description
It'll look like this alright, and all you gotta do is just put your valid email
Okay
All right
Put your valid email then watch the video on the other side as my friend Ben Martin shows you
What to do next and what what you need to be taking action on okay?
But you want to hurry up and act soon because I don't know how long this offer will be on the table
For you guys to even to take a peek at okay alright
So like I said go ahead click the link in the description go ahead put your email and click
Click watch video and go ahead and follow the steps, and I'll see you guys on the inside. I'm here to help you guys
Generate a boatloads of cash and build your income okay currently I am at
714 prospects and
the goal is to keep going as high as you can the
Hihihihi numbers okay, um and I'll see you inside and link in the description peace
-------------------------------------------
HOW TO MAKE MONEY WITH G2A GOLDMINE - Duration: 2:10.
Today I'm going to show you how to make money with G2A goldmine affiliate program.
But first of all - what is G2A and how I can make money?
G2A is the global biggest marketplace where you can buy PC games on relatively low prices, cheaper than the official price.
You can make money with sharing your reference link, if somebody buy a game you will become a commission.
But that's not all, you have the chance to build a team and for every sale your team make, you will receive a passive Commission.
They have a Trustpilot of 8.9. And more than 2 million followers.
Now let's go back to the money making with G2A goldmine.
First of all, what you have to do, is to sign up for the affiliate program, the link is in the video description.
Go to the top and click on G2A goldmine. Go to join now and fill up all these informations.
After you did that, check your emails and verify your account.
After you have verified your account, go to login and enter your email and password.
After login, you will come at this, site right here - and the first thing you see is your reference link
Now basically what this does, is when once you copy reference link, you will give it to somebody and if he click on it,
he will come to the main page of G2A
Now if he clicks on a game, let's say Counter Strike global Offensive and he buy it, you will receive a commission.
wait, that's not all let's go back to the goldmine, if you have any friends or people that's interesting in doing this like become a affiliate...
you will give him this invite link, right here.
And basically what this does is, that adds him to your group and for each sale your group make, you will receive a passive commission.
If you have any question, let me know - or if you want to talk with me, contact me...
I will add you to my whatsapp group, all informations in the video description!!!!
Please leave a comment and subscribe to my channel
-------------------------------------------
HOW TO MAKE PAD WITH TRANSFER TECHNIQUE-in Spanish - Duration: 7:03. For more infomation >> HOW TO MAKE PAD WITH TRANSFER TECHNIQUE-in Spanish - Duration: 7:03.
 -------------------------------------------
How to Make Small Dovetail Boxes | Episode 2 | Paul Sellers - Duration: 39:39.
now we're going to put this one piece this was the piece I used there's only a
slight variance in thickness here what we're gonna do is place the plane here
this is very common I didn't invent this this has been done ever since people
made dovetails I'm pretty sure I use my plane it's a level this piece
move it out over here so that you can rest this piece onto that end grain here
and then I'm not focusing really on this outside rim so much as this inside
corner here I'm making sure that this line here lines up with this inside face
of my box the outside if this was overhanging I can just plane that off
later now in most books many books it'll
probably say use a knife to go along the side I prefer not to do that on pine
because it closes up I've got my pencil super sharp so I now keep my finger on
here keep it in firm in place and I'm making a pencil line across here and
then right in this corner I make a second one that gets me the exact
dovetail I'm gonna make an A on here or a B whichever you want and I'm gonna
make an A on here so I know that this is a matched corner I have to square down
here I can do this two ways I can use my finger as a finger guide like this that
keeps me parallel or I could reach for the square or I could use my dovetail
template whichever one I want make sure you square a square because you want
this to be perfectly parallel to this long edge
here I just run that line along there and you want them to line up on the
corners here you see that and the same on this one so if those line up you know
that you can follow those lines the most important one is to follow this one here
and this one here mark and X I'm here just in case you don't want to cut these
off on the outside which often happens for some strange reason but now we're
going to make our saw kerf and the saw kerf needs to be on this side of the
line and this side of the line you're not trying to split the lines at all
that's the very last thing you want a lot of times people think you're trying
to split the line but this pencil line doesn't go underneath the dovetail it's
at the side of it so we leave that line in we cut this one first so thumb along the side of the
saw exactly to the angle with no variance just rub the saw until you
penetrate it like that I'm looking at my line making sure I'm staying parallel
now I'm focusing on the vertical wall not the dovetailed angle because it's
not going to change but the vertical wall could so now I place again my thumb
right on the side and I'm angling the saw slightly inclined this way so that
I can start on the back and lower my hand to drop directly to the line so I
instead of trying to get it parallel this way I just with each successive
stroke now I can look at that line and follow that line perfectly so right in
the corner I can see the parallel soccer with the line exactly and now I focus on
my vertical cut
like this down to just above my line now I have to remove that midsection here so
this I'm going to now make a knife wall across here so the piece that I just cut
I can now use my fingertips to line up the outside face like this now I go
right on this inside corner here like this gently gently with the first pass
then I go heavily again and then the last one I can go as heavily as I like
it will not move that knife wall and this is important now to transfer to the
other side I want a perfect line so I make a knife cut and now a Knick right
in the corner just a very small nick lift up and I slide my knife into that
Nick move my square up to the edge like this and make a second Nick on the
opposite side that gives me the exact square line that I need to to now set
this square on the other side into that nick with my knife slide up and then
right between the two saw kerfs so I go gently gently gently and then a little bit
heavier and and that's my final pass with that now I go to my chisel and I'm
going to chisel out the midsection like this I go in my vise now you'll notice
here that I've not gone level in my vise I'm angling down slightly so put your
chisel right between the soccer on the side of the soccer and about 1/8 of an
inch from that cut line the knife wall and then just rock the chisel you're not
trying to hit the knife wall you're just trying to use the bevel of
the chisel just to split the surface fibers to establish the knife wall a
little bit deeper and then right at this point I just use my thumb and I just
break off and that will naturally break down to the vertical cut depth that I
made now I flip over and then exactly the same
way I come in from this side about 1/8 from that just rock your chisel and then
I move over 1/2 a chisel width and do the same so I've established my knife
wall and now I'm going to make vertical chopping cuts here and so I'm gonna
slide my chisel right onto that knife wall like this just just chop but this
is a gentle chop this isn't you're not trying to get to any depths at this
point just I go so I listen for that sound because I don't want to go beyond
that move the chisel over use the same because if I hit it harder of course I
could hit it harder and I could go in 1/8 of an inch with a super-sharp chisel
but I could be moving that knife wall and that's what I don't want to do and
now I turn over you can see how I think you can see how crisp this inside corner
is here where I've chiseled so that's gone in now about a little over a
sixteenth of an inch probably so I'm going to do the same from this this side
here the vertical chop no compensation
and as I go deeper I'll be able to hit just a little bit harder with each depth
now I want to keep this outside rim here because as I flip over and go deeper
this will stop this from levering and tearing out the end grain fibers
hard to understand that really at this point but as you do this you'll
understand what I'm talking about so here I come away from my knife wall now
well I'm probably half the length of my recess and I just Rock my chisel like
this move over to the other side and do the same use and you can flick these now
and what that flick will do it'll take you down to the exact depth it goes down
to the depth of that knife cut so we're about three thirty-seconds deep here
almost 1/8 deep already and this is only 1/2 inch so theoretically we're about
quarter of the way through pine works really nicely for this and it's a
wonderful practice wood but it's also a wonderful permanent wood it's no less of
a wood than the hardwoods are you could use a wider chisel for this I would
probably suggest you stay I'm using a 3/4 inch chisel so I don't have as much
resistance that's the reason and then I go half a chisel width that helps me
maintain the line of the knife wall the other thing is I'm slightly inclined
this way to compensate for the wall of the dovetail so I think that's important
to chop the other side
in the vise this is a safety thing you really want to go in and out of the vise
no chopping towards your hand a lot of times I see people doing this this is
probably very dangerous especially with the super sharp chisels that we're using
so I'm moving away from my line again this keeps that long grain which is much
easier to cut than trying to cut down this way I'm almost through
really now so again move away from your wall and now I'm chopping see where my
fingertips are - my fingers are way down here I'm not holding it this way very
hard to control your vertical cut this way so come right in here and I'm
angling over because of the depth now that I've gone to right in the corner
right into this corner and then take down the middle section like this and
listen it still sounds quite firm but when I go from this side that may change
so here I'm going to go down with a vertical cut no compensation for the
bevel or for the angle of the detail
this is changing so let me turn this around so you can see what's happening
here so I'm chiseling this way watch what happens here yeah I'm through there
so now I can go to this one maybe not a full width because the grain varies and
then here so now I've severed through this wall here and I've got a little bit
of fiber here to remove and I do that
from the vise again so I use my chisel just inside here lift out those fibers clean
up clean up chisel off any belly in there if there is some there's a little slight belly not very much
thank you so that the joint seeks tight up against this shoulder line place the
dovetail on and just check yourself don't just press in now what I do on all
my dovetails it's a signature of my work and lots of people have signatures of
their work I choke up on my chisel and I take off just a little bit of this
inside corner without touching this outside face I take off just a very tiny
amount and what this does it gives me a slight lead in to my dovetail it's not
very much place this on and it see it's automatically started see already I'm
only in quarter of an inch and this is self-supporting here so what I do now
this is important too instead of just pressing I waggle this end just
about half an inch and I press with my thumb
you can hear it going and that's my dovetail cut nice clean crisp lines and
then I would probably tap use it I've got a thorax hammer here it's the seven
one two and it has a soft face and a hard face the hard face for the chisel
the soft face for assembly and that's my dovetail cut so we've got four of those
to do on this box so now we'll cut the other four I've got
two fitted and these are fitted before so these are the first ones something
about pulling your joints together and pressing them home when you have this
completed it just is so rewarding I use the soft face again just to make sure
everything is seated and you can use a block of wood if you don't have you can
use a hard faced hammer like this I still use that even without a block of
wood if I'm careful we just use a block of wood
these nubs are protruding just slightly which is exactly how I like them so on
here what I would do now because I'm going to be gluing this together shortly
I would put this in the vise like this and because I want to clamp this in the
vise when I'm done I put this in the vise like this and just take the corner
of my chisel and I place it right on here and I just use the slicing action
this pine slice is very nice and it's a circular motion really so then I go to
the outside edge I take off the bulk of the waste and then I place my chisel on
here and I just slice cut into that opposite face so this is dead flush now
I have a slight high spot there so I come in from this face and I just rotate
the outside corner of my chisel into that edge there's no resistance and
actually I could go all the way through I'm just worried that your chisels may
not be quite as sharp as mine and if they're not this outside edge here will
split off so here see the thumb on top let me see if I raise this just a little
bit so you can see this technique which is important for you to understand I put my
thumb on the top of my chisel and I choke up with my finger here hitting the
the rim of the box that stops me from overshooting so my hand is actually both
hands are behind the cutting edge this is a safety issue and safety is of
course of concern to me but it's also your responsibility so I just use this
thumb to press down I went all the way through there with no visible breakout
and I come in here again thumb on top of the chisel it's just pressing it flat so
I'm using this dead flat surface and then that's come in from the outside
edge you can hear that maybe I can hear it the annual rings are so close
together there are ten or fifteen annual rings in that half inch which means that's
15 years of growth in half an inch of wood
so just to make sure this is not going to be stopping the seating of the joint
these are already flush here now I can take this put it into the vise here and
I can press this shut now if you don't have a vise that's big enough that's not
a problem you can just simply use some clumps and I'll probably I think you you
know you probably will have you could clump this in a black & decker workmate
or something like that that would work perfectly the jaws on the Black & Decker
anything really if you don't have the vise so all my joints are seated here
I'm looking let's see where my knife is I'm looking in here to make sure that this
joint line is pristine that there's no gap in here because if this if this end
of this piece was slightly bellied it would reveal a gap there this one is
crisp perfect line and no gap and the same on this one this nub just protrudes
a little bit more so I'm going to trim that down but I could do that after I've
glued up I just like to get things into place as early as I can and just taking
this down now so I've got these side clamped and I've got this clumped in the
vise so I just bring my chisel in one big continuous arc like this go towards
the outside edge but not into it here I can go through because it's supported by
this edge of the pin and then here I just want this edge
in here that feels just lovely to me and now I'm dead flush here this one's a
little protruding so I know I'm ready to glue up and that's what I'm going to do
I'm going to take this apart I've marked all the outside joints here B to B X to
X and C to C I usually don't mark the D because of D when I make my DS I make my
D like this well that can also look just like an A so I avoid using the D so I
usually go ABC X and that's just convenient for me and that's the
predominant number of parts that you have so let's glue this up and I'll show
you how to do that now we break this apart very carefully and I'm going to
leave this no not I'm going to leave this in the vise with these two
components here and I'm gonna use some glue and I keep my glue sticks
ready here so I'm going to split this one like this and then I take a bead I've got a
little bit of fiber inside this corner here it might just hold me off so put a
bead of glue you can put it in the recess or you can put it on the stick
itself just like that and then place this into the recess and pull it just
pull it up the wall just like this here watch just pull it up the wall and
across the bottom here again up the wall
up the wall across the bottom now I'm also going to glue the sides of my
dovetail here and I'll do that outside shoulder not really necessary on there
I don't do this face because that glue is in the bottom of my recess so I'm not
going to do that one
and then on to this shoulder c2c so I can oops
I can close that up remember that this glue is always swelling your
material so you want to get this together quite quickly make sure it's
seated and you can pull the glue off here use that in the other side I'm
gonna put this in the vise now I've got those together I'm not really too
worried about them now exactly the same remember gluing up is the point of no
return so try to usually it is you can reverse it sometimes you just work
quickly and methodically and it's good to practice and rehearse this this point
in your project just practice put it together even feign putting the glue on
doesn't do any harm it'll give you some idea it gets your fine motor
moving and adjusted this is good for children too to practice a rehearsal
like this so A goes to A so I've got that one in, tap down
and then remove the excess again like I said just take it off make sure it's
underneath the bench where it needs to be remember if you get it on your
fingertips like this just wipe it off rub rub it off this PVA just peels off
your fingertips now I'm going to put this into the vise like this now you may
as I say you may have to use clumps to do this my advice is just about perfect
and I'll see this glue squeeze out at the ends here and that's what I want I
want to squeeze off the excess the thinner the film of glue usually that's
the better the joint now I check one more thing I go from corner to corner
internal corner with my tape so I'm one on three sixteenths there and I'm one
and three sixteenths there so I'm dead square there is no question really of
whether I'm square so I can leave this now in the vise my joints were tight
enough so I would probably only need to leave it for half an hour or something
like that so we'll leave that for half an hour and while
that's curing we can get ready to make the bottom to go on the box
I need a good sharp plane to plane up the surfaces of the outside of the box
we glued up good sharp chisel as well I've already sharpened that
set my plane ready I'm listening for sound gauging the thickness of the set
the depth of the cut by the sound now I've taken up the slack and I'm taking
up the excess and going for super-fine shaving so I got more on the Left than the right
close what we're gonna do now on the box we got to level the surface here
we've got to clean up the outside of the box we use the plane almost like an
eraser to erase little dimples in the wood pencil marks the excess is on the
ends of the nubs and so on but when the nubs are actually protruding like these
are ever so slightly protruding I usually put this in the vise and remove
as much of that as I can and to do that I use a three-quarter inch chisel like
this one here and I take the chisel I press down with my thumb on the top and
I make a little arched movement like this and because this chisel is super
sharp it's just pairing this a little bit like
peeling butter then I come in in another movement coming in towards the body of
the wood like this so I've just got a little bit left on the corner so here
thumb down on the top and then just take off that nub there I've done this for so
many years and it really works very well I haven't found anything that works
better than this really
same again and this prepares me what this does it is it lowers the amount of
hardness that the plane hits which I like the idea of it keeps my plane from
being damaged around round the box with the chisel being sharp it usually
doesn't break off on this outside edge down here if my chisel was dull you can
probably see here when I've pared down this surface is perfectly level I can't
actually feel any difference I can feel a texture difference but on here I've
got a pencil line it's not a gap but those pencil lines are along the grain
and it's best to plane a long grain
the ends too a little bit wider area here a bit more to pair off don't put too
much pressure on your vise because you can you can dimple the wood so you want
to be careful of that but just enough to secure it and then just peel this pair
it with the chisel like this these are techniques really so you'll notice that
when I'm pairing here I'm pairing from this outside edge along here in towards
the main mass of wood and that way I don't get any breakout on that outside
edge and I'll show you a technique for making sure when you plane this end that
we don't have any breakout from the plane to because these are hard to land
the plane on and plane the surface with
again
but you can see how you can see how how sharp this chisel is too and so keep your
fingers behind the cutting edge you know when I put my thumb on here it's usually
at the side it's not usually towards here because you'll cut inside that
corner of your hand between your thumb and your first finger all right so I'm
ready to plane this and then what I'm going to do is I'm going to plane the
ends first and to do that I need a second piece of wood as a sacrificial
piece on this end just to cover it just needs to be enough to cover the bulk of
the dovetail area this end the two sides are not going to break so I open my vise
up slide this as low in the vices I can get it so that the main stem of the vise
is actually compressed between these two and not the I don't to compress the long
walls at all so this is just slightly above the end grain of this so the the
sacrificial block is slightly higher so I plane that down now like this so I'm
level now now the outside of my box is flat we already planed the surface so
I'm gonna work from left to right I could work from right to left but it's a
habit of mine so I go here move across and I take this down I'm already there
there's nothing else I can do I can't even feel a texture difference on this
end and I don't know if you can see in here but you can see a perfectly tight
joint line that's because we use the knife wall the knife wall is so critical
so I'm going to do the other end while my vise is set and plane this end and
then I all I have to do then is go to 240 250 grit sandpaper
so I'm planing the end of my box I'll learn my plane on this short runway if
you like plane the surface is out I've used a sacrificial piece and as you can
see what it did is it saved this piece which is very critical on the corner of
the box so I've got a perfectly crisp clean line here but look where I've got
the ragged edge is on the outside out out thrust of the plane on this outside
part of the wood and that's a little technique I think that will help you in
the future when you've got short pieces to plane now when I have planed this I'm
going to sand this with 240-250 grit sandpaper somewhere in that region and
the reason I do is because my plane is 15 this is sharpen to 15 thousand grit
so I'm actually going to roughen the surface and that helps the finish that
we put on to meld with the surface of the wood now I'm clumping this in the
vise I've got the bottom rail the opposite of this clamped in the vise I
can't get it all the way down I would like to but I don't need to so I'm going
to I'm going to feign this these shot these strokes just to show you how I
handle my plane as I'm doing this I can't I cannot plane from here all the
way through here because it's going to trip on this and it's going to split
these outside unsupported and grain fibers so the important thing is to go
part way I go from here about 2/3 of the longer start to lift my plane up lift
the heel of the plane and just follow through so I go here just as all you
swinging a golf club when you're practicing you go through here and lift
off go through here and lift off and then we'll work from the other end and
that will give us a perfect surface so let me show you another thing too is
sometimes this will be either belly door it'll press down as you're planing so a
good trick here is to take another that sacrificial piece of wood if it works
put this between the two this end in the vise and this is actually clamping the
bottom of my piece of wood so I can press down
here so that now caused a belly on here and and so when I plane here now I have
a slight belly so watch what happens I take the nubs first I go to this one and
then I go to this one so these are flush then I go one two three back again you
can go as many times as I want now I'm gonna go this side and work from this
end the same again but I've got a little bit of a Ridge there so one swipe and
that got rid of it so now I'll show you the dovetails now that they've been
planed and again I've got these beautiful crisp lines around my
dovetails here and here and I've got a perfectly smooth surface this feels
literally like a piece of glass so one more face to do here's slide this piece
in make sure one of these ends is in the vise you don't have to have both and
press down here just to create the belly and this belly is only slight so one two
and you almost have to you have to check your grain direction this is planing
fine in this direction sometimes it won't plane from this end and that can
present a problem so that would be a question of trying to work with the
grain as close as you can to here and sometimes you may even have to sand
because you can't plane it
-------------------------------------------
How To Make Your Husband Happy In Life Love Your Husband - Duration: 39:19.
How To Make Your Husband Happy In Life Love Your Husband
How To Make Your Husband Happy In Life Love Your Husband
How To Make Your Husband Happy In Life Love Your Husband
How To Make Your Husband Happy In Life Love Your Husband
How To Make Your Husband Happy In Life Love Your Husband
How To Make Your Husband Happy In Life Love Your Husband
-------------------------------------------
How To Make Your Hair Grow Faster For Kids | Hair Loss Cure | Vitamins For Hair - Remedies One - Duration: 3:59.
what your child eats is very important in addition to helping their body grow
healthy and strong it also influences your child's hair growth today's video
will discuss how to make hair grow faster for kids before you watch this
video please take a moment to subscribe our youtube channel by clicking the
subscribe button then tap the bell icon so you will be the first to know when we
post new videos daily a child's hair will usually change
dramatically over time when they are an infant it's not uncommon for them to
have very little hair but before you know it it's thick and unruly this is
why it's a good idea to know how to best care for your child's hair so it grows
as strong and healthy as possible one characteristics of a child's hair
growth first of all don't worry if your baby was born bald or with very little
hair as the months pass it will fill in it's normal every child has their own
pattern of hair growth and you have no choice but to wait and see typically by
the time they're three years old their hair will have completely covered their
small head and it should be shiny even wavy at times to nutrition to help your
child's hair grow strong as you know children need a balanced diet that's
high in variety and rich in vitamins and proteins but what kinds of nutrients
will help their hair grow better vitamin B biotin is essential for promoting hair
growth and has particular importance for younger children so don't forget to
include the following foods in your child's diet eggs whole-grain bread
cheese or yogurt avocados raspberries sardines salmon trout walnuts bananas
tomatoes child's hair care do children need the same hair care as adults too
how can you care for your child's hair to promote the healthiest hair possible
there are a few tips we're sure will come in handy on a daily
basis give them a shot one how often should you wash your child's hair
there's no need to wash their hair every day because all that's going to do is
dry it out ideally you should wash their hair every other day remember to always
choose hypoallergenic hair products that will maintain their natural pH balance -
hair that's hard to comb a lot of times long hair can easily get knotted and be
difficult to comb or brush you already know that brushing several times a day
is important to stimulate growth and promote better circulation in the scalp
so consider the following tips for making it less painful for your child 3
coconut oil the benefits of coconut oil for health and beauty are endless and
one of its most useful properties is that it acts as an excellent conditioner
just take a few drops of coconut oil in the palm of your hand and apply it to
your child's hair from the roots to the tips then use a wide tooth comb to
untangle any nuts for weekly apple cider vinegar treatment for this all you need
is to add 100 milliliters of water and 25 milliliters of apple cider vinegar to
a spray bottle apply it to damp hair and leave it on for 15 minutes then wash
your child's hair with their regular shampoo you'll be amazed how shiny and
healthy it looks what you do for your child's hair growth let me know in our
comment section below if you liked this video give it a thumbs up and share with
your friends for more daily tips subscribe to our channel below thank you
-------------------------------------------
permanent make up removal in Tunisia - Duration: 0:31.
contact info
contact us on +216 55 555 981
-------------------------------------------
Egg Roll Recipe | How To Make Egg Rolls | बैदे का रोल | Indian Street Food - Duration: 1:59.
Hi friends I am Nalini Malkani. Welcome to my cooking show Nalini Ki Rasoi
The recipe that I will be preparing is Egg Rolls
Please dont forget to press the Subscribe and Bell Icon button
So that you get instant notifications of all my upcoming and new recipes
Let's see the ingredients required to make Egg Rolls
3 eggs
1/2 onion finely chopped
1 small carrot finely chopped
Spring onion finely chopped
Coriander leaves finely chopped
2 green chillies finely chopped
1/2 teaspoon of black pepper powder
Salt
Oil
To start with break the eggs in a bowl
Beat the eggs
Add salt as per taste, black pepper powder, green chillies,
Finely chopped onion, carrot, spring onion, coriander leaves and mix well
Put some oil in a pan
Spread the beated egg on the pan
Let it cook well from the bottom side on medium flame
Once cooked well start rolling spread egg very carefully
Remove on a plate
Similarly make other Egg Rolls
Both Egg Rolls are prepared. Next cut them in a couple of pieces.
Yummy and tasty Egg Rolls are ready to be served
If you have liked this recipe
Then please don't forget to click the Subscribe button
And also links of my other recipes are there on the screen for you to click and see
I'll be back with many other recipes
Till then take very good care of yourself and your family
Stay healthy, happy and fit!
Thank you for watching Nalini Ki Rasoi
-------------------------------------------
We Have A Plan To Make Renting Fair - Duration: 0:31. For more infomation >> We Have A Plan To Make Renting Fair - Duration: 0:31.
 -------------------------------------------
How to make a funnel for a paper roller coaster - Duration: 2:54.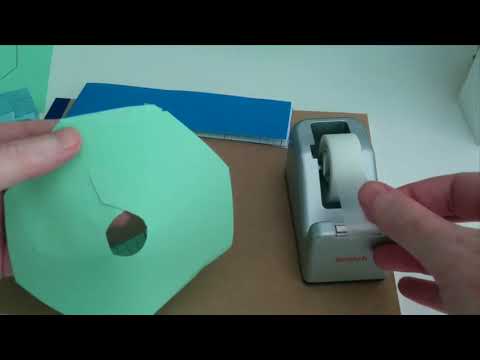
Raveena: Today, I've asked Brian to show us his special funnel module design.
Brian:It turns out that an octagonal shape is easier to both fabricate and also to assemble
in a roller coaster.
Hallelujah!
Hallelujah!
Haaaaaa!!!!!
Haaaa!!!
Haaaaaaaa!
-------------------------------------------
How to make a paper ninja star gun – Paper ninja star fidget spinner - Gun safe for kids - Duration: 10:50.
Don't forget to subscribe our channel for more videos!
Don't forget to subscribe our channel for more videos!
Không có nhận xét nào:
Đăng nhận xét