How to make a toy boat mini for kids
How to make a toy boat mini for kids
How to make a toy boat mini for kids
How to make a toy boat mini for kids
-------------------------------------------
Best Money Making Business 2017 - How to Make Money - Duration: 5:43.
energycrusher.org
-------------------------------------------
8 Recipes Food Cake Dessert | How to Make Recipes Chocolate Chesse ah Home|Recipes Dessert Season 14 - Duration: 10:14.
Thank You For Watching Channel Recipes Food Cake Dessert!
Thank You For Watching! Please LIKE - COMMENT - SUBSCRIBE to Channel Recipes Food Cake Dessert!
Please LIKE - COMMENT - SUBSCRIBE to Channel Recipes Food Cake Dessert to see more interesting new Videos!
-------------------------------------------
#AC Milan 'make contact' with homesick Chelsea boss Conte to replace Montella - Duration: 4:06.
AC Milan 'make contact' with homesick Chelsea boss Conte to replace Montella
HOMESICK Antonio Conte and Carlo Ancelotti are in the frame to replace under-fire Vincenzo Montella at AC Milan, according to reports in Italy.
The Rossoneri gaffer has come under huge pressure after an indifferent start to the season following a big summer of spending from the clubs new Chinese owners.
Antonio Conte and Carlo Ancelotti are both in frame to replace Vincenzo Montella.
Milan are currently in sixth place after two defeats in six games, despite spending £170million on drastically improving the squad with the likes of Leonardo Bonucci and Andre Silva.
Gazzetta dello Sport report that they have already contact Conte and Ancelotti over potentially replacing Montella.
Milans next two league games could decide the former Fulham strikers future, as they face Roma and then local rivals Inter Milan.
The clubs owners are keen to bring in a big-name to boost their profile as they attempt to return to their former glories.
Despite being a Juventus idol, Conte — as an Italian manager — would surely relish the prospect of restoring the Rossoneri to greatness.
He won the Premier League title in his first term, before a difficult pre-season saw him tipped to leave Stamford Bridge.
.
Chelsea boss Antonio Conte admits he longs to return to Italy.
Milan are struggling in sixth place and Vincenzo Montella is under pressure.
However, following an opening-day defeat, the Blues have turned a corner, yet he has since admitted he longs to return to his homeland.
Conte, 48, explained: "I have a longing for Italy, that's beyond any doubt.
"It's not in my head to stay abroad for too long.
It's good to have beautiful experiences, but I intend to go back to Italy one day..
AC Milan splashed out on big names such as Leonardo Bonucci in summer.
Sampdoria shocked AC Milan with 2-0 victory at the weekend.
Carlo Ancelotti is under pressure at Bayern Munich after underwhelming start.
Carlo Ancelotti celebrates winning Champions League with AC Milan in 2003.
Ancelotti, meanwhile, is under serious pressure at Bayern Munich after an underwhelming start to the season and would welcome the chance to return to Milan.
He won the Champions League twice with the Rossoneri, making them one of the most feared teams on the continent during his eight years there.
And would no doubt be very keen on a return.
-------------------------------------------
Paper fish craft for kids: How to make an origami Cute Paper Fish paper fish tutorial - Duration: 9:15.
Creative Paper Craft
-------------------------------------------
How to make Vocaloid Music #05 Adding your first Vocaloid track - Duration: 13:56.
Italian Vocaloid fandom, hello! I am Gigi Miu.
The time to add our first Vocaloid track has finally arrived!
This is the same file of last week,
in which we have a drum track made with Kong, and a synth track representing a piano made with Thor no.1
and Thor no.2 is instead in charge of our bass line. Only the singer is left!
Let's hope my mac doesn't crash when I load PiaPro VST,
which you can find here under instruments,
and here it is, our PiaPro VST plugin
Please note that if you are not using PiaPro VST, but you are instead using the Vocaloid editor
you won't be able to load it from here. But mind that what we discuss in this lesson works for any kind of Vocaloid editor.
So, when we add the PioPro VST a new track is generated.
Click here to open its interface
Luckily it didn't crash. Yeah!
Now, if you are an attention observer, you would have noticed that PiaPro VST interface is quite different from other instruments in Reason.
A normal Reason instrument is fully accessible from the rack
VST plugins, including PiaPro have limited controls using the rack,
since they are sometimes completely different softwares
and each one has its own independent interface.
From now on there are 2 different ways to proceed.
One way is to manually recreate your MIDI track inside PiaPro.
Alternatively you can just import the MIDI you have already done in Reason .
In the future we will also discuss on how to make a new one from scratch, but for now, let's import what we have done already.
So, to keep everything simple, go to File > Export MIDI track,
then choose a destination folder and export the file.
Oh I was about to forget to explain an important thing!
"What is a MIDI file?"
A MIDI file is a file format that is able to store musical information like notes and other things.
So by using this kind of files we can export our music not as a sound file, but as a succession of notes
but without going into too much technical details
Just import the file from the menu File > Import MIDI file
So, to recap, we export a MIDI file from Reason and we import it into PiaPro VST.
As you see all the music we composed has been recreated inside PiaPro.
Since we only need one track we can start deleting the tracks we don't need, starting from the drum track
then we proceed deleting the bass track
since the notes in that track even if they are the same of the piano track they are one octave lower.
So, just delete the bass track too.
Now we only the piano track left
that will be the starting point for our vocal melody line.
The Vocaloid engine need some time to start up, so the dark green area is never rendered.
For now this is not important, but if you should ever worry why this part is not playing, this is the reason why.
Double click the track to enter in edit mode
and as you can see the notes are the same of our piano track
if you don't trust me you can go check them one by one...
Now, let's tray to press play to check what we have here.
Regarding the play function
since you are opening PiaPro as VST plugging for Reason
just remember that Reason has play priority over the play control inside PiaPro
so press play inside Reason.
As you can see
Miku is singing exactly the same notes of our piano track.
So, even if this is not the best song ever,
we can say we managed to have Miku sing on top of our first original track.
Congratulations!
But it is not over yet! The next step would be to transform these LA LA LA into some proper vocals.
Let's pause for now
and think on what could be our next step.
As always there is never one correct way to proceed and in this case as well we have several options.
Ah, in case you are wondering how I am zooming in, I am just moving this slider over there.
Also, don't mind that everything is in japanese here
One way to proceed could be to start editing the length of these notes,
so it could sing a slight different melody from the piano track one.
You can try to randomly lengthen few notes, to hear what could be the result,
just by experimenting with notes lengths.
You can try lenghten them as well in the same way I am doing it now.
Bare with me while i keep editing these notes please.
Ok, et's listen on what we have here.
See? Just changing the notes length we already have a different feel! Isn't that cool?
From now on it comes down to personal tastes.
Just try to achieve something that you like. There are no set rules if not your own personal taste.
You could even try deleting few notes!
Now that we are here let me introduce you another property of any vocaloid editor.
Each vocaloid track has to be mono-tonic,
which means that notes cannot overlap each other
and as you try overlap them only one of the two will play. Be careful of that and avoid overlapping.
Let's keep editing a little bit more,
as you can see I am just changing length at random,
and there is no musical knowledge involved at all!
If you use this approach as well you will make music in no time.
Let's try this!
Have you noticed how much the feel can change with few edits?
So we are using the same exact process we used when me made the piano track.
And again it will be up to you to find a sequence that you will like.
It all comes down to personal tastes.
Remember that each LA LA LA you see here it will be then become a syllable,
but you can just hum the melody with these LA LA LA for now.
These LA LA LA will become words like PO TE TO, PO TE TO...
what will they become is all up to you as well!
Let me sing some more I am enjoying this!
You should enjoy this process too.
Let's recap for a moment what we have done so far.
We made 8 bars of music,
made by a drum track, a piano track,
a bass track based off the piano track,
and then we made the base for our vocal track, even if it is just a sequence of LA LA LA for now.
from here you could proceed in two ways. One way would be start deciding the lyrics of this vocal track.
Or you could go back editing the track to expand it and then make the lyrics at the very end.
In these video lessons we will proceed using the latter method, and we will slowly expand these 8 bars till we have a complete track,
leaving the lyrics to the very end.
Even if I know you are hyped at the moment, today lesson ends here.
From the next lessons we will keep expanding the base track,
and we will keep shaping it till it will be a complete song.
For next week keep playing and practice with your vocal melody line and experiment.
See you next week!
-------------------------------------------
APD chief says department has to make changes after sanctuary cities ruling - Duration: 1:05. For more infomation >> APD chief says department has to make changes after sanctuary cities ruling - Duration: 1:05.
 -------------------------------------------
[FREE template and tutorial] How to make paper Freesia flower - Duration: 2:40.
To make these stunning Freesia paper flower...
...cut the coffee filter with my template
Watercolor the petals...
Make the core bud from tissue paper...
Wrap the bud with floral tape...
Make different sizes of buds....
Cut a strip 1.5x 3.5cm from coffee filter to make stamen...
Glue the 3 inner petals together...
Curve it by a round stylus....
Do the same with outer petals...
Cut the sepal with template and curve it...
Now arrange the flower together...
Now arrange the branch with floral tape and wire
That's it. So easy, right?
-------------------------------------------
3 Creative Ways to Make Fidget Spinner Toy - Duration: 4:06. For more infomation >> 3 Creative Ways to Make Fidget Spinner Toy - Duration: 4:06.
 -------------------------------------------
🕹How to Make Remote Control CRANE At Home - Duration: 7:38.
Cardboard Sheet
crane is Ready
cut this shape of cardboard sheet
stick cardboard using hot glue gun
Make hole using drill machine
30 RPM DC Motor
Joint crane to main engine
Syringe
loading coca cola cane from crane
-------------------------------------------
12 Easy Homemade Bacon Recipes | Tutorial to Make Bacon Recipes For Your Family #1 - Duration: 11:00.
THANKS FOR WATCHING! DON'T FORGET LIKE AND SUBSCRIBE
THANKS FOR WATCHING! DON'T FORGET LIKE AND SUBSCRIBE
-------------------------------------------
How to Make a Cloak with a High Low Hem (FREE Pattern) - Duration: 6:29.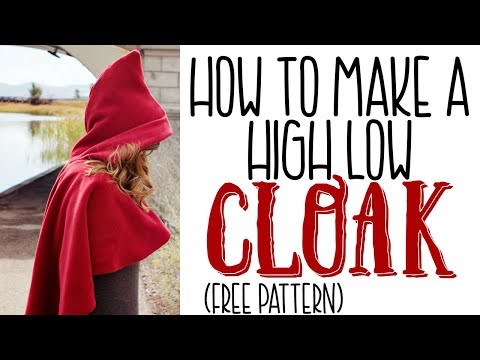
Hi i'm Angel with FleeceFun.com and today i'm going to show you how to make
this really cute high-low cape. It's got you know it's kind of high in the front
and drapes down long in the back. And has this really cute kind of pixie hood.
For this project you will need the following.
For this project you will need: two and a half yards of sixty inch wide fleece, felt or a jersey knit for the
exterior. Two and a half yards of sixty inch wide duck cloth or home decor
fabric for the lining I found mine for really inexpensive at
Ikea. Buckle or clasp sewing essentials scissors pins sewing machine that sort
of thing. Fleece fun's free pattern that is available on fleecefun.com
Alright now that you have all those items it's time to cut out the pattern.
Assemble the pattern you can find instructions on fleecefun.com 's channel
On folded cloth place the pattern on the fold and cut out one of the exterior
along the outer black line. When you cut out the neck be sure to cut out the
notches to make lining up the hood easier. Now that you have the neck cut
out, it's time to cut apart the cloth in front so you have two sides so the Cape
is open in the front. Simply cut along that fold up to the neckline on the
short side of the Cape.
Now I did try to make this pattern as simple as possible
so you didn't have to assemble like the lining and the exterior so what you'll
do is you'll make sure that you cut out the exterior first and then cut it down
to the lining.
Now cut down the Cape piece to the pink line. Cut one of the
lining like you did the exterior again on the fold and be sure to add notches
for the neckline. Cut out two of the hood exterior, again be sure to make the
notches. Cut the hook pattern down along the pink line.
cut two of the hood lining of the cloak
all right now that you have all those items cut out it's time to
start sewing. Using a turning foot or make a baby hem finish the edge of the
lining fabric except for the neckline and the straight sections in the front.
Set aside.
Okay let's get the hood put together.
with right sides together sew the top and back of the hood lining using a 1/2 inch
seam allowance. be sure to leave the front and neck open. With right sides
together so the top and back of the hood exterior using a 1/2 inch seam allowance
again be sure to leave the front and the neck open. Now it's time to bring the
lining and the exterior of the cloak hood together. With right sides together
pin the hood lining and the exterior together at the front. Sew together using
a half inch seam allowance.
Clip the curves of the lighting and the exterior for the hood so it will lay smoothly.
flip the cloak hood right-side out. Tuck the lining back into the cloak hood and
line up the notches.
See how the exterior comes into the lining a little bit that's on purpose
make sure the notches line up.
okay let's work on the lining
There is the interior of the hood and the
exterior of the hood. We will add a cape to each side.
Pin the lining to the interior of the hood right sides together lining up the
notches sew together along the interior neckline using a 1/2 inch seam allowance
clip the curves.
Now it's time to add the cloak exterior.
with right sides together
Pin the exterior cape to the exterior of the hood.
Please note that when you pin the cape to the outer hood there will be an inch
left over on either side that where we're going to tuck in later, So make sure that
you have that inch left over on either side. Sew together along the neckline
using a half inch seam allowance. Again clip the curves along the neckline.
Flip the cloak so the lining is tucked into the cloak and the exteriors of course on
the outside.
okay just one more little thing and it's finished
Remember those front sights that we didn't finish on the lining? Now it's
time to finish them. Fold the exterior fabric over towards the lining so it
covers the raw edge of the lining. Pin. Using a zig zag stitch sew down along the
edges of the exterior so it's folded inward along the front.
Place the clasp or buckle where you want it to be in the front and sew into place.
you're finished with how to make a cloak.
and that's it you have this nice
dramatic cape that will work for many different cosplay costumes and that sort
of thing oh and before I forget. All of the capes on my website fleecefun.com
They have different hoods they're all interchangeable. So let's say for example
you like this cape but you don't necessarily like the hood but you like
the hood on say the my long cloak. Switchable or vice-versa if you wanted
to put this hood on a different kind of cape on my website you can! Yeah I'm a
thinker like that.
Thank you so much for checking out this video please give me a thumbs up for my
hard work and hey free pattern! yeah you're welcome.
Also be sure to subscribe so you don't miss out on another free pattern that
I'm offering with a tutorial . oh and I also have a recommended video that you
might like and oh and a link to the pattern because you know you might want that .
So do you do cosplay? I'm curious let me know in the comments
below and have a great day remember velvet is pretentious fleece is fun. :)
-------------------------------------------
Easy Paper Butterfly Origami - DIY Paper Crafts - How to make Paper Butterflies - Duration: 5:04.
Welcome to Colors Paper. Let's enjoy"How to make Paper Butterfly".
You need 1 piece 10cm x 10cm paper, 1 piece 0.3cm x 10cim paper and 1 piece 0.5cm x 10cm paper.
Follow the video step by step for making Origami Butterflies.
-------------------------------------------
8 Recipes Food Cake Dessert | How to make Recipes Chocolate Donut at Home | Recipes Cakes Season 14 - Duration: 11:16.
Thank You For Watching Channel Recipes Food Cake Dessert!
Thank You For Watching! Please LIKE - COMMENT - SUBSCRIBE to Channel Recipes Food Cake Dessert!
Please LIKE - COMMENT - SUBSCRIBE to Channel Recipes Food Cake Dessert to see more interesting new Videos!
-------------------------------------------
Taste This: Learning to Make Infused Vodka and Cocktails at Hangar One in Alameda - Duration: 4:29. For more infomation >> Taste This: Learning to Make Infused Vodka and Cocktails at Hangar One in Alameda - Duration: 4:29.
 -------------------------------------------
Joe Knows Tech: IUPUI research team finds way to make rechargeable batteries last longer - Duration: 3:41. For more infomation >> Joe Knows Tech: IUPUI research team finds way to make rechargeable batteries last longer - Duration: 3:41.
 -------------------------------------------
মেকআপ ছাড়া কেমন দেখায় জবাকে |No Make Up Look | Ke Apon Ke Por Star Jalsha serial Actress Pallavi Sh - Duration: 1:56.
-------------------------------------------
DIY How to make grave decoration (ENG Subtitles) - Speed up #399 - Duration: 1:55.
Hi. Today I will show you how to make grave decoration out of artificial flowers.
I made this video by request from my viewer.
Detailed list of all needed items is in the description of this video.
Put a floral foam inside the flowerpot.
First attach the leaves and sprigs of fern.
If the sprigs are too long, cut off the excess.
Next, add the gladioluses on the sides.
Fill the center by with various flowers.
Now add a mesh ribbon.
Place the LED grave candle in the center.
And it's done.
This is a really pretty decoration for grave.
You can use normal grave candle instead of LED grave candle.
Of course you can use other flowers and additions.
Please give a like to this video and subscribe to my channel.
Thanks for watching. Bye bye.
-------------------------------------------
10 Easy Homemade Bacon Recipes | Tutorial to Make Dinner Recipes For Your Family #3 - Duration: 10:35.
THANKS FOR WATCHING! DON'T FORGET LIKE AND SUBSCRIBE
THANKS FOR WATCHING! DON'T FORGET LIKE AND SUBSCRIBE
Không có nhận xét nào:
Đăng nhận xét