Hey everyone, this is Orgil from Orgl Desgn
Today I'm gonna show you a design process of making soccer shoe poster design
I wanna show you how simple it is to make this kind of advertisement poster
and that you can do it too. Enjoy
-------------------------------------------
How To Make Your WordPress Website Run Faster By Changing 1 Setting - Duration: 9:21.
Welcome back to another video my name is Adam from WPCrafter.com where I make videos for
non-techies like me and I'm initially something in this video on how you can speed up your
WordPress website now it's going to be a little technical like the concept but implementing
it is going to be so easy just a few mouse clicks to know the technical side of his is
what powers your WordPress-based website is it on a web hosting account in their certain
services on that web hosting account to make it work you have something called MySQL for
the databases where your data is stored and you have Apache or something like that that's
being acting as your Web server there's couple other options there Apaches very common and
there's also something called PHP and in this video to show you how to change in the PHP
version to a current version and when you do this your websites going to be faster it's
good to be a lot snappier when you're in the backing of the website or the front-end of
the website now this is actually a big deal in there is that one of the goals of WordPress
the WordPress.org that the body that is controlling WordPress is they want everyone using PHP
seven they want every theme on PHP seven every plug-in on PHP seven and I'm in a show you
how to upgrade now if you go and get a new web hosting account chances are they're not
gonna put PHP seven on your web hosting account but most are going to give you the option
to choose which PHP version that your Ron she might be on version 5.5 or 5.6 I don't
know what happened to PHP six but anyways Ron PHP seven and were deep into it now the
reason why these Webhost aren't putting you on PHP seven is because not everything is
compatible with it and that is where can get a little dicey so for them to put you on the
lower version makes sense because it's going to reduce support requests and things like
that now any modern developed plug-in or theme it's going or to be compatible most likely
with PHP version 7 now if you're using some offshoot old plug-in from some scamming Internet
marketer and it was coded in 2014 there's a good chance that PHP seven is not gonna
work for you because you're not using plug-ins and themes developed by reliable developers
that are actually still in business so I'm in a show you how to first test your WordPress-based
website to see if the code on it will work with PHP seven there's a tool and then I'm
in a show you how to go into your web hosting account and change the PHP version so there's
this plug-in were going to use and is actually made by WP engine there one of the more premium
web hosts cohosting the cheapest hosting plan with them is $30 per month and I think that's
when you pay annually so they're not that the cheapest Webhost but they came out this
plug-in called PHP compatibility Checker now here's the thing I will when I look at this
I first looked at the reviews here and there's a couple one star reviews and when I read
them some developers of plug-ins and themes were saying it wasn't detecting that their
software was compatible when it is so that is one of the caveats but let's just go through
it together so I am in the back end of a WordPress site hear someone go to plug-ins at new have
never used this I recently updated to PHP seven my site not just on the run and gun
type of guy I'm just going to do it and deal with the consequences later that's not necessarily
a good practice but that's what I do more times than not so about what's nice is when
we change it to seven we can easily change it back to a lower version of something doesn't
work right so I would go ahead and click on install now and let's run it for the first
time and see hopefully it's instantaneous and it works pretty quick so let's see I'm
assuming it's going to be under tools there it is tools PHP compatibility and it work
and attested for version 7 and Dell it's only scan for what's active I'm pretty sure I don't
really have anything active so it's just scanned the 2016 theme of course it is let me scan
all plug-ins and themes because I have some other stuff in there and let's see what it
says now some people were complaining that there was false positives but then there was
a newer version of this plug-in that came out maybe two months ago and it was supposed
to deal with a lot of those problems okay now while it's running not sure lungs it takes
I never use this before I'm in a show you how to change your PHP version in your web
hosting account actually looks like it's almost done so I'm using InMotion hosting and when
you but this'll work with any Webhost now every Webhost is a little different this could
be some Webhost that don't want to give you the ability to change this I don't know why
but there are hosts like that in that case you're going to have to submit a support ticket
saying hey I want to go on PHP version 7 but in motion a hosting does give you the ability
and have a promotion with emotion they give all my viewers a 56% discount also throw Lincoln
down below to that but anyways going to click on cPanel LC panels that standard control
panel that most Webhost are using an enema to scroll down to where it says PHP configuration
it's right here in a minute click on that and it showing the all the versions that are
available to me and the version that I'm using right now so I can put version 7 and this
is RC right here that just means it's a release candidate I would not recommend that so I
would use this seven right here are some to go to version 7.0 and set of 7.1 go back and
take a look at that plug and see if it's done it still scanning but it's okay I'm going
implemented anyway soon as you do that and then you just click on updates and literally
now you are on the higher version of PHP and what's going to happen is your WordPress-based
websites can be a lot snappier I've noticed my site is a lot snappier in fact WordPress
is going to require Webhost to give you PHP seven by default if they want to be listed
on WordPress.org so many ways I don't know of this is going to finish by the end of this
video but I do know that sprite taken so long as have a bunch of themes on their I should've
maybe cleared out those themes but you get the point you can run your test now here's
the best part about it is because you're using cPanel and it's on some server of your own
you can easily come back here some didn't work right and you can just gulp down a version
now some of the caveats are if you're running non-WordPress non-WordPress apps on your hosting
account this upgrades the entire hosting accounts you just need to make sure that everything
you have is going to be okay on PHP version 7 maybe you can do this late on a Friday night
when you're going to have your least amount of traffic perhaps and then test everything
make sure works and then you're good to go but most of the reliable plug-ins and themes
they're all going to be compatible with version 7 of PHP chisels real random offshoot plug-ins
or themes that are really being supported or actively developed any more so anyways
this is one simple trick that you can do right now to make your WordPress website run faster
because you made it to the end of the video I have a free gift for you but before I talk
about that I want to ask you to do something for me if you can give this video a thumbs
up down below that would really help me out if you're not subscribed to the channel go
ahead and click on the unsubscribe button and become a subscriber and support this channel
and if you'd like you to notify you when I upload new videos there's little bell next
to that subscribe button you can click on that and set that up as well if you have any
questions or a comment about this video I'd love to answer it there's a comments section
down below all you have to do is put in your question or comment I respond to every single
one I made a course just for you and it's called the three steps to WordPress success
and I want to give this to you if you'd like to enroll in this course there's a button
right here off to the right you go ahead and click on that role as a student and that's
just my way of saying thank you for supporting me and making it to the end of this video
I make them just for you
-------------------------------------------
4 Ways to Make Money – Starting Today - Duration: 23:20. For more infomation >> 4 Ways to Make Money – Starting Today - Duration: 23:20.
 -------------------------------------------
GG Minecraft: How to make creepers don't grief especific areas! - Duration: 5:16. For more infomation >> GG Minecraft: How to make creepers don't grief especific areas! - Duration: 5:16.
 -------------------------------------------
How to make a Bad Video Tutorial Hot N Funny Juice Unseen Fails Special & More - Duration: 2:59. For more infomation >> How to make a Bad Video Tutorial Hot N Funny Juice Unseen Fails Special & More - Duration: 2:59.
 -------------------------------------------
HOW TO MAKE MICRO SOILS USING THE MAGICAL SQUARE - Duration: 4:41. For more infomation >> HOW TO MAKE MICRO SOILS USING THE MAGICAL SQUARE - Duration: 4:41.
 -------------------------------------------
The Nerdwriter | "How Louis C.K. Make a Joke" con Subtítulos en Español - Duration: 7:51. For more infomation >> The Nerdwriter | "How Louis C.K. Make a Joke" con Subtítulos en Español - Duration: 7:51.
 -------------------------------------------
How to make a Mango Milkshake - Duration: 5:32.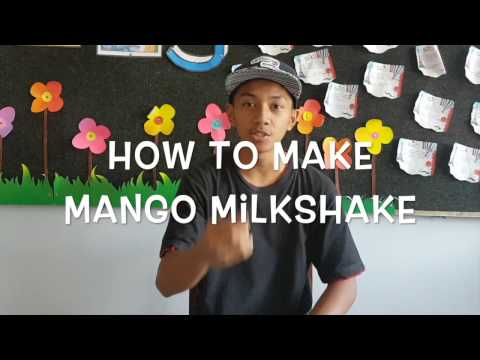 For more infomation >> How to make a Mango Milkshake - Duration: 5:32.
 -------------------------------------------
How To Make Orange Juice With COCONUT | INDO - SMANSA PANGKALPINANG - Duration: 4:42. For more infomation >> How To Make Orange Juice With COCONUT | INDO - SMANSA PANGKALPINANG - Duration: 4:42.
 -------------------------------------------
how to Tape Your Breasts to Make Them Look Bigger | Ways to Tape Your Breasts to Make - Duration: 3:00.
how to Tape Your Breasts to Make Them Look Bigger
Rip four pieces of tape. The best kind of tape to use is medical tape.
Sports strapping tape or cloth tape are good choices as well. Duct tape is used often,
but is risky if you have sensitive skin. You want these pieces of tape to be a little bit
smaller than the full width of your chest. You might only use three, but rip four pieces
just in case.
Lay your first piece of tape. Start your first piece of tape on the outer
bottom of your left breast. Use your right hand to lay this tape. Tape half of it down.
Make sure it is securely stuck by using both hands to rub the tape on.
Pull the tape across. Hold onto the end of the tape that's stuck
to your body with your left hand. Pull the tape as tight as you can, and hold it, with
your right hand. Release your left hand. Use your left hand to pull your right breast as
close to your left breast as you can. Lay the rest of the tape under your right breast
to hold it here.
Grab your second piece of tape. This time, start with your right breast. Follow
the same process. You want your tape to be half on the first piece of tape and half above
it. Pull your breasts toward each other even tighter when you place this tape across them.
This will help uplift your breasts to give you cleavage.
Use your third piece of tape. This piece of tape is simply going to be used
to secure your tape. Start on the left side of the tape you already have, anchor ½"
onto your skin. Pull across to the right side. If it doesn't stretch across the tape on
both sides, add the fourth piece to finish securing it.
Add a small strip of tape in the middle. For added cleavage, use a small piece of tape.
Rip a piece of tape, no more than two inches long. Pinch the center of the tape that's
holding your breasts (you'll be pinching directly under your cleavage). Use this small
piece of tape to keep it pinched together by wrapping it around the tape that's pinched
together.
-------------------------------------------
How To Make A D.I.Y. Picture Frame - D.I.Y. At Bunnings - Duration: 4:01.
If you have any artwork or photos just lying around your home, we all know it can be really
expensive to get them professionally framed.
So what's better thing to do than make your own picture frame to put them on display?
These are all the tools that you're going to need.
A miter saw, safety equipment, sandpaper, PVA glue, a measuring tape, a pencil, miter
corner clamps, screwdrivers, framing fixing pieces and don't forget the most important
piece, the backing piece of MDF.
The picture frame can be as big or small as you like.
Get all your measurements sorted and then go to your local Bunning store to have the
backing board pre-cut.
For the actual frame, I'm using a Tasmanian oak hardwood.
First thing to do is to measure and mark the frame.
Before you do anything, make sure you do your first miter cut and then you measure from
there.
Because I'm using miter joints, they need to be cut at a 45-degree angle.
I've already done my first cut but when I do my second cut, it needs to be on the opposite
angle.
When cutting the frame, just be nice and slow with the miter saw so it will give you a nice,
clean edge.
Let the blade do the work for you.
So, I've cut my first side piece.
I now need to measure out my second one which will also be at 435 millimeters.
I'll be using the same process of opposing sides for the miter joints.
Remember when doing the second cut to move your miter saw to the opposite 45-degree angle.
I now have two sides cut and need to measure the top and bottom.
I now have my four pieces.
All I need to do is glue each in together and use my clamps to hold it into place until
they dry.
But before doing that, make sure your frame all fits in nicely.
My frame fits perfectly, so now I need to glue.
Put some PVA glue onto each end.
Be sure not to put too much though because when you join it together, you don't want
it going everywhere.
Now that the frame is all glued together, wipe off any excess glue that's around the
edging.
Once all the excess glue has been wiped away, these babies are gonna be your best friend.
They make the job so much easier and will ensure that the frame stays nice and square.
Once you have all four clamps on, then you can actually go around and retighten them
all making sure it's all perfectly square.
Now, you just need to leave it to dry.
Remove all four corner clamps, turn the frame over and give it all a light sand.
It helps to ensure that you get a really nice smooth finish.
The frame is now ready for your artwork or photo.
Turn it over and place your image faced down.
Then place your backing board on top of that and use your frame stay clamps to hold it
all into place.
Secure the frame stay clips placing them roughly in the center of each side.
You'll need quite a fine screwdriver because the screws are really small.
Because I'm using a hardwood for the frame, I need to pre-drill the screw holes.
But if you're using pine, you can just screw straight into the timber.
So there you have it.
It's as easy as that.
Now you have a perfect frame with your art or photography.
Now all that's left to do is hang it and that's how you make a picture frame.
-------------------------------------------
How To Make A Perfect Galaxy Logo / Adobe Photoshop Tutorial - Duration: 6:04.
Now Hold Ctrl and Click The Image To Make Selection
Now Hold CTRL and Click The Image Again
-------------------------------------------
How To Make A Professional 2D Logo Online For Free Without Photoshop || No Skill - Duration: 3:13.
How To Make A Professional 2D Logo Online For Free Without Photoshop || No Skill
How To Make A Professional 2D Logo Online For Free Without Photoshop || No Skill
-------------------------------------------
Mayor Sarno doesn't intend to make Springfield a 'sanctuary city' - Duration: 0:37.
TIFFANY CHAN 22NEWS
TONIGHT MAYOR DOMENIC SARNO
WANTS TO CLEAR UP THE CONFUSION.
HE SAID SPRINGFIELD IS NOT A
SANCTUARY CITY, AND HE DOESN'T
INTEND TO MAKE IT
ONE.
THIS COMES AFTER DONALD TRUMP
SIGNED AN EXECUTIVE ORDER WHICH
WOULD
STRIP FUNDING FROM SO CALLED
SANCTUARY CITIES.
THE MAYOR SAID "SPRINGFIELD HAS
DONE MORE THAN ITS FAIR SHARE IN
STEPPING UP TO THE PLATE WHEN IT
COMES TO DEALING WITH
HOMELESSNESS,
REFUGEES, AND SUBSIDIZED
HOUSING.
HE SAID REGARDLESS OF
IMMIGRATION STATUS.....
COMMISSIONER BARBIERI AND I HAVE
BEEN AND WILL CONTINUE TO
COOPERATE WITH FEDERAL LAW
ENFORCEMENT AUTHORITIES IN THEIR
PURSUIT OF VIOLENT REPEAT
-------------------------------------------
Come fare il capppuccino con la foglia - How to make cappuccino with leaf decoration - Duration: 0:58.
To prepare a perfect cappuccino must use very cold milk ..
.. Heat the milk quickly, opening at full power the steam ...
... Keeping the nozzle half cm from the bottom of the jug...
... The foam must be thin and shiny ...
... Move the jug in a circular motion, favoring the emergence of the cream on the surface ...
Pour a little milk in order to create a basis to cappuccino
Do a lot of practice..
-------------------------------------------
Videocast: Sun to make an appearance today - Duration: 2:05.
RILEY: GOOD MORNING, EVERYONE.
HAPPY FRIDAY.
A LITTLE CHILL IN THE AIR RIGHT
NOW.
A LITTLE BIT OF WIND FROM THE
NORTHWEST.
21.
WE HAVE HAD SOME FLURRIES IN THE
AIR THIS MORNING.
LOOK UP TO THE NORTH AND WEST.
WE ARE STARTING TO SEE THE SKY
CLEAR OUT A BIT.
WE WILL HAVE A NICE SUNRISE,
ESPECIALLY NORTH.
MIDDAY, WE SEE I
THE MIDDLE OF
THE STATE, 23 DEGREES.
A LITTLE NORTHWESTERLY FLOW
GOING ON.
CARROLL, 0 RIGHT NOW.
SATELLITE AND RADAR
AGAIN
SHOWING THIS GRADUAL CLEARING UP
TO THE NORTH AND WEST THIS
MORNING.
IF YOU ARE GETTING UP AND
READY
TO HEAD OUT THIS MORNING, GRAB
THE SUNGLASSES BECAUSE I THINK
WE WILL HAVE A COUPLE OF HOURS
OF SUNSHINE.
GET OUT AND ENJOY THAT VITAMIN
D.
HERE IS THE PLANNER FOR TODAY WE
WILL STILL SEE SOME CLOUDS
AROUND 7:00, MAYBE SOME FLURRIES
.
WINDS SHIFT TO A
WESTERLY
DIRECTION.
COULD BE BRIEF, AS I MENTIONED.
THE SUNSHINE I THINK AND THE
WEST WIND WILL HELP US TO STAY
ABOUT 32, 33 DEGREES FOR TODAY,
SO HERE IS YOUR FUTURE
STATEWIDE.
I OVERLAPPED THE CLOUDS AND
TEMPERATURES SEE YOU CAN KIND OF
SEE THE TREND HERE.
SUNSHINE,
LAMONI, THE METRO
AREA, NOTICE TO THE NORTH AND
WEST, CLOUDS ARE ALREADY
STARTING TO INCREASE.
WE COULD SEE SOME FLURRIES BREAK
-- WAKING UP TOMORROW MORNING.
WE DO SEE MORE CLOUDS THAN SUN
FOR YOUR SATURDAY.
SUNDAY LOOKS LIKE WE'VE A BETTER
CHANCE OF MAYBE SEE IN SOME SNOW
SHOWERS TRYING TO MAKE THEIR WAY
IN, BUT WE COULD GET A COATING
OF SOME LIGHT KNOW IN WESTERN
IOWA.
BE AWARE OF THAT.
NOTHING MAJOR OUT OF THAT ONE.
ONCE WE GET PAST SUNDAY, THINGS
-------------------------------------------
How to make vanilla ice cream eggless reciepe - Duration: 8:28.
whatsup guys iam going to show u how to
make vanilla
ice cream
what we need ingredients
so lets get started
first of all
we need a corn flour then two teaspons of vanilla extrent
one cup of heavy cream
one cup milk worm milk
so lets get started
pour the milk into the bowl
save little milk
if we need after wards
-------------------------------------------
How to make a $20 Green Screen / Behind the scenes - Duration: 8:38. For more infomation >> How to make a $20 Green Screen / Behind the scenes - Duration: 8:38.
 -------------------------------------------
Butter Chicken Recipe | How to make Butter chicken at home | Restaurant Style Butter Chicken - Duration: 4:08.
hello friends welcome to classic
masala hut. Today we are going to make
world famous and the most ordered
recipe of all time butter chicken. So I am
going to start by marinating the
chicken I have here 1/2 kg of boneless chicken
cut into 1-inch pieces. Now I'm
going to add two tablespoons of thick
yogurt, 1 tablespoon of kashmiri chilli
powder to impart nice red color , juice of
half a lemon , 2 Tsp of ginger garlic paste
and finally salt. After adding all the
ingredients mix it nicely with the
chicken pieces. Now i'm going to cover
this and let it marinate for
20- 30 minutes
Now after 20 minutes i'm going to pan fry
the chicken. So heat 2 tablespoons of oil.
Once is nice and hot place the
chicken pieces and let it cook for some
time
Once the chicken is fully cooked, remove
it from the pan and keep it aside
Now the next step is to make the base
for our butter chicken i'm going to use
the same pan because there are lot of
falvour left over, to this I'm going to
add one tablespoon of butter
and next I'm going to ask one medium
sized onion roughly chopped, a pinch of salt
and saute it for a couple of minutes
once the onions are nice and translucent
I''m going to add the rest of the
ingredients. First I'm going to add
4 large tomatoes roughly chopped, 1 tsp of
ginger-garlic paste ,1 tsp of garam
masala 1 tablespoon of kashmiri chilli
powder to impart nice color, 5-6 cashew nuts
mix all the ingredients
together and also add some water. Cover it
again and let it cook for 7 to 10
minutes
Now look at this our tomatoes are nice
and soft
turn off the heat and transfer the
contents to blender and once the mixture
cools down, grind it to a very very
smooth paste. Now let's combine
everything together and make butter
chicken. So for that melt some butter
once the butter is melted i'm going to
add some whole spices for that extra
flavor. 2 Bay leaves, one cinnamon stick and
2 cardamom. I'm going to add the
onion tomato paste
required salt, some sugar - 1 teaspoon of
sugar you can also add honey if you
prefer and finally I'm going to add the
chicken. Mix it nicely with the gravy, cover
and let it cook for four to five minutes
now I'm going to add the final set of
ingredients some fresh cream
and some Kasoori Methi that is dried fenugreek leaves
give it a stir and turn off the heat
Our butter chicken is ready to be served
This is an excellent side dish for naan roti and rice
Do try the recipe at home and if you
like this video please subscribe our
channel classic masala hut. Spread the
Joy of Cooking !
-------------------------------------------
Make a Kindred Pinwheels Quilt with Jenny! - Duration: 11:15.
Hi everybody, it's Jenny from the MSQC. And I've got a fun project for you today.
We're calling this Kindred Pinwheels. And the reason is this makes a cool pinwheel block
but the kindred comes from the fabric that we're using. Now this fabric has a lot of
history to it. It's Anne of Green Gables fabric and I have three daughters. And they
grew up loving Anne of Green Gables. And so this fabric has just this kind of nostalgic
feel to it. And I just really enjoyed making the quilt.
So to make this quilt what you're going to need is one packet of ten inch squares.
And we're actually going to sub cut these down into five inch squares. So if you want
to get four packs of five inch squares you can make this quilt as well. You're also
going to need four yards of background fabric and that's going to take care of all these
pieces around here. You're going to need sashing fabric and you're going to need
2 ½ yards of a print for your sashing fabric. And your little cornerstones right here, this
is a ½ a yard of a solid and we used that cute pink. And then for the border you're
going to need a yard and ¾. And this is a 5 ½ inch border out here and just frames
it all up. I want you to notice the binding on this. The binding, you're going to need
a yard for your binding. And we've used this really cute little stripe that's part
of the line. And it just makes the whole, you know I love, I love a stripe on the binding
because to me it just kind of frames it all up. I think that's really cute.
Alright so let me show you how to make this block because even though it has a bit of
a complicated look to it, it is very simple. So first we're going to take our ten inch
squares right here. And I have this, I'm using my rotating mat today which is always
really handy to have. And it's a Martelli mat and I just love it. Anyway I'm going
to take my ruler and I'm going to cut these into four five inch squares. So I'm just
going to use that and turn it, put that on here like this and turn it. Now you can stack
several of these up because you're going to be doing the same thing to all your ten
inch squares. So now you have four five inch squares just like that. And then what we're
going to do is we're going to cut these diagonally from corner to corner. And so I'm
going to do this and this. And then I'm going to turn them over here and cut them
diagonally as well. Alright, there's that one and this one.. Now I would cut your whole
pack and because we want to mix these up. We want to be, we want to be able to draw
from all different colors. You'll see our blocks, they're made of lots of different
colors of fabrics and so, that's a real scrappy look. I mean you could arrange it
so you could do them all one color but I wanted to do it scrappy so that's how we did it.
Now for the background you're going to need to cut five inch strips and 2 ½ inch strips.
So out of your five inch strips you're going to need five inch squares, just like the front.
So I have this five inch strip right here. Let me put this on here nice and straight
so you can see it. I have this five inch strip right here. And I'm going to go ahead and
cut my selvedge off. And cut me a five inch square because you need the exact same size
triangle, these triangles out here, you need the exact same size of your background for
that. So I'm going to do the same thing. I'm going to take my five inch square and
cut it side to side. And these are now the exact same size as our print square. From
the 2 ½ inch strip, and I'm going to put this over here so I can cut off my selvedge
again, you're going to need seven inch strips. So 2 ½ by seven. And you're going to need
four of those for each block. So let me line this up on here. And I'm going to count
over, one, two, three, four, five, six, seven just like that. Alright so now that we have
all of our pieces together we can put our block together.
So now we're going to make the block. So you're going to choose one of your pieces
of print and one of your pieces of solid. And you're going to match your triangles
just like this. And you're going to sew those together right down that side. Alright
so let's go to the sewing machine and do that. We're doing a quarter of an inch and
we're going to press this open. And let's press to the dark side. We're going to set
our seam. Alright. So now for the other half of the block you're going to take another
piece, another triangle and your 2 ½ by seven inch strip. And you're going to sew it onto
here just like this. So we're going to lay this on this side of the triangle. And this
is, you know, one of the short sides here. And we're going to sew a quarter of an inch
right down the side. Now I only sewed as far as this because it doesn't go all the way
down. So I only sewed just a little beyond that. And then we're going to go ahead and
press this open. And then we need to trim off this edge. So we're going to lay our
ruler on here, let our triangle be our guide and then just trim this off just like that.
Then we're going to sew these two together just like this. Isn't that cool? So there's
no lines to match up. We're just going to, we're just going to match up our two colored
edges right here and sew right down the side. There we go. Now we're going to press this
open. Now all of these blocks do have to be squared. You know sometimes, sometimes if
you want to make the pretty stuff you've just really got to square your block.
So when you're ready to square your block, you're going to square it to six inches.
I"m using a block lock ruler and this one happens to be 6 ½ so I'm going to have
to mentally, make a mental note to ignore the half on this. I like the block lock because
it has this little shaved edge under here and it will wedge itself on that seam line
so it doesn't move too much. So what I'm going to do is I'm just going to slide this
a little bit on here so that I get a nice side to trim with. And I'm just going to
trim this off over here. And trim both sides. And then I'm going to pull those away and
then I'm going to slide my ruler so that I lose my half an inch. So see here my half
an inch is sticking over. And then I"m going to square up this other side as well. Just
like that. And then once you get both sides trimmed up you have this perfect little block
like this. And you're, this is the one fourth of the quadrant that makes this block. So
I have my other ones done over here. And we're going to put them together just like this.
Well let's not put green to green. And here we go, there we go. Pink to green is better.
And see how this all comes together just like this. And then what we're going to do is
we're going to sew this together like a four patch. So let's go ahead and do that.
And I'm just going to lay these right on top of each other and carefully move them
to the sewing machine so I know exactly where I'm sewing and I don't lose my spot. And
so we're going to sew here at a quarter of an inch right down the side. And you can
make your center, make your little center lines nest up so the one seam is going one
way and one seam is going the other. And then these I'm going to slide right in after
them. When you do that without cutting the thread, that's called chain piecing. I'm
going to make sure these line up real nice here. Alright now we're going to sew these
two together. And we actually shouldn't even have to clip that thread. We can just
open them up like this, yep. Just like that. Fold it right over on itself and then sew
these together. So we're going to line up the outside edge. Take a few anchoring stitches,
then I'm going to line up my center seam. None of the other seams have to line up with
anything, just that little center. And then make them fit. It's not wanting to go over
that part, there we go. Alrighty. So now we're going to press this open. Ooh! That's pretty
in the center. So we're going to press this open just like this. Everything is kind of
sliding around on me today. Oop, there we go. Flip it over. I like to press from the
top and then I flip it over and make those seams go the way they want. Give them a shot
of steam. I do love a steam iron, I have to say. Alright. And then you get this perfect
little block just like this.
Now we have to talk about laying them out. So let's go look at the quilt behind me.
We have one, two, three, four, five, six blocks across here. And we are going to sash in between.
What that means is whatever size your block ends up, which is should be like eleven and
something, something like that. You're going to actually cut your sashing to that size
right here like this. And you're going to attach it to the edge of your block in between
the whole row. So I have one here with the sashing already sewn on. Let me move this
out of the way. I've got one here with the sashing sewn on. And you're just going to
match those up block to block just like that. See how that is going to work. So then when
you're ready to do the next line of sashing in you're going to go ahead and put your
cornerstones in. You're going to sew your cornerstone to your sashing strip just like
this. And attach those together. And that will go in as one long strip, all the way
across here just like that. One big long strip. And so it's just going to make a darling
quilt.
So this is a really fun block to make. I'm glad we figured out an easy way to do it.
It's going to make a really big quilt. The quilt is 91 by 104. That is a big quilt. And
so if you want to back this you're going to need about 8 ½ yards of backing. And we
have used, we have used this awesome Anne of Green Gables fabric. You can see it has
all the little scenes on it and the words. What a great, fun quilt. And we hope you enjoyed
this tutorial on the Kindred Pinwheels from the MSQC.
Không có nhận xét nào:
Đăng nhận xét