How To Make Juice Fruit Decorating | Summer Juice Fruit Recipe | Easy Dessert Ideas
Thank you for watching! Hope you enjoy & like it!
-------------------------------------------
How to create an ebook for school and make it interactive - Duration: 3:05.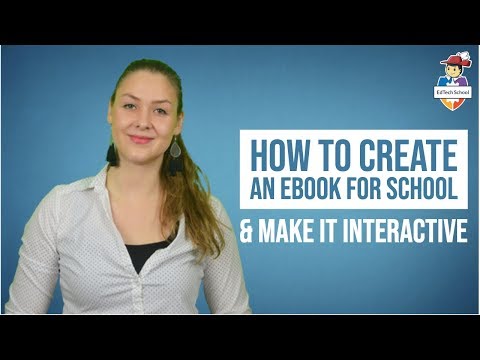
In this video, you're going to learn how to create an eBook and how to make it interactive
as well.
You don't just want a book behind glass, you want an ebook that engages your students.
I'll show you some handy ebook creation tools and show you how exactly to make one.
Here we go: Create eBooks for free from a pdf, a Word
Document or from a PowerPoint.
These ways to make an eBook are great, but they have a few disadvantages as well.
You can't make them really interactive.
You can insert links, but that's basically it.
Another disadvantage is that you have to format your eBook completely yourself.
You have to be very creative to make it visually appealing to your students.
That requires a lot of extra work.
I'll put the link to extra resources about these options in the description below.
There are two eBook creation tools that offer you much more options:
Create an eBook with iBooks Author for Mac
or Create one with Kotobee.
Creating an eBook is in all cases basically the same.
There are 5 basic steps you have to follow: Choose the right template for your ebook design.
This will be your guideline throughout the complete eBook course.
Create a compelling eBook cover.
In education this is most of the time the title of your course and, if needed, a specific
part of that course.
Add text and media to your book.
Make it interactive as well.
Add a table of contents.
Preview your eBook course and publish your ebook when finished.
Be careful when publishing your ebook as a teacher.
If you're selling your eBook on Amazon or somewhere else, you have to make sure everything
in it obeys by the rules of copyright!
When you've create your ebook and added some texts, you probably want to make it more
interactive.
That's where BookWidgets comes in.
With Bookwidgets, you can choose between over 40 interactive exercise templates
such as quizzes, crossword puzzles, flashcards, timelines, WebQuests and much more.
BookWidgets offers you the template, and you adapt it with your own content.
The exercises are generated in minutes, and are very intuitive and interactive for your
students.
Download the widget you created with BookWidgets.
Then drag and drop it into your iBook, and that's it!
When students read your iBook, they can instantly make the BookWidgets exercises you made for
them.
They can even submit their work for you to grade it and to give feedback.
So, let me summarise this real quick: Create an interactive widget on bookwidgets.com
Download your widget Drag and drop the widget into iBooks Author
or import a popup widget in Kotobee.
I've put some extra info on how to use BookWidgets with iBooks Author below in the description.
Hope this video helps you out.
Make sure to give it a thumbs up or subscribe.
Thanks!
-------------------------------------------
10 Infallible Tips That A Man Must Follow To Make His Girl Madly In Love - Duration: 3:24. For more infomation >> 10 Infallible Tips That A Man Must Follow To Make His Girl Madly In Love - Duration: 3:24.
 -------------------------------------------
Primitive technology:How to make a rope in winter - Duration: 6:04.
Dry reed breaks easily
Good building materials for a roof
Young grass
It is suitable for making rope
А stone with sharp edges
It is suitable for cutting high grass
Тall grass, sharp at the edges
That's why I cut it
Can be used for roofing and rope weaving
I take young grass and separate a small bunch
I divide it into three parts
I will tie a knot to hold better
Аdd the third part now
I'm starting to weave
Right side to the center
Left side to the right
Center part to the left
All over again
Мeasure three more parts
Weave into the common part
Just put in the center
To start over
Repeat as necessary
To create the desired length
Get rid of unnecessary parts
Simply apply coal
Аnd the fire itself will do everything
Тhe main thing is not to hook the weave
In this case the rope will break in this place
Сan also be cut with sharp stone
But I prefer the breath of Muspelheim
We got a solid rope for home use
-------------------------------------------
How To Make A Long Crystal Necklace - Duration: 8:36.
To make the long crystal pendant necklace you'll need a crystal and this is a faceted rectangle crystal
that's 12 millimeters by 17 millimeters.
It's kind of a smoke color. And
then you'll need a pearl and we chose sort of a smoky blue pearl to go with our smoky crystal and the pearl is five
millimeters.
We've got gunmetal findings here. We've got a gunmetal daisy spacer. That's five millimeters. A gunmetal bead cap
that's four millimeters by six millimeters.
And we've got a gun metal clasp and our clasp is about 12 millimeters across the diameter of the toggle.
We have chain and you can make the chain any length you want ours is about 30 inches.
And then we've got two gunmetal jump rings to attach the clasp to the chain.
We've got a head pin and we've got silver wire in 24 gauge.
For tools we've got chain-nose pliers, round-nose pliers, and wire cutters.
To get started making the necklace we're gonna feed the daisy spacer onto the head pin and
then we're going to feed on this beautiful faceted crystal and
then the bead cap. And this is going to be our pendant part of the necklace and
To make this into the pendant what we want to do is make a wrapped loop in the top of this head pin wire
To do that. I've got my round nose pliers
I'm gonna pinch the wire right above the last bead. I'm pushing those beads together at the daisy spacer the crystal and the bead cap
nice and tight and I'm going to bend a 90 degree bend in the wire right above the last bead the bead cap and
Then I'm gonna reposition my pliers to the top of that bend
I'm gonna push the wire over in the other direction to
Make a partial loop and I can't complete the loop because the bottom jaw
The pliers is in the way. So I'm going to reposition the pliers
into the bottom
So I can pull that wire the rest of the way around
Like that, and then I want to wrap that loop to secure it and to do that. I'm going to hold
the
Ring the loop
I just made across and I'm gonna pull this tail around
two times and this wires a little bit hard and
What you can do if that's the case you can use your chain nose pliers to give you a better grip on
The wire so that you can pull this wire around a little bit
Tighter I'm just making two reps there
sometimes headpin wire is a
Little thicker or stronger and sometimes it's not but that's how we want to do our to wrap loops there
I'm going to reach in with my wire cutters and I'm gonna cut that little tail that we just made
I'll hold on to it. So it doesn't fly off
And just reach in there you give it a good snip
and
That is our pendant part. That's so pretty got a little tail sticking out there
And I'm gonna press that down with my chain nose pliers
and
That looks great
And now we want to attach this to our toggle. This is going to hang from the toggle
The round part of the toggle clasp and we're going to attach it with another little piece of wire work that features our purl
What we're going to do is we're going to cut a piece of wire. This is our 24 gauge wire
I cut a piece about four or five inches long and
I'm going to start by making a wrapped loop in the end of this wire
to do that
I'm going to use my round nose pliers just like we did before
I'm gonna come about a third of the way down on that wire and I'm gonna make a 90 degree bend in the wire
reposition to the top of that Bend and
Push the wire over the top jaw
reposition the pliers to the bottom jaw in that loop and then I can pull the wire all the way around like that and
Before I pull this wrap around and secure that I want to connect it. It's acting as a connector
so we need to connect our pendant that we just made I
slide it in there, and I want to just Nestle past the crisscross and
into the loop
Now I can secure this
By holding that loop across with the pliers and then pulling the tail around two times
Like that and then reach in there and trim
That wire be careful not to cut the project
and
there's our
Connector on there another little piece of wire sticking out. I'm just gonna mash that down. I
Don't want to cut too close to the project because I don't want to cut the project
So then I sometimes find up with the little tail like that. That's fine. You can just push it down and
Now we want to feed the pearl
onto the wire and
That's part of our connector. And then we're going to connect this to the toggle with another wrapped loop
So I'm going to take my round nose pliers again
I'm going to make a 90-degree Bend and
Then I'm going to make a loop here
By positioning my pliers in the top of that Bend, but if I make the loop at the top part here
It'll be very narrow of narrow part of the pliers would be a very small loop if I go here on the pliers
I'll make a big loop. I want a medium-size loop because I want it to fit over this toggle
So I'm gonna go there in the middle and push the wire over
And then pull it around
so I switched to the bottom just so I could pull it around and then before I do my two raps on that I
want to remember to attach it to
The round part of my toggle clasp. I'm just gonna
Kind of I just slide it past the crisscross I made there it is
Now that's attached and then to secure it. I do my two wraps again. It's the same technique
one two, I like to use a long piece of wire because it's easier to pull it around and
You can save your scraps, but this wire is not expensive. So don't worry about it. And
Let me wear this necklace. The toggle is going to have this cute little pendant hanging from it
But we need to attach the toggle to the chain really do that with a jump ring
This is one of our jump rings and it has a little split right here
So what I like to do to open a jump ring is hold the jump ring on one side of that split with one pair
of pliers and
Then with the other pair of pliers grab the other side of this jump ring on the other side of split
Push one side down towards the table
While you're holding the other side up towards the ceiling and that keeps the jump ring round. It's still around shape
It just has a little opening in it like a door and then that gives us room to slide on our clasp
And then we can slide on the end of our chain
so where's the end there it is and
Then to close this I'm actually going to use my chain nose pliers, which of these flat pliers are called chain nose
And you can press it back together like this. You could also use the two pairs of pliers and
Just do the reverse of how you opened it in order to close it
So this is on one end of our chain now and then we have the taco part of our clasp
We want to put on the other end of the chain. So this is our last
Jump ring. I'm going to open it again the way I use two pliers
What you don't want to do is open it like sideways. You don't want to just pull it apart
It won't be round. You'll never make it round again
This keeps it nice and round. So I'm pushing one side down towards the table
and I have a little opening that I can slide that toggle in there and
Then I have to find the other end of my chain. Here it is and
slide that into the jump ring and then press that closed and
Then to wear this necklace
I'm going to
take the toggle end and we'll slide it into the circle part of the clasp like that and
Then when you wear it, you have this beautiful long crystal pendant
on your necklace so pretty
-------------------------------------------
How To Create A High Converting Landing Page In WordPress In 15 Minutes 2019 (Step By Step Tutorial) - Duration: 15:24.
Hey, this is Giorgio and in this video, I'm going to show you how to
Create a high converting landing page on wordpress step-by-step
So just let's check it out
So basically everybody needs a landing page if you're serious about
Doing stuff online if you are selling something online if you have a blog and
want to get more subscribers on to your email list or
Whatever you do online. You basically need a landing page. So I
Use elementor. Elementor is in my opinion the best page builder
If you're using WordPress, so you head over to plugins add new
Elementor and you click on Install Now and you activate it. So that's the first step
Once you're done you go to pages
Add new and let's say that we're going to build a landing page in the weight loss niche. So
how to lose weight
Within two weeks
Without blah blah blah
So, this is your headline you click on edit with Elementor to just edit it and to build a nice-looking landing page
as you can see, this is not a
Landing page so you go down click on settings page layout
landing page
Alright, so click on this one this icon
I'd like to have a little bit of space on top
so I click on spacer and I drag it down basically over here and I
enter 20 and
Next up we need a headline, of course, so I click on heading drag it down
And this is my headline. I want to align it to the center and
Maybe a little bit bigger
the font so
Click on... I want
45 so this is nice and maybe a different color as well. Maybe green
So this looks great in my opinion
This looks great
Next up we need well, I like to have a little bit of text maybe
three benefits that they will discover in the e-book or whatever just a couple of benefits or
Yeah elements that they will learn in the e-book. So
you click on the icon again and
you click on intersection and
Drag it over here
Next I
Want a little bit of text
over here, so I click on text editor and drag it over here and
I want an image
Let's enter a couple of benefits
So this is what I just made up. It's really easy really simple just for demo purposes
of course, you have to just make it much better, but
yeah, this is just for demo purposes and
Just play around with this as well you click on this
Image and just pick an image you like I
Won this eBook over here. And again just play around with it. How big you want it then?
I like to have this a little bit bigger as well. So I click on it and I go to style
Typography, let's say 30 31, no 30 and
I also want to have a
small
Subtitle, so exclusive ebook 25 proven tips. I want to make it a little bit bigger
Maybe more weight as well and I
Want to make it blue, so yeah, I like it. I
like it and maybe
I'm going to underline it. Yeah, it's much better
Just play around with it
Yeah, something something like that. The only thing we need to have now is a
button, of course, so we click on it drag it down and
Yeah, just play around with the size. I
Choose large I want to align it in center
text
nine times out of ten I use download now and
Of course just again. Yeah play around with the size. How big do you want it?
35 or whatever. I also like to use uppercase. So yeah, this is something I like and
The background maybe blue
Yeah blue looks good. So
Now I want to have
one thing
Which is an image
and
I want that people
are looking
to download now as soon as they land on this landing page, so
Now the land on the landing page and I see these arrows
Yeah pointing up. So they see download now and one thing before I forget it
I also like to have a subtitle on top of the headline. So I
Just click on text editor and drag it over here. I
delete it and
100% free ebook so people know exactly what I can expect and what this is
So make it a little bit bigger
style
Typography and just play around with the size
so
This looks clean and simple in my opinion. So if people land on this landing page
they just see exactly where they where they can expect and
it's proven that the more text you have on a landing page the
yeah, the worse it will comfort people like simplicity and people don't like a lot of stuff around it and don't like a lot of
Distraction as well. So it's really clean. It's simple if you're interested in the e-book
you can only click on download now and
These are a couple of benefits that you would discover a couple of elements that you will learn
Etc, etc
So it's really clean in my opinion. So next you click on publish
But if I click on download now nothing happens nothing happens and I
Like to have a pop-up, so people click on it and then a pop-up will appear
so we go back and
We click on
Templates and pop-ups, but I have to say in order to use pop-ups. You need Elementor Pro and
elementor Pro cost about
50 bucks the elementor pro costs about 50 bucks for a completely
full year
So it's really cheap in my opinion and you will get a lot of features a lot of extra
functionalities if you use elementor pro if you're serious about
Designing websites or yeah, just improving you your online visibility. I
definitely recommend Elementor Pro, so
you click on pop-ups and
We want to create a new one
How to lose
weight test
Create template
so you click on this over here and
Full screen I like to have it full screen. Just pick one. Whatever you like. I like this one
Why do I like this one? Because it's really?
Simple I like simplicity like I mentioned
Everybody likes simplicity, so I deleted
that Icon and
I don't like this as well and
I click on join the club and I'm going to edit the title
where
should
Where should we send the ebook because that is what people like
So if they click on download now, yeah, you have to send the ebook to a specific email. So
really basic and then
Email I like to just have email not another form field like name, for example
the more form fields you have
The less conversion you will get so I click on email
but if you really like
to have a name form field for example and click on
edit item and again this
elementor form
Functionality is only for elements of pro users. So you click on
Item number two label name placeholder name as you can see it appears
You can make it required if you want
You can just drag it above email
Next you click on submit button
I'd like to enter download
You can play around with it small or medium or whatever you want
Actions after submit. So I
use getresponse getresponse is
an email marketing service and
What happens is that
Somebody clicks on download now if you have set up your autoresponder correctly
the person will receive the e-book automatically and that is
possible because you have just integrated with an
Email marketing service and I use getresponse. Like I mentioned it's really beginner friendly and
Yeah, it doesn't cost a lot so that's why I use get responses really beginner friendly and if you are on a low budget
getresponse is something you like whether you are a blogger or
A digital marketer doesn't matter
you can also use drip or MailChimp for example, but I like getresponse and
It also has a 30-day free trial so you can basically play around with it and see if you like it
That's getresponse. You click on get response and custom
For the API key and just enter your API key
Before I forget it actions after submit I also like to send people to a thank-you page
So if they have opted in, they will get redirected to a thank-you page. And yeah, just enter your
URL of the of the Thank You page
I'm not going to show it but really easy just create a new page
create a thank-you page and just copy the URL of the Thank You page and
paste it over here and
That's basically it. Yeah, you can change the color of the button as well. So you go to submit button
And you go to style and
you click on button and
We like to yeah, we like to have a blue one
and yeah, that's basically it
so you click on publish a
couple of conditions well
we don't want to show the pop-up on the entire side, but just on our
landing page so you click on singular and
you click on all
pages and then you can choose our
And
then you can choose our page that we have just created how to lose weight within a couple of weeks and
Yeah, you have a couple of triggers so let's say that you want to get the pop-up shown if you
Click on anything or
Scroll or on page load or after inactivity, but we don't want that the same applies to advanced cruise
We don't want it just take a look, but we don't use it for now safe and close
So now it's done
So next up we go back
exit to the dashboard and
We go back to pages as well
We go to our page edit with Elementor. This is our landing page
we click on our button and click on dynamic and
Here you see pop up
And
again pop-up and
Now we just well what how did we call it?
how to lose
weight test
This is our pop-up
So now if I click on it
This is what people will see where should we send the e-book name email download now? No, thanks and
This is it. This is basically
what you need to create a high converting landing page and like I said
It doesn't matter if you are a blogger if you are digital marketer if you have an online business
You basically need a landing page. So
this is it and
make sure to subscribe make sure to like the video as well if you have any questions just
Yeah, reach out to me
leave a comment down below and
Yeah, that's basically it I see you in the next one
-------------------------------------------
How To Make Your Ex Forget You Soon - Duration: 2:12. For more infomation >> How To Make Your Ex Forget You Soon - Duration: 2:12.
 -------------------------------------------
How to make a perfect cappuccino|| Best home made || Easy recipe|| cappuccino|| Beauty internal|| - Duration: 6:08.
coffee
put some coffee and sugar . add some hot water.
take one spone
boil milk
Take a cup add some smoothy(which you prepared
hot milk take a spoon dissolve slightly
for topping again add some smoothy which we prepared
finally cappuccino is ready
-------------------------------------------
Royal Az - Charles and Camilla set to make historic trip to Cuba as part of wider Caribbean tour - Duration: 1:22.
The Prince of Wales and Duchess of Cornwall could meet some of Cuba's most celebrated music stars when they make an historic visit to the country
Charles and Camilla's official four-day trip to the communist state in March, part of a Caribbean tour, will be a first by members of the monarchy
At a Havana recording studio, the prince and his wife may meet members of the Buena Vista Social Club, although details are yet to be finalised
The group became worldwide celebrities when their 1997 album became a surprise global hit and Grammy award winner
Other highlights of the Cuban trip will see the couple meet Havana owners of the famous vintage cars still running in the capital, although these will be British classics
There are no plans for the royal couple to meet Raul Castro, the brother of Cuba's former Communist leader Fidel Castro who died in 2016, but they will be guests of honour at an official dinner hosted by the country's president Miguel Diaz-Canel
Scott Furssedonn-Wood, the royal couple's deputy private secretary, said they were visiting the country at the request of the British Government
He added: "The prince and the duchess' visit will highlight cultural and academic connections, links between the people of the UK and Cuba, and explore key themes, such as the arts, youth entrepreneurship, heritage restoration and sustainable agriculture
" Charles met Cuba's president in November last year at his London home, Clarence House, when the foreign leader visited the UK with a delegation of senior ministers
The couple's 13-day tour of the Caribbean will begin on March 17 and see the couple travel to St Lucia, Barbados, St Vincent and the Grenadines, St Kitts and Nevis, Grenada and the Cayman Islands, with the Cuban leg beginning on March 24
-------------------------------------------
Man United tipped to make incredible signing - Duration: 2:26.
That is according to former player Dimitar Berbatov who was very impressed with the Italian
midfielder during PSG's win in Manchester. Veratti was deployed in the centre of midfield
alongside Marquinhos as the Parisians stifled Manchester United's attack.
The Ligue 1 side enjoyed the lions share of possession and the former Bulgarian captain
turned Betfair ambassador has compared the 26-year-old to Barcelona greats Xavi and Andres
Iniesta. United lack of player of similar ilk and the
2011 Premier League Golden Boot winner thinks Verrati alongside Nemanaja Matic would be
the perfect combination. He said: "Marco Veratti was very impressive
in the centre of the park for PSG. "What I like about him is that his first
thought is always to go forwards, but if that's not on, he's happy just to keep the ball,
controlling the tempo and almost putting the other team to sleep.
"The Italian is an unbelievable talent; he reminds me of Xavi and Iniesta in many
ways. "He'd be great at United next to Nemanja
Matic in midfield, allowing the Serbian to do the dirty work while he controlled the
game. "Can't see PSG selling though!"
Verrati has been at the Parc des Princes since moving from Italian side Pescara in 2012.
The midfielder has gone on to make over 250 appearances and become pivotal to the club's
success. United have attempted to sign a dominant central
midfielder and the acquisition of Matic in 2017 has gone some way to filling the void
left by the likes of Paul Scholes. The Serbian is a defensive linchpin but doesn't
have the passing ability to match some of the game's elite midfielders.
The likes of Ander Herrera haven't been able to stamp their authority at Old Trafford
leaving United open to the idea of bringing in another midfielder to unleash the rejuvenated
Paul Pogba.
-------------------------------------------
Tips to make Husband Happy - Ustaza Iffat Maqbool - Duration: 39:19.
Subscribe our Channel. Like & share Videos. jazakallah.
-------------------------------------------
How To Make Mermaid Cakes | Yummy Cake Recipes | Easy Cake Decorating Ideas - Duration: 10:10.
How To Make Mermaid Cakes | Yummy Cake Recipes | Easy Cake Decorating Ideas
Thank you for watching! Hope you enjoy & like it!
-------------------------------------------
DIY How to make a 5 strand round plait /braid - Duration: 2:45. For more infomation >> DIY How to make a 5 strand round plait /braid - Duration: 2:45.
 -------------------------------------------
Como Fazer Tempero Caseiro para Carnes / How to Make Homemade Seasoning for Meats - Duration: 7:56.
Hi everybody welcome to Batistenha I'm Iva
I am Joselito and as I promised you,
today we are going to make a seasoning for meats using those herbs that we
dehydrated, If you have not seen the video of how we dehydrated, I'll leave it on the screen for
you. As we dehydrate the parsley, the coriander, the spring onion oregano and also
When we dehydrate the garlic and the onion, for us to do this
recipe. So let's go to our ingredients,
We're going to need a cup of salt, I I'm using Himalayan salt. But
you can use the white too, thick white salt,
we prefer the one because it does not leave much salty. So to make a meat
with less salt is better pink salt, we have here half a cup of parsley and
half a cup of coriander. We'll need a tablespoon of
onion and a tablespoon of garlic powder,
we'll need half a teaspoon of rosemary and basil and oregano
saffron and smoked paprika. Look at the ingredients we do not
we have here in Batistenha are these two here, the smoked paprika and the saffron by
while, because this year I will plant the paprika to make the smoked paprika.
So come on how to make our seasoning,
I'm going to use this funnel, someone asked us where we got
this funnel. This funnel came from a gift that someone sent us, it's a kit
to make preserves, to put in hot water.
Here comes the meter, this is to get the cap, it's a magnetic one.
Someone sent us this, I do not know who it was because it arrived as a gift and no
had the name. We'll use this,
first we'll put the salt, coriander, whatever you put of a mixed it.
Although later we will mix well the glass, the parsley. This spoon is
cool look, because sit has a tablespoon
here is a tablespoon and has a teaspoon. So
is easy to use, we will now use one tablespoon of garlic, one
tablespoon of dehydrated onion and powder.
Now here I have already measured one teaspoon of rosemary, one teaspoon of
basil, a teaspoon of oregano,
a teaspoon of saffron and a teaspoon of smoked paprika. And let's go
also put a teaspoon of our pepper, this has to take a lot
Careful people, it is very spicy. This is cayenne pepper that we take away the
seeds, we take out the seeds and we made powder. So it did not stay
It's as spicy as you get it in the store, but put as much as you
like pepper. Mix everything we will cover to give a shake
Our seasoning is ready,
What I used was that, a cup of salt and a half of parsley and coriander
but you can use a cup, only remembering one of salt and a half
of the other two herbs. Okay, our seasoning is ready,
this seasoning you can use in everything, barbecue chicken beef. We
we use even on goat meat, people this is simply a delight, quite easy is just
temperate and ready. Now it gets even better when we
we dehydrate our own herbs, because the taste of the herbs that we
dehydrate fresh from the yard, retain more flavor is much more tasty.
Speaking of dehydrating the herbs, I wanted to show you a gift that
we gained from a sister of the church who blessed us.
She did not want me to say her name, but it's an electric dehydrator.
You can adding trays, you can add a four tray
trays or even ten trays is not a blessing? Before we did everything in the
stove, now we can do in electric dehydrator.
Thank you very much, my sister for having blessed us, you know very well who you are
Speaking. Then I'll show you some things we'll dehydrate
here in the electrical dehydrator. Many thanks for
follow here in Batistenha, leave your comments if you like
season the meats with plenty of herbs using less salt. because this way
we use less salt to season our meat and leave in the comments,
give your like to us. If you have not yet signed up for the channel,
this is an opportunity, subscribe and activate the bell for notifications.
Many thanks again, I'm Iva and I'm Joselito
-------------------------------------------
How To Make A Playboi Carti x Pierre Bourne Type Beat - Duration: 10:16.
How To Make A Playboi Carti x Pierre Bourne Type Beat
-------------------------------------------
easy1up Review with Team Mansell and Babskenky - How to make money online? - Duration: 13:46. For more infomation >> easy1up Review with Team Mansell and Babskenky - How to make money online? - Duration: 13:46.
 -------------------------------------------
How to Make Tofu from Soy Beans + Lemon Juice - Duration: 3:15.
It's a tranquil moment chez moi, my baby's sleeping and it's a beautiful day
so it's time to make tofu of course. You take a cup of soy beans that have been
soaked for eight hours or overnight, you chuck them in a blender with the soaking
water and you blend for a good minute until you get a nice smooth
mixture like this. Don't drink this even though it looks like a milkshake, it's
not delicious at all. But it will be, because we're gonna strain out all of
the fibre by straining it through a nut milk bag or a cheesecloth whatever you
fancy.
And you're left with soy cream which you heat on a medium heat for about 10 to 15
minutes, and once that's heated you're gonna coagulate it which is basically
making curds and whey out of your soy milk. My method is using a tablespoon and
a half of lemon juice in half a cup of water, but you can also use nigari salt
or vinegar. So you add half of that lemon mixture to
the heated soy milk and you stir and then you stop the milk in its tracks by
holding the wooden spoon kind of vertical, and you add the other half. This
time you're doing a sort of a back-and-forth M-shaped motion and then
you just leave it to stand for about 10 minutes and you'll find that you've got
this kind of like scrambled egg kind of mixture and that's your curds. And the
whey you will strain out through the nut milk bag. So you just squeeze all the
liquid out, you can also use a cheesecloth for this, and then you end up
with a dry mixture which you then form into a square, well any shape you
want actually, but square is easiest and then you just leave it for
10 minutes to let all of the excess moisture come out, and you can even put
some weight on top of it to make sure that every last drop gets squeezed out,
and then you have tofu. A wonderful lovely block of tofu. Here's the acid
test - is it going to cut in a lovely clean manner - yes it is, yummy. The texture
of that is just so nice and the taste oh my god is so good it's so fresh-tasting
and it's actually totally different to the experience of eating shop-bought
tofu. So now I'm going to enjoy it with my deliciously veggious lunch here. It"s
really good just like that nothing on it at all but it's also really really good
with tamari poured over the top or soy sauce or nama shoyu, whatever you
prefer. This recipe is so good.
So enjoy and we will see you next time on Veggie Magnifique TV.
-------------------------------------------
How To Make Wild Compost Fertilizer | Organic Gardening - Duration: 13:46.
I live in South Carolina. South Carolina too much clay in ground. Ground no good and
too hard. If you put compost you'll be...
your vegetable production will grow excellent and you'll have your home natural production and
no chemical,
because it's much better. Show right now how we'll be to make this compost. Where pickup?
How easy. Right now go next step. First step we're doing this
looking right here fireplace. We have wood. You see like this wood.
Wood. Wood. Now finished. Big wood take out. Small wood we have ashes pretty good. Put together
and
after fire any place where you go. If you go in park
or you go in... if you looking some
ashes, you have always basket or something, and bag,
and small shovel, and pick up, and put inside basket, and bring for your home. Ashes very good
mineral.
Mineral
production right here.
I show for you where we put these ashes on my property
and show how process go step by step.
Go. Some people doing a road right here and pushes top ground right here, and mix together.
You see this is wood. wood and
rotten wood stay inside. You see like this.
Rotten wood and inside w e have
a lot of compost. Wild compost. Very good.
Very good.
Wild compost very good and leaves, and
pine leaves, and everything mixed and on top ground. This wild compost,
study for me my dad. I lived in Russia.
He studied how pickup very natural wild compost. We go to forest,
move out these leaves
always and pick up wild compost.
Wild compost have much better, no chemical. No
chemical. This chemical kill
natural
benefits for people and better if you put
for your ground, for vegetables... you'll be
healthy always. Too many people right now no healthy, because have problem.
Too much chemical food, because too much chemical in soil and ground.
Use farmer, everybody and say "natural food." It's not natural food. If you want
healthy food and natural wild compost,
homemade, you must come on to forest,
your property, or
forest government, or any place where you are allowed to pick up this
natural compost. Come on show for you more.
Right here I'm pickup this area, compost for my property. You see I am take out top layer and
bottom is mixed.
Rotten wood... everything together.
Rotten wood.
It's very good and
rotten
leaves and
pine leaves. Everything small ground. You see like this.
It's much... if you have a little bit sand, its much better, sand too.
Doing ground very perfect and
if you're looking like this area, something
pushing together wood, it's much better area. It's a lot better.
You must pickup everything for your ground. You must have inside
car
special basket, small shovel or something, and
plastic bag where you can put something inside
and if you're looking much better
compost, you must take, pick up this compost and put inside bag.
How much do you need or put inside basket.
This is will be natural. I'm
pickup right here and go more another place where I have too much.
Too many. A lot. A lot compost we show next
area where I'm pick up too much more.
This compost we can
pickup
every area where we have permission. If
Some people say "Okay come on my forest" and
give for you permission, we can pick up this compost.
It's much better. Too many people have forests or big farm, nobody work
inside forest. You come on
inside. Between trees we have leaves inside like this.
You must move
outside little bit more.
Everything moving. Under trees you'll have always,
inside compost. Not too much.
Not a lot,
only top layer, right here this area,
you see, always good. This probably like this area. You can doing like this clean up and out
You see,
it will be
easy, very good. Around trees we can pick up like this and put inside basket.
Very, very good compost and
go for your property. This is very soft. Very nice. Sometimes
rotten wood,
it's okay, because a little bit more time it'll be this is very good and
put inside car,
and I put right here my shovel. Put inside car and go for
next
area. What we doing next area.
Right here we have compost ready. Right here my home.
Right here ready compost, very good. We bring more. You see like this clay,
very hard to grow plants, because this clay
no good,
and if you bring compost and mix this, everything. My wife mixes like this.
Put right here. Very easy grow every plant.
Every tree same idea. You must put inside
roots,
inside hole, between roots, this compost. Trees will very excellent grow.
Go next step. Wild ground, you're doing like this.
Pickup shovel and doing upside down. Doing right here, It's your ground.
After finish right here,
your backyard, you'll finish, cut everything, grass out.
After finish right here,
What we doing?
Put on top these ashes.
I just put on top, top layer. After doing, pickup ashes and put on top right here.
Put on top ashes. After finish ashes,
then
lay down
and
put more
compost. Put on top.
Again,
separate everything and after finish everything, everything mix together.
Ashes and compost
mix together.
We have very excellent ground, for every plant.
Grow fast and better and easy for roots, for every plant.
Roots have air.
Roots easy grow. Water easy go inside ground. See like this, very good, too much benefits.
After finish,
you ready,
go to
flea market to buy new plant. What kind plant do you want? Flower?
Cucumber? Dill? Tomato? Everything, what do you want? Eggplant.
You'll be have natural pr oduction your backyard. You see like this ground,
(rain drops)
nobody put right here nothing. We last year
to buy this property, bought this property and put trees and
put small
backyard.
What to do first? First shovel, doing natural.
This regular ground.
We doing shovel, mix everything first. Second step, we bring right here, put
some ashes. You see ashes?
Right here, probably like this, put ashes right here and
Separate for everything where you want
put plant. What do you want? After this, we bring...
next step,
We bring right here compost. I show for you where we pickup compost. It's natural compost. Put on top.
On top put compost.
It's natural. It's not ready ground. After finish this, we come out right here,
pickup shovel and mix everything.
You see like... what kind ground stay right here. See like this, mix. Natural. Good.
Ashes.
compost.
What do you want put for this ground?
Looks like black, you can put this ground every plant. Tomato,
we put last year. Tomato grow perfect.
Cucumber grow perfect, dill, parsley,
everything grow excellent. This is ready ground.
This is right now February, we have ready ground for new plant.
If you put right here new plant, we'll have natural
vegetables, everything natural, not chemical, because
everything we pick up from forest. From forest it's natural compost. Try doing this right here.
If you have flower garden... come here. Now raining.
I show for you... this is raining. See right here.
February start grow flower right here and right here. My wife not finished right here, we only start this property.
We bring compost right here. My wife put right here
ready ground. Inside compost. Before we have clay right here. This needs mixing. Will grow every flower. Perfect grow.
If you want natural, no chemical
property, if you have... Whats better for you? Long life and
healthy, no go to doctor,
you doing yourself.
You doing for
health, for you. Work your backyard,
you healthy because, fresh air, you work forest, pickup
compost, moving, you have interests for life. You have good idea and
your life will be long time no died early. Good luck. If you have questions,
please put questions, will be answered every time. If you want look more video,
more we'll be continuing video for this
interest, for Compost, for backyard (gardening).
Thank you very much. Like and
Subscribe. Thank you very much.
-------------------------------------------
How to Make a Rolled Beeswax "Staircase" Candle - Duration: 5:48.
hi I'm Sophie and welcome to my world today I'm going to end my three part
series in candle rolling with what I call a staircase candle and as you can
see it goes Stepity, stepity, stepity,
stepity it goes from skinny to fat and I'm gonna teach you how to make it right now
for this project you'll need beeswax sheets candle wick scissors exacto knife
hairdryer and a ruler so we've already cut this straight down the middle and
with a staircase candle I mean you can make it big and long if you want to it
gets really really fat though in that case and so what I like to do is cut
these in half and so I'm gonna just measure about eight inches here and
using my ruler just cut straight down to make two sheets so just like with my
skinny candle I can get four of these thin staircase candles out of one sheet
I'm gonna be measuring two inches down and making a little cut and then I'm
gonna be measuring an inch and a half up excuse me an inch and a quarter up
you're making a little cut and from the cut here to the cut there I'm gonna use
my ruler and just cut straight on down so that I make a triangle now I'm gonna
cut my wick just like I did the other tutorials one inch longer than the width
of the candle and I'm going to make sure that that's right and I'm going to at
this point cut my embellishment and I'm gonna be using just one honeycomb width
of this so I've got my yellow here cutting one tiny little honeycomb width
and I'm gonna actually place it ahead of time on my candle as with my
other tutorials I'm warming up the beeswax just to make sure that it stays
nice and secure that it's nice and malleable and I'm just lining this up
all the way along that edge there see that all the way along the edge and I'm
just going from one end all the way down and as you can see I gave us a little
extra up here so that I didn't end up with a rough edge because I can come
back and cut these little edges off here just cut this one here and cut this one
here there we go so now we've got our pretty line and then what I'm gonna do
is flip this over and I want to give this a little warm up again it's very
fast now I'm gonna take my wick and I'm going to like I did with all the other
ones lay it right at the very end push it down in and start to roll once again
I want to make sure that I'm keeping this very very tight as I roll and I
also want to make sure that I'm always keeping that bottom in line and straight
as I go I want to make sure that my embellishment stays so I just want to
run my finger across as I'm rolling making sure that that's staying in line
as I'm rolling and if it rips a little bit don't worry just use your fingers to
smooth it down keep going keep rolling making sure that that bottom is not
sliding out and there we go now once you get to the end here
I'm gonna take your hairdryer like we've done with the others
warm that up a tiny bit seal it off and I should have a tiny little bit left
over that we had cut off and we can just take that and smooth it in so that it
goes all the way down now if you have your candle base you may need to taper
it just a tiny bit with your fingers and if it's not going easily heat it up a
little bit with that hairdryer but it should be pretty malleable and you're
just gonna taper that end just like a regular candle like a real candle they
will get in the store it has the tapered end and then you can make sure that it
fits right into your candle holder like that and there you have it your very own
staircase candle now the product that I used once more is this fabulous beeswax
candle making kit from Amazon and as I said it comes with everything you need
to make your candles if you've enjoyed this series make sure that you give us a
thumbs up and if you're not a subscriber already make sure you hit that subscribe
button down below so that you can get our videos every Wednesday and Friday
for more great ideas check us out at sophie-world.com
-------------------------------------------
15 Amazing Chocolate Hacks Ways & More Recipes | How To Make Chocolate Cake Recipes - Duration: 10:43.
15 Amazing Chocolate Hacks Ways & More Recipes | How To Make Chocolate Cake Recipes
Thank you for watching! Hope you enjoy & like it!
Không có nhận xét nào:
Đăng nhận xét