Welcome To My Channel
SUBSCRIBE FOR MORE VIDEO
Leave a like ,comment ,share
-------------------------------------------
DIY How to make Rainbow Slime | Most Satisfying Slime Video 2018 - Duration: 10:14.
Thanks for watching
Hope you have a great time
Please, like, comment and subscribe for more!!
-------------------------------------------
How to make felt Easter eggs - Duration: 1:43.
How to make felt Easter eggs
-------------------------------------------
Welcome to Making Sense of Social Media for the 50+ Entrepreneur - Duration: 1:39.
hello my friends over the internet Lorri coming to you today again from
making sense of social media with more tips and tricks on social media
marketing for your business I wanted to say welcome welcome to my youtube
channel welcome to what will hopefully become your top resource for social
media marketing tips and tricks for the 50-plus entrepreneur and why I've
singled you out is for two reasons one I'm one of you so I know how you
feel when it comes to social media marketing the frustrations the fears the
anxieties the just insecurities even and number two I'm a social media specialist
I've been a self-employed social media consultant for over seven years now so I
know a few things about social media marketing this channel is intended to
help you grow your business using social media marketing whether you have a
brick-and-mortar business a network marketing business a solopreneur
business a business selling aprons a business fixing clocks whatever it is
that you do for your encore career it's up to you to know how to use social
media to your best advantage and that's what I'm here to help you do you could
be spending your time anywhere on the internet and you're here with me I
really do appreciate that so make sure you subscribe and click the bell for
notifications for when my videos are uploaded and I look forward to helping
you make sense of social media
-------------------------------------------
How to make bread masala (riz) - Duration: 9:55.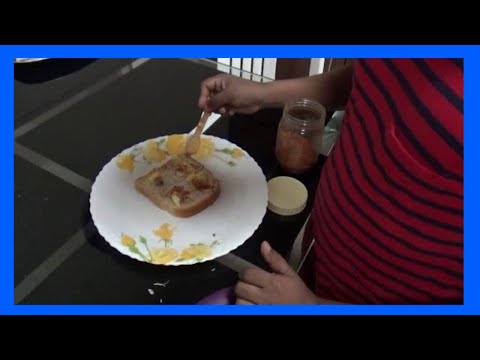
today I'm going to make bread masala
-------------------------------------------
How to make potion their hands! Idea! - Duration: 11:37.
Hello friends my name is Lada and in this video I'll show you how to make this photo phone
with my own hands of inexpensive materials I'll say right away that I'm not a professional in
creating Photo background just in one moment I was interested in how to do my
photo for instagram and for youtube including attractive and interesting and
looked at those materials that have I have the presence and came up with this
here's a way to create a Photo background if you're it's also interesting, I invite you to
viewing do not forget to subscribe to channel will be a lot of everything
interesting and click on the bell then surely do not miss my
The photo phone looks like this two sheets of cardboard which I with purl
The sides are fastened with a strip of cloth which helps very flexibly these sheets
cardboard bend well and of course the whole interest is in this surface which I
imitated under a brick somewhere some craquel traces are there now
I'll tell you what it all did from the basic materials for the photo background at
we will need a cardboard on it we will imitate the surface
here you decide how many sheets and how much cardboard you need
I advise you to take a plump card but the most durable and will be long for you
serve further sheets of watercolor paper here too
see if you have many sheets of cardboard then take more leaves
watercolor paper density is any here I have a density sheets of 200 grams
further out of the tools will immediately show the badge to all here
knead the brush for the same purpose palette knife if no palette knife
spatula if spatula and no take any plastic card
further from the materials here I have wood filler
it was inexpensive I bought it in building store costs about 50
rubles here such a tube 250 grams further white paint can take white
acrylic paint but it is of course expensive so I buy cheaper
acrylic enamel for radiators also in building store is sold and more
need glue pva here you can take any glue pva and from clerical
store and building store are any good here I showed
they are all materials to work full list of materials I leave in the description
under the video so look there since
that I cut the watercolor paper into small rectangles
further I divorce the mixture for this I take the pva pour into a bowl
I think so much is quite enough there is somewhere a whole tablespoon
further I take acrylic enamel I too somewhere a table spoon is no more
I mix everything up and go on here add some putty just a little bit
about a teaspoon all I do on eye generally there is no recipe from
the result is always very interesting the result is different but interesting
all this carefully mix this mixture now I am doing this cardboard I have already
did so that I have a little glue here came out of the bottle here is already ending
so I had it here so turn the cardboard I very carefully
missed very, very good, I do not regret
glue
here, keep in mind if you take exactly the same cardboard as I have here
See here are such ribbed strips of them we also need then hide it will we
all we do is grease all pva and while all this in our raw form I paste
this all our rectangles of watercolor paper in this way then
there are they we will imitate brick masonry can be said
can and will mimic but here just is not very interesting
the effect is given maybe it will not be like on a brick, but it will also be
it's interesting to look really ways to make a photo phone very, very
a lot of this is one of them very carefully glue the corners
these rectangles although I have a photo background some corners are peeled off but at
It's also interesting to look at everything like as if the wall is old so on top I still
I cover it a little with glue a little
just a little bit to somehow fix these rectangles here
You can do everything not ideally if somewhere you made some roughness from this
the surface will only be more interesting look so do not aspire here to
perfectionism here you can relax this is all to let go and my bone is mine
pleasure and so after our the surface a little dried up not quite
it remains so in places sticky we now go to the next stage
we take our mixture into which bred palette knife or spatula or plastic
map and apply this mixture from above here so here is the way here you decide
these masks are vertical or horizontal to apply this mixture for
name all these places between our rectangles
You can apply the entire mixture and then distribute it as needed, even here as
just the same plastic cards it is convenient to do do so we have the whole surface
is smeared and now I will put a palette knife to give all sorts of unevenness to her like this
Here is the way you can take for this same the most plastic card or even
You can try the brush in different directions in one
direction try experiment
on a small piece look like it will be better here still here such here
small problem can say cardboard on which we do it all it can
a little jarred here like I have it a little bit so here I am doing an arc
see if you look from the side but it's no problem when the surface
I dry out a bit on him a Georgian and then he straightens up, that is
it's fixable look now after all
creating these unevennesses I take again putty
and now straight clean putty I go from above
that there were any such bulges in plumpness any interest is created by our
rectangles of watercolor paper also stick out creating such a feeling
as if we have boards here or something like this, that is, here I am somehow still
again we repeat and ointment to them as we want you can add some color for example
turquoise here or gray or pink then you have then it all turns out
some color spots I do not add anything basically gray white
the color suits because the putty at us grayish all our mixture was white
this is at your discretion I just show how the idea of how it all
you can do it and there you yourself too will add something to reduce
remodel, well, here is our Photo background almost ready now we give this
the surface is completely dry because I this mixture applied a thick layer on
The cardboard of course took a little more time to make it all dry up somewhere
a day has passed and the surface is now completely dry, so here it looks
Once again I will say that you can go even on top a little sponge with the color will be
too very interesting effects and here here is how you have already seen the cracks
appeared in some places they appeared the process of drying by the way I
noticed that the thicker the glue pva you in this mixture add the more cracks
there is such a craquelure effect craquelure here is formed still wanted
to say that the cardboard itself with itself has leveled off at me at least here
this cardboard may be it because of that that the size is not very big but so does not
less I did not put any cargo here then there is a process of drying it once and
I straightened at all such a background photo it turns out to be quite strong and here
for example this photo background which I did has served me for a very long time
somewhere around a month and a half here, even he withstood cat attacks
and several times fell because the cat on him many times attempted and before
So far, the attempt is directly loved this photo background he is very here by the way here these
rectangles of watercolor paper in some places I get unstuck and wanted
glue but know something to me until you want to do it too very interesting
this effect is obtained here, but here more cracks because I'm here
used very thick glue pva here this is the moment it is very thick and when
this dries out here this mixture is formed such cracks are also very interesting
look and here on this side of my photo phone I added
a little black paint quite a bit here I put a brush literally dry I
It turned out such an effect of an aged wall
I hope that this video you liked be sure to write in the comments that you
use as a Photo background to me it will be very interesting to read
big fingers to subscribe to channel not to miss a lot of everything
interesting I wish everyone inspiration excellent mood and see you very much
Soon in the next video broadcasts for now bye
-------------------------------------------
how to create gmail account in mobile in hindi || ईमेल अकाउंट कैसे बनाये सीखे हिन्दी मे - Duration: 8:28.
Subscribe To Our Channel BPS RAJAWAT and click on The BELL ICON so that Whenever we bring a NEW VIDEO You get Notification.
Subscribe To Our Channel BPS RAJAWAT and click on The BELL ICON so that Whenever we bring a NEW VIDEO You get Notification.
Subscribe To Our Channel BPS RAJAWAT and click on The BELL ICON so that Whenever we bring a NEW VIDEO You get Notification.
Subscribe To Our Channel BPS RAJAWAT and click on The BELL ICON so that Whenever we bring a NEW VIDEO You get Notification.
Subscribe To Our Channel BPS RAJAWAT and click on The BELL ICON so that Whenever we bring a NEW VIDEO You get Notification.
hello friends All of you are Welcome in your own Channel BPS RAJAWAT
hello friends All of you are Welcome in your own Channel BPS RAJAWAT
-------------------------------------------
Diy vibrator | Homemade vibrator | how to make a vibrator | vibrator for woman | Stupid Engineer - Duration: 3:26.
youtube.com/stupidengineer
-------------------------------------------
How To Create Shape Transitions, After Effects Tutorial & Template - Duration: 4:27. For more infomation >> How To Create Shape Transitions, After Effects Tutorial & Template - Duration: 4:27.
 -------------------------------------------
How to Make Chettinad Style Crab Fry|செட்டிநாடு நண்டு வறுவல்|Spicy Crab Fry|OOR SAMAYAL - Duration: 3:42.
Subscribe OORSAMAYAL Channel
Don't forget to click on notification symbol
hello every one!! welcome back oor samayal
In tamilnadu chettinad recipes are very famous
Today we are going to see, chettinad style crab fry
lets watch how we can do it?
now we are going to make 1 kg crab
lets saute required ingrediants
for that am adding 3 tsp sesame oil
1 tsp cumin seeds, now turned golden brown colour
at this point, lets add 2 chopped onion
2 green chili
lets saute for 5 - 10 mins
at this time lets add ginger garlic paste
lets add 3 chopped tomatos
add 2 spoon of salt
lets saute well until tomato cooks well
between this lets prepare a masala
take a half chopped coconut
add redchili 's based on your spice level
i am adding 15 red chili's
add 1 tsp cumin seeds
with this add 1 1/2 tsp fennel seeds
also add 1 tsp black pepper
lets grind all nicely by adding water
lets take in this consistency
now our base is cooked well
with this lets add 1/2 tsp turmeric powder
lets mix everything
and now lets add prepared masala
now lets add required water
now the mixture boiled well
lets add cleaned crabs
mix everything to blend with masala
then close the lid
let it cook around 10 to 15 mins
for wonderful aroma, i am adding coriander and curry leaves
check salt and spice taste at this stage
add salt if required
then lets crab until the water content
go way from crab
you can add oil as needed
so that our crab will be yummy
nicely fry the crab
i fried crab like this
that's all our tasty
and yummy
chettinad style crab fry is ready
This crab fry will go well with Rasam and Sambar
you guys also try at your home
if you like this video subscribe our channel
share with your friends
subscribe oor samayal channel
don't forget to click on notification icon
-------------------------------------------
IRS scammers lurking and waiting to make their move - Duration: 2:22. For more infomation >> IRS scammers lurking and waiting to make their move - Duration: 2:22.
 -------------------------------------------
HOW TO MAKE PIZZA SAUCE AND DOUGH - Duration: 5:20.
Cover the dough and keep it in a warm place for 1.5 - 2 hours to rise.
Cover the dough and keep it in a warm place for 1.5 - 2 hours to rise.
Cover the dough and keep it in a warm place for 1.5 - 2 hours to rise.
-------------------------------------------
【Origami】How to make a Easy Carnation flower - Duration: 6:10.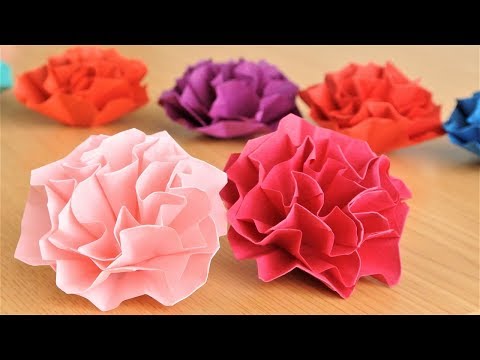 For more infomation >> 【Origami】How to make a Easy Carnation flower - Duration: 6:10.
 -------------------------------------------
Braised pork belly with taro (芋头扣肉) - How to make in 4 steps - Duration: 8:17.
In this video
I'm gonna show you how to prepare the Chinese braised pork belly with taro. It is called
Kao Yuk in Chinese which means inverted pork.
That's actually what it means! The meat is braised in a deep bowl and invert
onto a plate and serve up -ended.
Step 1- Prepare the pork for braising.
The preparation before putting the pork belly into the braising liquid
affects the quality of the dish. This step include blanching the pork
to remove the untoward pork smell. Apply some soy sauce to the surface to get a better appearance and
pan-fry in the skin side to create the aroma.
This is pork belly-
layers of fat
alternate with lean meat, perfect for this dish. Then we have the red preserved bean curd and
then Shaoxing wine,
oyster sauce,
five-spice powder,
white pepper marinade with this
pork, and the dark soy, sauce to apply on the skin to improve the color of the pork.
First, blanch the pork.
Blanching helps to remove the unwanted smell of pork.
Blanch the pork belly until you can use the tip of the chopstick to pierce into the flesh. It takes about 10 minutes.
Then remove and drain.
Next puncture the skin.
Puncture the skin with the tip of the chef's knife. This step creates plenty of small holes in the skin.
When you deep fry the pork later, the skin may tend to crack due to high heat.
Pricking small holes can prevent the skin from cracking.
Then after pricking holes apply some dark soy sauce on the skin. The dark soy
sauce help to add color for better appearance.
Set you aside for 15 to 30 minutes or until the pork is dry before deep-frying.
Then pan fry the skin until he turns crispy and aromatic.
Heat up about half an inch of oil in a flat pan or wok
over medium heat.
Gently lower down the pork belly, skin side down into the oil and pan fry the skin until crispy and golden brown. You
may cover the wok or the pan if the oil splatter too much.
Put the pork on the chopping board skin side down and cut it into slices about 5mm thick,
Marinate the pork with the set of seasoning that I have shown you just now.
I've just made a batch of pork belly with taro recently by following a recipe that does not require marination.
Although it is an easy recipe,
but I find that it does not deliver the desired flavor as intense as the marinated version as I shown you now.
Step two- prepare the taro. After you get the right taro, prepare it by following the following steps.
Cut the taro into two and then quarter and then into slices of about 5mm thick.
Some people may find that taro can irritate your skin,
due to the presence of oxalic crystals, but luckily. I'm not allergic to it, so I'm fine.
If it is, put on your glove before handling it if you're allergic to it.
Heat up about half an inch of vegetable oil in a frying pan
or a wok over medium heat. Pan fry the taro slices until both sides are brown and crispy.
Then remove and drain away the oil on paper towels.
Marinated taro slices with the fermented red bean curd, some Shaoxing wine and
the five-spice powder. Be gentle when you mix the taro with the marinade
because there are quite fragile.
Step 3
preparing a sauce , this savory
sauce is entirely different from the
ordinary braising liquid. The hero with the sauce is the preserved red bean curd.
This fermented bean curd has a very strong savory flavor very much like fermented cheese.
Therefore it is only required a small amount for large pot of meats.
This ingredient is very popular among the Chinese which you should be able to get it in
most of the Asian grocery shop.
Some vegetable oil, to saute the garlic and the onions.
Saute until fragrance then add the red preserve bean curd, Shaoxing wine,
sugar and the star anise which is optional and
some chicken stock or just plain water to make the sauce.
Saute the garlic and the shallots in the vegetable oil until aromatic.
Then add the preserved red bean curd into the wok, then add the rest of ingredients- the stock,
Five-spice powder, wine, star a nice, light soy
sauce,
salt, sugar everything into the wok, bring it to a boil and let it simmer for five minutes to reduce to a quarter of the volume.
Step 4- Braise the pork and enjoy.
The final step is to braise the pork and the taro slices with the sauce. It may takes a while
but I'm sure it is worth for the wait, when aroma from the lengthy braising drifting in from the kitchen.
Arrange the pork and taro slices alternate one with another in a standing position.
We have the pork skin side down in a large bowl.
Make sure you pack the taro and pork slices upright like a pack of cards
and tightly in a bowl so that they will stick together when it is served.
Pour the sauce over the pork and taro. the sauce will seep through the layers eventually.
Braise the pork on a steamer over medium heat, lid on for about two hours,
or until the pork and taro slices are soft.
Then pour the excess braising liquid in a bowl
carefully so that the pork and the taro slices are firmly sitting in a bowl.
Heat up the braising liquid and reduce it to a thick sauce.
Invert the bow on a plate.
Remove the bowl so that the pork is now served up-ended.
Poured the thicken braising liquid on it and
serve along with some simple Asian greens such as bok choy or Chinese lettuce.
I've just show you how to prepare this fabulous Chinese pork belly with taro in four simple steps.
You can get a recipe, the video and the detail cooks note at my blog:
http://tasteasianfood.com/pork-belly-taro/
If you like this video, please subscribe to my YouTube channel by clicking the button below and
until then, I'll see you in the next video.
Bye for now.
-------------------------------------------
Star Stormy Daniels Asks Court To Make Trump Talk, Judge Ends Her With 1 Word - Duration: 4:19.
Star Stormy Daniels Asks Court To Make Trump Talk, Judge Ends Her With 1 Word
Adult film star Stormy Daniels and her attorney recently asked a court for an order to depose
President Donald Trump.
Now, the money-hungry "actress" has suffered a huge disappointment after the judge stopped
her with one little word.Stormy Daniels and her attorney Michael Avenatti have been relentless
in their quest to gain permission in court to legally sell Daniel's story to the highest
bidder.
According to Daily Caller, a California judge deflated Daniel's hopes to depose Trump
and make him talk, saying that her request was "premature."
Following the judges ruling on Thursday, March 28, 2018, Avenatti took to Twitter to vent
about how "unfairly" he and his client are being treated.
"Here is an order from the Ct denying our motion as premature on procedural grounds.
We will refile the motion as soon as DT, MC, and EC, LLC file their motion to compel arbitration
seeking to hide the facts from public view.
We expect this any day," Avenatti tweeted.Michael Avenatti joined CNN's Wolf Blitzer in an
interview to whine about having his request rejected by the judge and explain what steps
he would take next.
"We're going to wait for the President and Mr. Cohen to file their motion to compel
arbitration, and then we're going to immediately refile our motion," Avenatti explained.
"Again, Wolf, based on the language of the order that came down today, they are in a
world of hurt.
They are not in a good place."
"We told them what the law was before we filed the motion.
They didn't seem to understand it.
Maybe they're going to understand it now, but I think we're going to get the discovery
that we've asked for, and I think we're going to get the trial we've asked for,"
Avenatti continued.
In an attempt to make it look like less of a blow, Avenatti said, "It's not even
a gnat," he told Blitzer.
"The court has denied this on procedural grounds.
We know they're going to file it, we're going to refile it.
I'm excited about our prospects now more than ever because of the order."Of course,
the mainstream media is more than eager to eat this up as they continue bashing President
Donald Trump for what they would like to portray as sins of the past.
It's hilarious to see the left's attempts to alienate Trump's base by promoting the
Stormy Daniels drama.
I don't think liberals have figured out that Trump's supporters really only care
about one thing — making America great again.
According to USSA News, Daniels' attorney was ridiculed by CNN's Morning Joe hosts
Mika Brzezinski and Joe Scarborough.
"This attorney, Michael Avenatti, is like feeling very Gloria Allred on me, overexposed
in a huge way and in this specific case he is overexposed, Joe, and he has under-delivered,"
Brzezinski said.
"If you're a lawyer and you've got all the evidence that you need that's going
to prove that you're ultimately in the right, you don't go on cable news ten, twelve times
a day," Scarborough responded.
"You don't call Michael Cohen a punk, punk, punk, screaming at the top of your lungs
on Anderson Cooper's show."
"You sure don't tease out a CD and say, 'Hey, look what we've got.
Look what we've got,'" Scarborough said.
"I'm sorry, that's bush league.
All of those things are what bush league lawyers do when they're in it to get the publicity,
and I just — his actions over the past two days have been really surprising because he
has — he's overpromised and he's under-delivered, time and time again."
It's always amusing when the left attacks the left.
I don't see Daniels' lawsuit against Trump going anywhere, and honestly, conservatives
in America don't care about her allegations of an affair with the President.
Perhaps it's time for Daniels to get a real job and earn a living like the rest of us.
-------------------------------------------
How to Make a Peanut Butter & Honey Sandwich || Deliciously Simple Recipe - Duration: 0:48.
Peanut Butter & Honey Sandwich
Toast some bread
Let it cool
Peanut butter
Honey
-------------------------------------------
How To Make A Energy Generator At Home || DIY Ideas || Ideas Factory - Duration: 7:17.
How To Make A Energy Generator At Home
-------------------------------------------
Tam Kıvamında MENEMEN Nasıl Yapılır? How to Make Best MENEMEN from Scratch | Episode 7 - Duration: 3:14.
Turko Food Channel
2 tomatoes
green chilli
small size onion
a clove garlic
40 gr butter
3 eggs
copper egg pan
saute for 1 minute
cook for 3 minutes
3 beated eggs with salt
cook at slowest heat for smooth texture
mozzarella slices (optional)
turn off the heat and let rest for one minute
hot chilli flakes
Turkish bread
Lets dig in :)
Không có nhận xét nào:
Đăng nhận xét