Hey there subscribe to my channel and also press this Bell icon so you never
miss any new updates cause whenever we upload new video you will get a
notification on your phone you
How to make 6 Karahi Recipes You Must Try - By Breakfast Recipe
-------------------------------------------
How To Make Strawberry Jam - Duration: 2:16. For more infomation >> How To Make Strawberry Jam - Duration: 2:16.
 -------------------------------------------
How to make knit Crochet Ice Cream Cone Amigurumi Part 5 English Subtitles Translations - Duration: 2:26.
down here I'm going to make a little knot right about here
and I'm going to run it to the inside just like that and I'm going to cut off
some of this and just leave it on the inside this is what it looks like with
the cherry so that's an additional option if you'd like to add a cherry I
don't have any stuffing so I'm going to be using some old yarn and I have some
yarn here that looks like it might be from a hundred years ago I've never seen
this before but I'm going to be using this let slip here at the label so so
it's from Ben Franklin and it cost three dollars and 59 cents so I'm going to be
using this as stuffing to the inside and I'm just going to pull it out like that
just create a big yarn mess I'm going to stuff the inside of my cone using this
old yarn so if you don't have stuffing sometimes I use fiberfill you can use
your scrap pieces of yarn or an old cotton t-shirt or old cloths you know
whatever you have around recycle what you have and if it's something that you
washed say you want to wash your ice cream cone it gets dirty your kids play
with it and it gets they drop it in the mud you may want to wash it so the yarn
is going to be washable I'm filling the inside of mine with this until it's full
now I'm doing the same thing with this one and I'm putting a little bit down
here at the point and I'm going to use my scissors to push it down here
and try to make it nice and pointy the top part is stuffed as full is it's
going to be stuffed so I'm going to wind this around and pull the edges just
slightly I'm not going to pull it completely shut I'm just going to
slightly pull it
-------------------------------------------
Tutorial : Make Looping Video - Duration: 9:41. For more infomation >> Tutorial : Make Looping Video - Duration: 9:41.
 -------------------------------------------
DIY Paper Bag Making at Home - How to make a Shopping Bag easy - Duration: 5:01.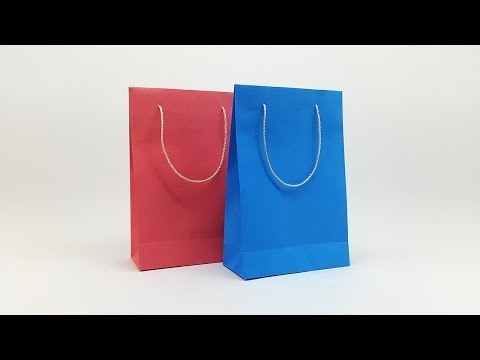
Dear Crafts Lover, Welcome to Paper Shopping Bag making tutorial.
You need 1 piece A4 size paper (29cm x 21cm)
Follow the instruction step by step for making a best Paper Bag for Kids
Now you will need 2 pieces 20cm length ropes
-------------------------------------------
WhatsApp Group Calling New Feature, How to do , Hindi, Urdu, हिंदी English Subtitles/cc - Duration: 1:11.
How To Make Group Video/Audio Calls in WhatsApp
Step 1: Open WhatsApp
Step 2: Do a normal call.
Step 4: Check if there is a new button "Add participant"
Make call with 3rd Friend
calling
I really enjoyed this feature. Try it, you will also do.
thanks for watching
Please subscribe my Channel
thanks again
Myself Tahir Ahmed Mahar
If you enjoyed this video please like and comment me
Thanks u so much
See u in next video
-------------------------------------------
Woman hires designer to make her wedding dress but it's not what she thought it would be - Duration: 4:00. For more infomation >> Woman hires designer to make her wedding dress but it's not what she thought it would be - Duration: 4:00.
 -------------------------------------------
[SLIMEBOX] 😀How To Make Youtube Button Slime😀 ▒ Clay Slime ▒ Clear Slime ▒ Slime ASMR - Duration: 5:28. For more infomation >> [SLIMEBOX] 😀How To Make Youtube Button Slime😀 ▒ Clay Slime ▒ Clear Slime ▒ Slime ASMR - Duration: 5:28.
 -------------------------------------------
HOW To make lauky kofta - Duration: 6:37. For more infomation >> HOW To make lauky kofta - Duration: 6:37.
 -------------------------------------------
Oil Free Snacks to Make At Home - Recipe in Hindi - by Indian Food Made Easy - Duration: 3:47.
We all love snacks but we avoid eating them when they are too oily, so today's video is oil free snacks recipe
These are all the ingredients for oil free snack recipe
For oil free snacks recipe firstly add 1/3rd cup gram flour in a mixing bowl
Quarter cup semolina
Add quarter cup curd and mix everything well together
Now add one chopped onion
One chopped green chili
Chopped half capsicum
Now add two grated potatoes
We have peeled and grated these potatoes, after grating them we washed them in water and squeezed all water out to make them dry like this
For this oil free recipe we are using raw potatoes
Add about three spoons chopped fresh coriander
Half spoon garam masala
Half spoon or as per taste salt
Quarter spoon turmeric powder
Half spoon chat masala
Quarter spoon of red chili powder
And add quarter spoon of baking powder and mix everything well together
After mixing everything together, cover and put away for 10 minutes so that semolina could absorb all the moisture
After 10 minutes if your mixture appears to be too tight you can add a little water, but our mixture did not needed any extra water
Now to make these snacks oil free we have to use non stick flat pan
On which we will place a little mixture with a spoon this way
Set temperature on sim for cooking these
Cover and cook so that heat could be distruted equally
After cooking for 5 to 7 minutes on sim gas, flip and cook from other side too
You can see how crispy they look from bottom
Cover and cook again
After cooking for another 3 to 4 minutes, these oil free snacks are ready
Serve these tasty and delicious oil free snacks with tomato ketchup and hot chai
If you also don't like having oily snacks, then you must try this oil free snacks recipe, you will definitely like it
If you liked my video then please press the like button below
And do subscrie to my channel
Do press the bell icon so you don't miss any of my new videos
Thank you
-------------------------------------------
MANGA SENPAI STRIKES [23] Screentone | How to make manga by Japanese manga-ka - Duration: 9:40.
I'll tell you what we are going to do today and
why am I wearing black shirt.
OK so today's topic is that...
IS THAT
is screentones.
Do you know what screentone is?
This is a dotted pattern printed sticker which is used in manga.
Generally used in paper printed manga such as magazines.
I want to tell you about
letterpress printing.
But I suppose this magazine is not printed with the technique...
This is just made to look like a letterpress printing...
This magazine might be printed in letterpress printing.
Letterpress printing is an old printing technique
which is able to express only 1 color, black and white.
And it has been used with manga magazine because it was cheap I believe.
However, printing techniques are so developed for these decades,
so I don't know whether this magazine is printed by letterpress printing or not...
Well, the printing techniques are well developed,
so we don't have to express gray with black-and-white dotted patterns anymore.
We can just paint manga with gray.
However, the use of scrreentones are one of characteristics of Japanese traditional manga.
We used screentones to express gray in manga.
So use of screentones makes mangaish atmosphere.
It looks like very manga.
So we're keeping using screentones also these days.
Maybe you can't see the dots, it looks like just gray sticker...
But when you zoomed it,
you'll see dotted patterns like this.
So screentone tools in manga drawing softwares,
like CLIP STUDIO PAINT, is trying to reproduce the function of the dotted pattern sticker.
That's the today's situation. It is good for you to know that.
Use of screentones has some rules. Understanding original materials helps understanding digital tools.
Originally, we put these screentones on manga drawing
after we cut this to appropriate size.
I must tell this out loud because the generation who doesn't know what the screentone is
coming soon.
That's today's situation.
And screentones
cost very much in Japan.
Very expensive.
If you buy 100 sheets...
So expensive.
You can buy a PC by 40,000 yen.
And you need plenty of sheets to make a manga.
Especially gradation screentones.
Nowadays you can make gradations as you want by one click and one drag.
In old days,
We choose gradation from this sticker...
by putting this on line drawings.
So it's impossible to use this whole sheet
Just a part of it we could use.
So that,
Just a part of it is useable though it's so expensive.
So we had to buy many sheets of screentones to make a manga.
Like "I'm in trouble!"
So use of digital screentones is expanded.
By understanding general use of this,
you can handle screentone tools in CLIP STUDIO PAINT with same ideas.
THEN,
There are 2 big screentone makers.
One is IC Screentones. This is the most popular maker of screentones, but is bit expensive.
So there's a cheaper brand. Deleter.
Deleter is bit cheap. IC is bit expensive.
But IC screentones has a good quality, thiner and softer. Easier to handle with.
But their use are not that different.
For example, their patterns of screentones has ID numbersB like S-41.
What the number shows is
the first digit shows the roughness.
Like how many dots per a inch.
Like a resolution of a display.
That's the same idea.
Smaller number shows more scarce dots.
Like this.
As the number gets bigger,
there are more dots per a square.
Then,
today's standard screentone is 60L. S-61 to S-64 (or S65).
It is said that this is the most basic screentone in Japanese manga.
But 60L is bit too dense
to be printed in Japanese comic book size.
It seems like just gray.
So manga artists who want to keep this dotted pattern,
sometimes use more scarce screentones like 40L.
Well, the second digit shows...
(searching English word...)
Noudo.
So as the number of the second digit gets bigger,
Like 61, 62, 63, 64,
The dots get bigger and so the brightness of screentones gets darker.
In CLIP STUDIO PAINT, the second digit corresponds to the % of thickness.
Like S-61 is 60 lines with 10% of thickness, S-62 is 60 lines with 20%, S-63 is 60 lines with 30%, S-64 is 60 lines with 40%.
Screentones work like that.
Suddenly I remembered CLIP STUDIO PAINT trivia.
This is what I told from a manga artist I worked for.
We shouldn't use the thickness of % higher than 40%.
The reason why is,
you put screentone of thickness of 50%
and then you make this black-and-white.
After that, the pattern of the screentone looks like a checkered pattern.
Like this.
It happens also with gradation tones.
So the dotted pattern suddenly changes into the checkered pattern. It doesn't look nice.
So we don't use the screentone thicker than 50%.
It is ok to use as a gradation tone.
AND
The point is,
Screentones with scarcer dots, makes mangaish feeling,
but less reality.
I mean, the picture gets too childish with too scarce screentones.
The picture with scarce dotted screentones NEVER get enough reality for some reason.
Do you know "DEATH NOTE" of Oba tsugumi & Obata Takeshi?
See the background picture of DEATH NOTE.
If you put S-41 screentones on the picture,
it ruins its reality totally.
To choose lines of screentones suit to your manga drawing style
Something like that.
Furthermore, the difficult point is,
which lines of screentones you choose.
For example, the are some people...
There are some people in long distance and some people in foreground.
Like a crowded street.
As gets far away, you can put denser tones.
High density.
Like 60L and 10%.
And as closer you put scarcer tones like 40L 10%.
This is an example to choose screentones.
With physical screentone, you can just change the screentone.
With digital material,
maybe it is bit more complicated to change lines after you make layer mask.
Maybe you should select where to change the lines.
Anyway this is just an example. Just I wanted to mention it.
You can do it if you want with the digital materials.
You just change layers.
THEN,
so the basic screentone is S-61, 60L 10%.
Don't use many different screentones.
10% is the standard.
The point of the use of screentone is to consider these 3,
1. No screentones (white) 2. 10% screentone (gray) 3. Black
I mean,
white, 10% screentone, black.
Compose your manga picture with these 3 colors. That's the point of making good picture with screentones.
Then you can add some darker colors.
Some more information,
You shouldn't overlay screentones with different lines.
With different dpi.
You'll get distort patterns.
It's called "Moare" in Japanese manga term.
I'll try to overlay a tone wit 42L and 65L.
Oh, I messed it up...
When you overlay these you can see strange pattern appears.
This is Moare. It gets moare.
This happens
when you overlay screentones with different lines.
Some strange textures appear.
When you overlay screentones with same lines, The distortion doesn't occur.
It's OK to do that.
There's another overlaying technique.
You can simply put 20% screentone,
but instead of doing that, you can double 10% screentones.
You overlay a screentone as you can see dots of both screentones.
It is used in physical material era.
You can do it with digital materials.
Just find good setting.
I'll show you if I have time.
And here's the tip for screentones.
It's not screentones that finishes your manga.
Though you put many screentones on your manga, it might not seem like completed.
And you feel like "why the heck my manga looks not enough?"
So, why is that?
Firstable, screentones is NOT the final process of making manga.
That's a wrong idea.
Screentone is not the final one. After we put screentones,
we have Shiage. The finishing process.
Without this process, your manga might seem imperfect.
For example, there's an apple.
You put a screentone on the apple.
You see the apple doesn't look good enough.
Like "It just putted a screentone"...
So after screentone,
adding some highlights makes this apple much better.
This is the important part to make your manga perfect.
And some Beta(adding the darkest part, black) .
I mentioned this in the previous video, about the light and shadow.
These little final extra efforts are
more important to make your manga perfect.
It makes your manga get close to the perfect one!
And success...
Make a combination of light, shadow and screentones.
What I wanted to say is
See you again.
I did it.
If you want to add some more,
you can add shadows with lines.
Using screentones with lines is also good.
You can get 2 level of tone of brightness.
You put only one screentone, but you can get two different colors.
It seems like there's two colors.
And here's the darkest shadow, black.
So you can get 4 level of tone by using lines.
This is a possible way to make light and shadow.
Let's try it.
There's a Like mark in the right corner, so please push.
Please push Like mark, Nice mark.
And below this video there's a red button. Please push.
And please check pixiv FANBOX or Patreon page.
-------------------------------------------
Pen Holder With Paper | How to make Origami Pencil Holder | Hexagonal Pen Holder - Duration: 5:00.
Welcome to origami art. Today i show you how to make
paper pen holder. Origami pencil stand make very easy.
If you want to make pen holder please watch full video
step by step. Don't forget to like, comment and share if you like this video.
Thank you very much for watching this video.
-------------------------------------------
origami dolphin - origami dolphin easy step by step.How to make an easy Origami Dolphin step by step - Duration: 5:33. For more infomation >> origami dolphin - origami dolphin easy step by step.How to make an easy Origami Dolphin step by step - Duration: 5:33.
 -------------------------------------------
CONFIRMED : Klopp confirms Alisson to make Reds debut in Dublin vs Napoli - Duration: 1:33.
a listen Becker is set to make his Liverpool debut in Saturday's friendly
with Napoli in Dublin Jurgen Klopp has confirmed the goalkeeper joined up with
the red squad for the first time on Tuesday at their training camp in France
following his transfer from his Roma last month the team will head directly
to Ireland from their Evian base this weekend and a listen will almost
certainly be handed his made an appearance for the club at the Aviva
Stadium you'll be able to watch Liverpool's game with Napoli live on LFC
TV and LFC TV go click here for details clop told Liverpool calm it's pretty
likely he'll make his debut we should not waste time then it'll be nearly a
week or six days in training since he started and yes he will play a listen
met his new teammates for the first time when they arrived at their Evian base on
Monday evening having tied up his switch from Italy on July 19th and he's already
made a positive impression club continued I'm very pleased to be able to
work with him but first of all it's very
-------------------------------------------
How to make a Primitive Car - Amazing Paper DIY - Duration: 6:27.
Thank you for watching!
-------------------------------------------
How To Make Heart Chocolate Cake Decorating CAKE STYLE 2018 Amazing Chocolate Cakes Tutorial Ideas - Duration: 11:08.
How To Make Heart Chocolate Cake Decorating
-------------------------------------------
BEST Way to Make WIDESCREEN Videos - in 60 seconds! - Duration: 1:00.
Letterboxing looks very cinematic but simply adding an overlay of black bars
over your footage isn't great so in today's 60 second tutorial I want to
show you the "right way" to make widescreen videos. And that is just to go
into your project settings and change the resolution from a 16x9 resolution
to a widescreen resolution. If your project is in 4k then use this value and
if your project is in 1080p use these values. It's also very
important to make sure you export with the same settings. Otherwise you'll end
up with black bars overlaid over your final video instead of having an actual
widescreen file. The advantage of doing it this way is that if someone is watching
your video with a wide monitor or on YouTube's theater mode then the video is
going to fill more of the screen instead of being shrunken down. This is also just
the actual resolution of the video, like what's the point of having completely
unused black space in your video? That is all for this 60 second tutorial. Keep creating
and I'll see you in the next one.
-------------------------------------------
Mayesh Design Star: How To Make a Floating Installation - Duration: 5:04.
(calm music)
- Hi everyone, my name is Kaylee Young
and I'm the owner of Flourish by Kay,
and I am the 2018 Mayesh Design Star.
In this video I'm going to be talking you through
how I made a floating installation.
The tools I used to make this installation are:
clippers, wire cutters, scissors, fishing line,
wire netting or chicken wire,
and then I also used oasis caged bricks,
and also oasis bricks that were not caged,
placed in Lomey dishes, floral tape, and baby's breath.
We got started by using chicken wire.
We cut the chicken wire into different pieces,
different sizes,
according to what size we wanted the ball to be.
So we started with a large ball,
so we had quite a large piece of chicken wire,
about two feet, crumpled it into a ball,
and then tied it with fishing line multiple times around,
and then tied it to the rafter in the venue.
Once we did that and we made sure it was secure,
I started shoving baby's breath in, in clumps.
And this created a tight, kind of, ball,
with the baby's breath,
and it allowed everything to hold together tightly,
and I could build out more and more.
So I just kept building out baby's breath,
shoving until it was nice and full,
and all the chicken wire was covered,
and then I made sure it was the shape that I wanted,
and then it was finished.
The next two balls that we made were the same process,
they were just different sizes, so smaller balls,
and then again, I just shoved baby's breath,
and then filled it up until it was nice and full
and all the chicken wire was covered,
and then made it kind of asymmetrical, whimsical looking.
And then the last two little,
tiny pieces of hanging baby's breath,
I juts made a little ball of baby's breath
and tied it with fishing line so it was just like a bundle,
and then tucked in some extra pieces,
so it would be extra small.
I didn't use any chicken wire for that.
The pieces on the ground,
the first large piece we used a large, caged brick of oasis.
Soaked that, pushed it up against the wall,
and then started with baby's breath,
placing in the oasis and building out as we went,
bigger and bigger, until we made, sort of like,
a cloud looking thing.
We did the same thing
with the other cloud installation piece on the ground.
It was a regular sized piece of oasis
that we had placed in a Lomey dish,
so it would be smaller than the other caged brick of oasis.
Once we got the overall shape of the clouds made,
I just made sure that none of the chicken wire was showing,
I made sure that none of the oasis was showing,
and then I put in extra pieces of baby's breath
to add, sort of a whimsical, asymmetrical look,
and to, kind of, finesse them,
make them perfect, kind of focus on the details.
And after we were finished, then we swept up the floor,
and then the installation was finished.
While I was designing this installation,
I used the first piece as a gauge
for the rest of the installation.
So the first cloud that I made,
we hung up the fishing line, and the chicken wire,
and then I started putting the baby's breath in,
and kind of used that as a gauge
to what size I wanted the other clouds to be.
So after we got finished making that first piece,
then I knew how I kind of wanted to make the second,
and the third pieces.
The second piece I decided to maybe try and put
the baby's breath in on the ground,
I thought maybe that would be a little bit easier.
When you're doing any kind of installation,
no matter what kind of installation you're doing,
it's gonna be very subjective to your surroundings,
the venue.
So I think that you're gonna be gauging
no matter what you're doing,
so just start with a small piece,
see how it goes over,
and then kind of adjust your technique as you go on.
Installations are really amazing
because they can do something for a venue
that just nothing else can.
They kind of bring it to life.
And so, I really love this installation
that we made with the baby's breath.
The bride was very whimsical
and she liked things very structural,
and so we had a lot of fun designing this together.
And then I used,
we also made it a frame for their wedding video,
that they projected onto the wall.
So, the baby's breath installation was used as a frame
for people to take photos in,
as kind of a photo moment,
and it was also used as a frame for their wedding video,
when everyone would sit at the table
and watch their two minute wedding video
of when they got married.
So, it was a really nice addition to the venue.
It was a really nice addition to the reception,
and it really brought the whole venue,
and the whole event, to life.
Hope that you learned something valuable from this video,
making an installation is different
for each person every time,
so I hope that something you learned here today
can help you in your next installation.
(calm music)
-------------------------------------------
GTA Online Guide - How to Make Money with After Hours - Duration: 24:17.
What up guys? Welcome to a new episode of GTA Series Videos Tips & Tricks.
I'm Gary7 MT and today we're gonna analyze the new business opportunity in Los Santos
and Blaine County added with the latest GTA Online update: After Hours.
With this video our intent is to give you info on costs, wages, investments, upgrades,
time and more, in order to allow you to make the best choices and decide if you want to
be an active part of this new business.
We took time with every new aspect added by the DLC in depth, in order to give you the
best guide possible - which has also been made possible thanks to some members of the
GTA community like TezFunz2, KUNMB11 and many others from GTAForums and Reddit who provided
fundamental data that will be shown in this video.
Unique from all other businesses, in After Hours, you're able to do almost everything
alone and in a private session.
The only thing restricted to public sessions are the selling.
This is the starting point for this DLC, after receiving Tony's call we're good to go.
Let's start by purchasing the nightclub.
If you're unsure whether the business is good for you, start with a low-key location.
One isn't recommended over another - generally the rule is to select one near a highway or
on the north of the city in order to have fast access to the other half of the map.
Don't go crazy on the customization and keep the storage facility as it is.
There's always time in the future to change everything making it stylish or bigger.
With just a little more than a million bucks, you'll be the new owner of a nightclub with
an underground hub for managing your criminal activities.
Once you've bought everything you need, head to your new property to enjoy Tony's presentation
with Lazlow, the real star of this new update.
When the cutscene ends, before clocking dollars, you're forced to complete three setup missions.
The first two missions are to recover speakers for the nightclub and three staff members.
After that, you need a DJ and with him on board, you're ready to earn some money to break even.
Before delving into more complex explanations about the time and effort needed to make a
profit, allow us, in the interest of clarity to split the activities in
After Hours into two main businesses: the Nightclub and the hub.
Let's start with the Nightclub.
Players in the club can enjoy activities like getting drunk and blacking out, only to find
themselves on Mt. Chiliad nearly nude, to becoming a new member of the Epsilon Program,
to spraying expensive champagne on friends & NPCs.
You can also dance for dollars, unlock an exclusive t-shirt and gold trophy for your
office if you dance to the DJ for 6 cumulative hours.
All these activities will help you obtain the new rewards added with this update.
As far as business activities go, everything can be done in private sessions in the following ways.
There are two ways to clock dollars: nightclub earnings and jobs.
Club earnings are based on the popularity meter.
Every 48 minutes - a day in GTA Online - a specific amount is placed in the club's safe
depending on how well known your club is.
Keep your promotion maxed and you'll make 10,000 a day, and have access to the
most expensive booze.
Keep the popularity over 90% for a little more than 11 hours and you'll unlock
the gold Hotspot trophy on Tony's desk - the one shaped like a star next to Luis' picture.
The safe has a maximum capacity of 70K, so that means that if you keep your promotion
full all the time, every six hours you have to collect the money, otherwise you'll lose your next pay.
Let the bar run dry and you'll find yourself with a mere 100 bucks income a day instead.
So when the promotion bar starts to lower, refill it by completing a nightclub promotion mission.
An easy, solo mission that normally takes from three to five minutes to complete
- or kill a player in an active promotion job to gain some for yourself.
These missions don't pay that much, an average of $2,000, but every penny brings us closer to breaking even.
There's a five minute delay from the end of one promotion to another.
There are also a fair selection of missions available randomly for the player split into
three main categories tied to the character talking to us before and after the job.
The first type of mission are Tony's and always involve directly promoting your club
or ruining someone else's.
He may ask the player to fly on a Buzzard and drop flyers, put posters up around the city,
steal or recover a stolen Mule full of booze, destroy Bahama Mamas supply trucks
or force a change of mind in property developers by smashing their cars.
The second type of jobs are Lazlow's and their themes involve VIPs visiting the club.
The four types are: reach a VIP who has been arrested, jump in the Transporter,
lose your wanted level then finally take the VIP to your club.
Use Snapmatic pictures posted by the VIP to locate them,
reach their location and bring them to the club.
Reach the VIP, loose the paparazzi, grab a second guest
and return to your club.
And finally reach a couple of not-so-well-known celebrities or clubbers and get them in the club.
Promotion type 3 are random missions for English Dave.
Unlike other promotion jobs, these aren't started by the player, but are randomly activated
by the game through a call made by Dave.
These missions' themes are favors asked by the resident DJ, favors ranging from
free a couple of kidnapped friends, recovering some classic stolen vinyl,
or bring a group of friends to the club using a helicopter while keeping a low altitude
'cause one of the guests doesn't like heights.
And this is more or less all you can do with the business activities part of the After Hours update,
but there's still a little more.
Like any other business, the nightclub can be attacked too - always by the game,
not by other players.
There are two different kinds of raids, ones tied to the nightclub, the other affects the hub.
Let's look at the first kind.
Once attacked, you'll get a call from Lazlow informing you that some punks stole some bags,
phones and stuff.
When the call ends, we have to find the thieves, kill them, recover the stolen property
and bring it all back to the club.
There's no time limit and if we fail, we'll just have to promote to change the opinion
of the clientele about the venue.
To avoid being raided there is a simple trick that works for every business in GTA Online:
do not register as a VIP or CEO or MC.
Just make sure to disband your organization when it's not needed
and you don't have to worry about security anymore.
You don't even need to buy the Security upgrade - almost 700 thousand stays in your pocket.
And speaking of upgrades, the $475,000 Staff Upgrade is a worthwhile investment considering
you'll have a third bartender and the loss of daily popularity is lower.
And that's that for the nightclub, but not for all the activities of After Hours.
Now onto the other part of the business.
As we said at the beginning, the actual name is "Warehouse" but its also called basement and storage.
To avoid confusion with the warehouses from the Finance and Felony update, in this video,
we just gon' call it the hub, alright?
Alright.
So the hub is a five floor max, underground structure divided into two main areas.
A personal garage in front and round rooms in the back with a terminal for managing the club and staff.
Then there's a terminal room for the technicians and various other rooms where the contraband is kept.
Again, if you're unsure if this business is for you, when buying the nightclub,
leave the storage facility alone and don't buy any additional floors
- there's always time to enlarge your hub later.
There are two ways to get the goods for the hub: Business Battles and Technicians.
The former is active, in other words it requires your direct involvement.
The second is a passive method that doesn't even require player interaction.
Let's start with the Business Battles.
They have one activation requirement: being in a session - even if an invite only,
with at least three players active - moving or idling outside, not inside nightclubs, apartments
or any other interiors.
You don't need to buy or start anything else: no technicians, businesses, or upgrades.
You can have fun playing with your friends and others while filling your hub at no additional cost
A Business Battle is nothing more than a freemode event.
It is set to start every 15 minutes or so, like any freemode event
- as long as players in the lobby haven't disabled them.
The business battle consists of a mission where players have the chance to recover
and store two crates of any random product in the hub.
There are various scenarios Rockstar created for this event.
In one, we gotta reach a laptop inside a police station and interact with it while trying
to survive the cops to mark the location of a vehicle with the cargo on the map.
Sometimes the crates appear as duffel bags on maps after killing a bunch of targets
for an unknown character.
Or dropped from an airplane after clearing a drop zone of military and marking the area
by throwing a flare.
If the cargo is split into two bags or crates, recovering both may be difficult if you're solo.
Sometimes it's better to go halfsies than to die.
Several scenarios involve the full cargo stuffed inside one vehicle.
Starting with a car meeting in which we have to steal a Hermes.
Another scenario requires finding a vehicle at the airport using a picture on your phone
or reaching a trailer with a Mamba inside that we must free by blowing off the trailer's doors.
In another we have to deal with a large group of Merryweather soldiers at Fort Zancudo,
or a fairly large group of professionals in the underground garage of the Union Depository.
There's even a scenario involving Simeon's dealership where we have to hack the garage doors,
kill all the mechanics and thugs or outrun them - and collect a vehicle to take it to the nightclub.
In all these missions you can either use the supplied vehicle and bring it to the hub
getting both crates in a single drop, or destroy the vehicle to free the crates,
and then take them to the hub one by one.
Obviously, if you're alone, keeping the original vehicle is the best choice.
It's also worth noting that if you win 20 business battles, you will unlock a special
gold trophy for your office.
Like the club, the hub can also be raided and while you may risk losing some clubbers,
with the hub you risk losing everything you have so far.
As soon as the raid starts, police will surround the nightclub using Grangers and a helicopter.
To successfully defend your club you have to kill all enemies around the club without dying
or otherwise you'll fail and all goods in the hub will be seized by the police.
But, as we said before, to avoid being raided there is a simple trick
that works for every business in GTA Online: do not register as a VIP, CEO or MC.
And make sure to disband your organization when it's not needed
and you won't have to worry about security anymore.
You won't even need to buy the Security Upgrade
- which just delays raids rather than eliminates them.
With all that said, let's start crunching numbers with the other way to gain goods for the hub:
Technicians.
Until now we've discussed the active experience of this update, with the next part
we'll delve into the passive activities where there is almost no player interaction.
After the introductory mission, you'll automatically gain the first of five technicians
that can work recovering goods to sell.
Seven different types of goods can be stolen and stored in your hub by technicians.
Cargo and Shipments is the first category.
Nothing really new here to see.
Just a fancy name for the CEO special cargo from the Finance and Felony update.
Then we immediately have the five businesses added with the Biker update: Printing & Copying,
Organic Produce,
Cash Creation,
Pharmaceutical Research and South American Imports.
Last is Sporting Goods, again, a new name identifying weapons produced by the Bunker business
from the Gunrunning update.
To have a technician to work on one of the previous categories, you have to own the related
business and everything necessary to run it.
In other words, if you want to put Yohan to work on Cargo and Shipments,
you need a CEO office and a warehouse.
Which office and warehouse isn't important, you just need to own one of them.
The same goes for the five businesses from Bikers - with the necessary clubhouse
- or the Bunker from Gunrunning if you want your technician to collect Sporting Goods.
Once you have the business, make sure to complete the setup mission or restart the activity
if you closed it before.
And that's all, you DON'T need to do resupply missions or upgrade these businesses.
Nothing you can change in these activities will affect the production time or quality of the products.
The Finance & Felony, Bikers and Gunrunning activities only have to be open.
So with that clear, let's bring on the tables.
Like we said, they're seven categories of goods, each with a specific value per crate
from a thousand bucks to 20Gs.
Depending on the type of good, technicians require from 30 minutes to 4 hours
of real time - not GTA time - to accrue one of these crates.
That means if you're looking to fill your hub without doing the Business Battles,
you need to stay in game for almost a week.
Just like the Staff Upgrade helps you with the club, the Equipment Upgrade
is useful for your hub 'cause it improves the productivity of your warehouse technicians
by allowing them to accrue goods faster, exactly half the time needed without the upgrade.
It costs $1,425,000, but if you're trying to get the most out of this activity,
it's an investment you need to make.
And that's all you need to run the hub.
Hire a technician and assign him to a specific job, then simply wait until you have enough
and want to start selling.
With the business running, let's move onto the next part of the activity, selling for profit.
First of all, selling the goods is the only activity that requires a public session,
so before selling, try to find the right session for you or hire some help to avoid losing income.
With that said, there are three different ways to sell your goods.
You can sell your entire cargo, all the crates of a single type or a special order.
Another difference from all other businesses is that it doesn't matter how many crates of goods
you're gonna sell, everything gets loaded into a single vehicle.
Selling missions are extremely easy to complete, from simply reaching a single delivery point
to multiple deliveries, with or without enemies to face - from thugs in vehicles
to roadblocks to clear before completing the sale.
Sometimes you'll need to use a Cargobob and deliver the packed vehicle
on a barge near the helicopter.
In another scenario you need to use the app Sightseer to uncover the next drop-off.
You'll always have a time limit, and the higher the value of the cargo, the more enemies will attack
Definitely buy the Mule Custom and the Pounder Custom
and in the hub's garage modify the delivery vehicles.
Add the maximum armor and all the other customizations from the engine to the weapons.
A fully customized Pounder Custom can resist almost anything during a selling mission.
Later we'll talk more about tactics to make a profit, but for now just know
that the best way to sell goods is by collecting most of them and from time to time,
choosing one of the three special orders available.
These orders change over time, so don't wait to have enough to fulfill a specific special order
because once you have what's needed, most of the time that order is not available anymore.
The reason special orders are better than selling the entire hub
or a complete set of goods is because you'll receive an additional bonus for a set,
a value that can go from a 5% more, to 25% more.
Take these three orders as an example.
If you sell all the goods listed directly instead of by completing the special order,
you'll gain a total of $759,500.
If you instead satisfy three customers by selling them the exact same goods,
you'll gain an additional bonus of $67,200.
As always, when selling we have to remember our contact's cut.
This means 10% of the profits Tony keeps for his services.
If you sell $100,000 worth of product, you'll actually get $90,000 while Tony gets the remaining $10,000
- Tony's cut, by the way, is capped at a maximum of $100,000.
The High Demand bonus is instead a 1% income boost over the selling price
for every enemy in the session at the moment you do the deal.
Again, if you sell a total of $100,000, you'll receive $1,000 more for every player
not affiliated with your organization in the session.
Now, let's run the numbers to find the best strategy for breaking even
and starting to profit with the club.
We could bombard you with tons of possibilities, including all the businesses, various venues
or just some, buying one or more floors and a lot more, but we won't do that.
Follow the strategy step by step to gain the most money possible in the least time possible.
Go with the cheapest nightclub at the pier in South LS for just over a million,
avoid customization, but buy all the storage floors for the hub.
Reach the nightclub terminal, buy the Equipment Upgrade and hire all the technicians.
With that done, a little over five million will have disappeared already,
but that's it if you've already bought the other businesses.
If not, time to spend some more.
The best strategy considers that the player owns five businesses: CEO Office and Warehouse,
Gunrunning Bunker and three activities from Bikers: Counterfeit Cash, Methamphetamine Lab
and Cocaine Lockup.
If you're going to buy these activities only for the hub, don't spend a single penny
on upgrading or supplying them, to keep your expenses at a maximum of 5.5M
bringing the total investment to almost $10,600,000.
Despite offering good bonuses, the special orders aren't the best way to make money.
The most logical thing to do is work within a time limit.
Three of the seven businesses create maximum product in 20 hours.
If we set this moment as the reminder to sell everything created in the hub
after having assigned the five technicians to Cash Creation, Sporting Goods, Pharmaceutical Research,
Cargo and Shipments and South American Imports, we'll be able to sell everything
for a total of $830,000 more or less, minus Tony's 10%, meaning we'll gain around $750,000 per sell.
So, rounding up the numbers a little, we can make 750K from the hub every 20 hours.
To pay for the investment we have to repeat these sales exactly fifteen times,
obtaining a surplus of a little more than 650K.
All this without considering that we can lower the expenses by winning the Business Battles
or that there are the staff's wages to pay: Nightclub, CEO assistant, bunker and biker's activities
- every 48 in-game minutes, for a grand total of $18,000.
In other words, just to repay the Nightclub and Business investments,
they're a couple of weeks of keeping the game open 24/7.
The good thing is that exactly like the Bikers businesses,
the hub activities are for those players that play the game a lot.
The hub is the only really passive business in the game that doesn't require the player's attention at all,
so jump in, especially if you bought the other businesses in the past.
To wrap it up, at a first glance the business opportunities added with the After Hours update
may seem boring and a little stale while they actually give players chances to earn good money
if they use the right strategy.
Between the previous businesses and a passive use of the hub,
we're easily looking at a million or more, per day.
Surely to own everything and follow the best strategy, you'll need to spend a good chunk of your money
and if you're not an "AFK player" reaching the break-even point will take a few weeks, if not months.
So, if you're an active player, someone who still enjoys playing this game,
you now have all the info needed to earn the best profit possible from the hub in this update.
Otherwise, simply go for the nightclub.
And that's it for this episode of Tips and Tricks.
If you wanna to chat with us and other players or find someone to play GTA Online with,
join us in our official Discord server or follow our social media pages on Twitter, Facebook and Instagram.
From the GTA Series Videos crew, this was Gary7 MT.
Kifflom.
-------------------------------------------
How to Make Hair Dye at Home | Homemade Hair Dye | Natural Hair Dye by Nayyer Appa | Juggun Kazim - Duration: 10:22.
I hope that you are enjoying my videos.
And you are commenting on them as well, which I am really enjoying.
So please, remember to subscribe to my channel
and of course like and comment.
Lets talk about home made hair dyes today.
Now you must be thinking what is the benefit of homemade hair dyes.
It has alot of benefits, because
you can wash your hair with it and condition them as well.
And your hair get dyed as well.
But, I am sharing this specially for the people who
are allergic to hair dyes or hair colors.
There are very good, high end hair dyes and hair colours available in the market.
Do use them, but
if you are among the rare ones
who are allergic to dyes and get itchy scalp
or get any other problem
so these home made hair dyes can color your hair
as well as wash and condition them.
So lets see, how to make home made hair dyes for
people with allergies.
Assalam O Alaikum, I am Nayyer Apa.
Herbalist and cosmetologist.
On Juggun Kazim's YouTube channel
the remedy that I have brought for you is
for herbal hair colors.
Alot of people, especially the old ones
face alot of problems
when any sort of hair dye does not suit them and they get allergies
The scalp gets red
When they have to go somewhere urgently
they use hair colour
and take anti allergic tablets along.
Which cause side effects later.
So these, herbal hair dyes that I have brought for you today
these are best for the people
who want to colour their hair
without the use of alot of chemicals.
So you can make this and keep it.
And use once a week.
This is not only your herbal hair dye but also hair mask
and herbal shampoo.
This will wash your hair as well as colour them.
So the things that you will need are.
Like you see mangoes are
in season these days.
After eating mangoes, don't throw away the mango pits
Keep them and dry the like this.
We will be making half kilo
of this powder.
So I will tell you the quantity for half kilo powder.
We have to take 2-3 dry pits of mangoes
and a small piece of
Baal Charka and
4-5 pieces of Reetha
You will peel it off
and throw away the pit that is inside.
And 3-4 big pieces of Shikakai.
And methray.
Like I told you earlier, these things are great for hair conditioning.
So you will take 2 tablespoons of methray.
And you will add 2 tablespoons of
herbal mehendi/henna
You dont have to take mehendi with chemicals,
Take the one without chemicals.
So you will add 2-3 tablespoons of mehendi to this.
Because this powder
will be difficult to apply
without mehendi. It won't stay.
The red colour of mehendi will not show.
Because the things that we are using in this
they will give your hair
brown colour.
Then some people
dont want to apply weekly and wan the dye to stay for atleast 15 days.
So to freeze the color,
peel an onion and keep the peel.
You have to take onion peels of 2-3 onions
and soak them in water
Then after an hour, in that water you have to
make this hair colour.
You have to use the water from the
onion peel and make this colour,
then this colour that you will apply on your hair
this conditioner, will
stay on your hair for 10-15 days.
Infact the colour will remain on your white hair
but,
you will have to apply on the new roots after 15 days.
so you can mix and make this powder.
Make this according to the length of your hair.
If you have very long hair,
then
this much powder and mixed with onion water
Then leave it for half an hour,
Apply on your hair
for 1 1/2 to 2 hours.
and then wash your hair while massaging.
You don't have to do shampoo.
Sometimes using alot of shampoo
can also cause your hair to lose their natural colour.
And your hair colour
fades away earlier.
So this hair dye
gives dark brown colour.
Then girls and boys like a
bit of a golden shade.
So very simple and cheap remedy,
sunflower and marigolds,
are everywhere these days.
Take 2 bunches of these flowers
put them in 1 glass of boiling water
and keep them in it with lid on and shut off the stove.
After sometime you will obtain a
yellow coloured water.
Strain it and put it in a shower bottle.
Spray that water
in your hair after washing your hair and let your hair dry.
you will see tints of golden in you hair.
Especially the ones who have dyed their hair in light colour.
Or have streaking or blonde colour.
Their roughness and dryness
and shine can be treated with this.
So this water of sunflower or marigold can be used.
This is natural yellow colour.
Herbal colour spray.
you wil see
it will give alot of shine to your hair.
Do use these and do give your feedback.
Subscribe and like Juggun Kazim YouTube channel.
And do give your feedback.
If you used these tips and
how were the results.
Every person want sto look good
and usually people dye their hair.
Sometimes to hide the whites, while some
like to change the colour of their hair.
for fashion.
And I think thats a great idea.
But, for those for whom it is a necessity,
but they have allergies, for them
these hair dyes are very useful.
Do give us your feedback.
And let us know if you tried it.
And do subscribe to my YouTube channel
and follow on twitter and Instagram.
I hope that you are liking my YouTube channel.
Subscribing it and sharing your comments.
But I have a great opportunity for you now.
You can now share your comments with me on this number.
One thing that makes everyone curious is that
what is inside someone else bag.
Now I don't know why everybody wants to know
whats in my bag.
So I thought to share with you whats in my bag.
Actually people also say that why is your bag so heavy.
what is in it.
So I say it has dead bodies.
Actually it does not have dead bodies, I will show you what is in it.
Just remember one thing. That with different situations
of life, things in your bag also change.
So I will share whatever it is
Lets start.
So first of all, alot of people asked about my bag
This bag is from Jimmy Choo.
And other than that,
this fox infront, fantastic Mr. Fox
This is from Kate Spade. Now whats inside.
This big pouch.
This is from bow bow
Now this pouch has my
some things for eye care,
ointment for skin allergies,
my lip balm,
lip and cheek stain,
this iis for perfect eyes, under eyes
so things like this,
and then hand cream. So this is my all in one pouch.
And then alcohol swap
so I need to have alot such things.
my migraine medicine.
a painkiller.
and then some bandages.
Sunglasses, everyone has sunglasses.
in their bag. These are my favorite glasses from Valentino.
Không có nhận xét nào:
Đăng nhận xét