-------------------------------------------
#ImWithShelby: Family fights to make home handicap accessible for their daughter - Duration: 1:28. For more infomation >> #ImWithShelby: Family fights to make home handicap accessible for their daughter - Duration: 1:28.
 -------------------------------------------
How To Make A Beautiful Match Stick House & Make Dining Table Using Biskut - Duration: 4:05.
How To Make A Beautiful Match Stick House
-------------------------------------------
With One Week Left In The Session, Lawmakers Have Big To-Do List - Duration: 1:36. For more infomation >> With One Week Left In The Session, Lawmakers Have Big To-Do List - Duration: 1:36.
 -------------------------------------------
How to make the thick and thin yarn - Slub yarn - Duration: 4:49.
In this video we're going to present an artistic yarn to you that has a huge visible impact
and is one of easiest to accomplish.
The Slub yarn.
Usually a spinner is always trying to get better at obtaining a steady and thin thread count.
However, in artistic spinning we have to try and think out of the box
and be daring by applying techniques that will lead us to create
unusual shapes and styles.
The first step in making this yarn
is to practice spinning with a variety of different thicknesses.
To achieve the best slub texture
first of all, we need to get the most suitable fibre ready,
that makes it easier to work with, at least for the first few times.
Wool top is by far the best choice,
thin and compact like Merino.
So let's take our ribbon
and start to separate it lengthwise
into strips roughly about the thickness of our thumb,
whilst being careful not to tear them.
You may find it useful to roll each strip up on itself
to prevent it from getting tied up with the others
and place them in a box in order one next to the other.
Especially if you're not planning on spinning straight away or don't have much space.
Once ready,
we can set the spinner to have a slightly tight break,
not too loose,
to not give the yarn too much twist
and to reel even the thickest sections of the yarn back onto the bobbin with ease.
So, let's spin the first 30-40cm at a constant thickness,
not too thin,
And get ready to create the first thicker slubs.
To do this,
instead of ironing the fibres out to measure out the amount that needs to be twisted,
we're going to let a section of our strip slide through our fingers
4-5 cm long without thinning it,
and get ready to gently close your thumb and index finger around the end of our first slub.
now, if we had to iron the fibres out to create a thin section,
we would notice that the newly formed slub would empty from the inside
and end up weak and shapeless.
To avoid this problem
all it takes is a sharp movement clockwise,
in order to tear off the fibers at the end of the slub without unthreading its inner part.
We'll obtain a thin portion already ready to be spun and twisted.
I'd like to point out that these steps need to be done without stopping pedaling,
but slowing down and always keeping the thread, that is shaping, taut.
Obviously at the beginning it's a good idea to stop and start again,
until our hands have got to grasps with the technique.
As you can see
slub yarn is formed by alternating thin sections with thick slubs
and it's clear you can certainly shape the thread differently
by varying the thickness and the length of both the slubs and thin sections.
Now, let's just recap:
the so-called "thick and thin" yarns are made exactly in this way,
with a single ply and alternating very different thicknesses.
The difficult thing about creating yarns like these is knowing how to measure out the twist
so that the thick areas don't split apart
and at the same time the thin ones don't get too curled.
-------------------------------------------
2 ways to make a paper gift box - Duration: 3:17.
Hi, this is Joelle Meijer.
Here are two ways to create a small gift box.
You will find the necessary patterns in the supporting document.
A first way to create a gift box is to use a toilet paper roll.
Take the roll and flatten it.
Take the almond-shaped pattern
and place it on one end of the roll.
Draw the outline of the pattern.
Now place the pattern on the other end of the roll and proceed in the same way.
Cut both ends of the roll through the two layers of cardboard
to obtain a rectangle with two rounded ends.
Turn the roll over and now use the other pattern with the small notch.
The notch should be facing each time towards the outside of the roll.
Draw the outline of the notch as well as the curved line
on the other side of the almond shape.
Cut out the notches on each side of the roll but only on the top layer.
Take an x-acto knife and score the curved lines that you have drawn
on each side of the toilet paper roll.
So you will have to score 4 curves.
When you score a fold, it makes it easier to fold afterwards.
Squeeze the sides of the roll to give it some volume
and fold both flaps with the notches.
The notches will make it easier to open these sides later.
Then close the second flap of the box on each side.
And now, your box is ready!
You can keep the box as is or paint it and decorate it before folding the flaps.
Here is a second way to create a gift box.
Print the full pattern of the box on thick coloured construction paper.
Cut out the pattern.
Then take an x-acto knife and score the long folds of the box
as well as the curved folds that will form the flaps of the box.
Fold the box along the long folds.
Put some white glue on the tab of the box and glue it
to form the tube of the box.
When the white glue is dry, close the box as for the toilet paper roll.
Decorate the box with ribbons, stickers, beads, sequins, etc.
There are a thousand and one ways to make your box special
and use it for any occasion!
To print the document with illustrated instructions and patterns,
click on the link below the video and visit the Animaplates website
to find hundreds of other projects!
-------------------------------------------
How coaches & consultants can use social media to make a breakthrough in business - Duration: 1:48.
Are you a coach or a consultant, and have you been using social media to try and
make your breakthrough in business - to really turn the taps on when it comes to
lead generation. So, it's often a real point that a lot of my clients are
trying to solve. They're trying to get more leads, use social media this
Facebook that LinkedIn Instagram ... but actually where'd you find customers? Well
you know what - I've created a guide just to show you exactly how I do it and what
I want to share with you specifically is how I generated £54,000
pounds worth of business opportunities in one single month and actually ended
up closing 50% of that. And this was not based on ads, it was based on
conversations. So if you'd like to find out about the exact conversations that
helped me to get to those figures - then download The Guerrilla Method Guide, the
guerrilla method guide is the exact sequence of messages that I've put
together to connect and speak with my niche target audience. There's no
trickery, there's no wizardry, there's no kind of
special formulas, secrets, three steps... it's just pure unadulterated outreach - how you
speak to one human who is interested in buying your stuff. If you'd like to get
it, get it for free now - simply click on the link around this video, probably
below or above, and you get immediate access it's sent to your inbox it's a
PDF guide it's approximately 20 pages and at least 10 pages of that are actual
screenshots of my conversations that led me to leads, or led me to confirmed booked
sales. So get it now guys. It's Leon Streete from businessownerelevation.com, and I
look forward to speaking with you very soon
-------------------------------------------
DIY How to make a wind-propelled BUBBLE MACHINE / Como hacer un BURBUJERO AUTOMÁTICO | Craft Attack - Duration: 2:04.
-------------------------------------------
How To Make CHOCOLATE HEART CAKE Decorating 2018! Amazing Chocolate Cakes Ideas and More by Mr C - Duration: 10:38.
-------------------------------------------
[RECIPE] how to make chocolate palmier 이제이레시피/EJ recipe - Duration: 5:51.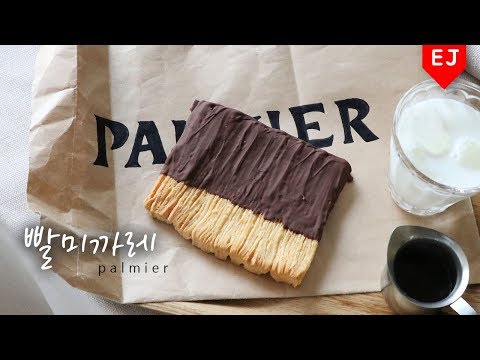 For more infomation >> [RECIPE] how to make chocolate palmier 이제이레시피/EJ recipe - Duration: 5:51.
 -------------------------------------------
How To Make Holiday Chocolate Cake Decorating 2018! Amazing Chocolate Swiss Roll Cake & More Recipes - Duration: 10:39.
-------------------------------------------
How to make a T-shirt mockup in: Photoshop - Duration: 3:49.
♪♪♪
Let's look at how you can create your own T-shirt mockup.
The easiest way is to use our free mockup generator,
where you can create mockups for different products
in just a few clicks.
If you like the sound of that
you can check out our in-depth tutorial in the description below.
Let's imagine you want to make your own mockup from scratch.
I`ll show you a few ways how this can be done in Photoshop.
For this example I'll use a picture of a plain white T-shirt.
There are many free to use T-shirt templates you can find online.
Let's start by unlocking the image layer by pressing on the lock icon,
located over here.
Now, I`ll separate the T-shirt from the background.
Subject selection. Method #1.
When there is a clear definition between the edges in the image
you can use the "Magic Wand Tool"
located right here in the toolbar.
Depending on the image, you can adjust the tolerance setting here,
to make sure no additional details get captured with the subject.
Now let's select the background and delete it.
Subject selection. Method #2.
As an alternative you can use the "Quick Selection Tool"
to paint over the exact area you want to cut out.
♪♪♪
Or leave it entirely to Photoshop by pressing "Select Subject".
If there are any unnecessary details in the selection area
switch to the "Subtract From Selection",
adjust the brush size,
and remove them.
If you see any rough parts in the selection area
press "Select and Mask".
Let's adjust the radius and smoothness of the selection.
You can play around with these settings until you get the desired result.
Subject selection. Method #3.
For complete control, you can use the "Pen Tool".
This way you can manually draw a selection path
by placing the anchor points and adjusting the direction lines
by holding the "Alt" key.
After it's finished, press "Right Click", choose "Make Selection".
I'm going to leave the feather radius at zero to retain hard edges.
And press "Enter".
After the selection is made,
go to the bottom of the screen and press "Add Layer Mask",
to create a new layer with a T-shirt on a transparent background.
Make sure to always name your layers,
so it's easier to navigate through them in the process.
To complete the mockup, let's add another picture with a Printful design,
by placing it on top of the shirt layer here.
In order to scale it down,
drag the image by its edges while holding the "Shift" key
to maintain the aspect ratio.
Now we have a complete mockup on a transparent layer.
To change the color of the shirt,
hold the "CTRL" key
and click on the shirt thumbnail to select it,
then press the "New Fill Or Adjustment Layer"button
and choose "Solid Color".
This will mask the selection area,
which you can now fill with any color.
Next - place it below the T-shirt layer
and change the mode of the T-shirt layer to "Multiply".
Now go to IMAGE - ADJUSTMENTS - LEVELS
to adjust the midtones and give the T-shirt a more realistic look.
Remember, this works best if you have chosen
a plain white T-shirt,
because it's easier to change its color.
You should also avoid painting the shirt in pure black,
since it hides all the fabric details.
Instead, choose the darkest grey for a more similar look.
You can also add a custom background.
For this example I'll create a "Solid Color Layer" by pressing here,
now I can choose any color for the background.
♪♪♪
As an alternative you can you can always drag and drop any other image
and place it at the very bottom.
♪♪♪
Now if you don't have any free time on your hands
or any photo editing software,
remember that you can always use Printful`s free mockup generator.
Hey, it's Wes from Printful.
I hope you found that video very helpful.
All of the links that we've mentioned can be found in the description below.
And in the comment section
feel free to leave any feedback or suggestions
on other videos that you'd like to see.
Our channel is full of tutorials
so don`t forget to subscribe and check those out.
-------------------------------------------
How to make delicious homemade pizza /Home made pizza recipe - Duration: 7:26.
everybody likes pizza and making your own is a lot easier than you might think and it
tastes so delicious so let's see how to make these a wonderful homemade pizza
along with homemade pizza sauce in your own kitchen
let's start making our pizza dough by activating the dried yeast yeast always
need a sweet and warm environment to bloom up so here in a bowl I have taken
1 cup of warm water and to which I've added 1 TSP of sugar and half a teaspoon
of active dry yeast stir them well until the sugar and the yeast get the salt
completely and keep it aside for the yeast to get activated now our yeast got
activated and we are going to add 3 cups of flour little by little along with 1
teaspoon of salt and 1 tablespoon of olive oil I mix them together this
mixing is just to make sure everything is well combined
at this point I felt we need one more tablespoon of water so I'm adding it
when making in pizza or any sort of bread we need not to be very strict on
the measurements the dough may be little sticky that's okay but if it is too
sticky we can add one or two tablespoons of flour and if the dough is too tough
you can add one or two tablespoons of water the point is that we need to have
a clear idea about the consistency of the final dough after kneading so after
kneading for 8 to 10 minutes our dough should be soft and supple and elastic
enough to withstand all the stretching and the puffing later the more softer
the dough the more beautiful and tastier our pizza will be
so now our dough is ready lightly oil a clean bowl then place the dough inside
it and lightly coat with some oil and then cover it with a plastic wrap and
now our dough is ready for the first proofing so leave them a rest in a warm
environment for one and after 2 hours or until they get doubled in size here in
Doha where I'm staying the outside temperature is 35 degrees Celsius so
it's pretty hot and so I'm leaving the dough on the countertop itself and so
after 2 hours our dough has risen well and all we have to do now is to gently
degas the dough and then divide them into equal portions I'm dividing it into four
equal pieces so if you want a more thick crust pizza then you can divide them
into three equal pieces then shape each piece into a ball by tucking the edges
into the center of the dough so that we get a tensive ball
and then we need these balls to rest for about 20 to 30 minutes until the gluten
strands loosen and relax and then it will be so easy for us to shape it into
the shape of a disc before covering it with a plastic film let's a smear the
top with some olive oil and then cover it with the plastic film so that it won't
cling to you the plastic film now after 30 minutes our dough has rested well now
we need to roll them into the shape of a disc you can either use a rolling pin or
use your hands to roll them into the shape of a disc you can store the rest
of the balls in the refrigerator and bring it to room temperature to make
wonderful pizza any time you want to make
now let's transfer this onto a pizza pan here I have used a perforated pizza pan
this helps the heap to reach the entire crest as it bakes and which will result
in more crispy pizza crust now topping the pizza with your favorite
toppings the pizza sauce here I'm using is homemade and it taste is so good and
so much better than what I used to buy from the store as a pizza sauce and you
can make these easy homemade pizza sauce in less than 15 minutes and I'll
put the recipe link in the description box below and you can watch the video to
see how easy it is to make a homemade pizza sauce here I have added some
Parmesan cheese mozzarella cheese and thin slices of green and red bell pepper
and some slices of onion and some pieces of cooked a chicken seasoned with some
salt and pepper and be careful not to overload the pizza with your toppings
because the Crestor won't cooked through if we get too crazy with the toppings so
for baking wonderful pizza we need an exceptionally hot oven so make sure you
preheated the oven to the highest temperature your pan can withstand my
pizza pan can withstand up to 230 degrees Celsius so I have preheated the
oven to 450 Fahrenheit and bake for 14 to 16 minutes or until the edges are
crispy so after baking we'll get a beautiful pizza crust with an amazing
pizzas are loaded with your favorite toppings I hope this video helped you I
hope you will try this recipe at home and I'm sure your whole family would
love it and it's so much fun making pizza at
home so please don't forget to share this video with your friends and family
who love making pizza at home and please don't forget to subscribe this channel
so that you won't miss any upcoming recipes
-------------------------------------------
How to Make a Cell Phone Case by Loom Knitting - Knit Cases for iPhone Samsung or Android - Duration: 10:03.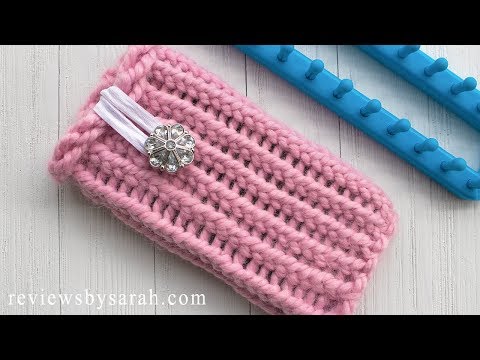
Hey! I'm Sarah Wolfe from reviewsbysarah.com Today I'm going to show you how I
made a loom knit cell phone case. You'll need a rectangle loom, preferably a
smaller one. And some super bulky weight yarn, which is listed on a yarn label as
a number 6. Find the anchor point on your loom and tie around it like this. Leave
about an 18-inch tail end for sewing. Hold the strand from the yarn ball on
the peg right behind it. Wrap your yarn.
You'll work left - front - right - and back.
Left - front - right - and back.
Continue wrapping like this for a total of seven pegs on this side.
Rotate the loom to work on the other side. Now wrap seven pegs on this side
using the same method. This process is called casting on. When you get to the
end, rotate the loom again. On the first peg
wrap from left to right again. Take the hook and lift the bottom loop over the
top loop. This is called a knit stitch.
Wrap the next peg with the bottom loop over the top loop.
Move to the next peg.
You can do one peg at a time or you can wrap all of them on one side like this.
Then work all of them like this at once.
Rotate the loom. Wrap the first peg on this side.
Lift the bottom over the top.
Again, you can wrap all of them at once like this.
Then use your hook to lift all of the bottom loops over the top ones.
You have finished one complete round. You can undo the anchor strand now since the
loops are on there securely. Work on round two. Now wrap your pegs.
Then lift the bottom loops over the top ones. Each round has 14 pegs on it. Seven
on one side and seven on the other. For my older iPhone I made 24 complete
rounds. Take your phone and test it out. You'll want some extra room on the top
and bottom. If it fits it's time to cast off. You can use any binding off method
you want. I'm going to show you a nice stretchy one. First wrap your yarn around
the 14 pegs about four times. It doesn't have to be perfect we're just trying to
measure a long length of yarn for sewing. Thread the yarn through yarn needle.
Push the needle down on the first peg.
Move back to peg number 14 and go up.
move the yarn next to the second peg.
Push the needle down on peg two. Go up on the first peg.
Move the yarn behind and next to peg three. Push the needle down and then go
up.
Move the yarn behind into the next peg. Go down. Go up.
Keep doing this until the end of this side. Then rotate the work. Down -
Up - Down - Up.
Do this until the last peg on this side.
Rotate the work and insert the yarn down into the first peg. And you are done! Take
all the loops off the loom with your fingers or the hook and pull the loom
off. It's time to sew the bottom end closed. Turn the work inside out and
thread the needle again. Make stitches along the bottom edge to close it
together.
Then make a few extra stitches to weave in the ends so they don't come out.
Turn the work correctly again.
With your other tail end push it inside.
Take a button and sew it on like this.
Weave in the end.
Take a stretchy hair tie like this. Push the ends through the case in the back.
Measure it with your button and knot it in the back. And that's it. I hope this
videos helped you. Please like and comment on this video. And please push
that big red subscribe button on my channel. And check out my website at
reviewsbysarah.com
-------------------------------------------
How to Make Your Own Sunglasses for Summer 🕶 | Evite DIY - Duration: 0:42.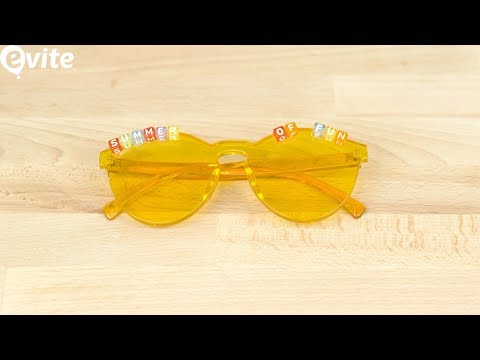
(upbeat summer music)
-------------------------------------------
How To Make Chocolate Cake Pops Recipe - Amazing Chocolate cakes decorating Videos - Duration: 10:39.
How To Make Chocolate Cake Pops Recipe
-------------------------------------------
How to make a flower vase using plastic bottle 2018 #4, Diy BigBoom - Duration: 5:46.
Diy BigBoom Love You.
-------------------------------------------
8 Summer Style Secrets to Make GIRLS Notice YOU! | How to STAND OUT with STYLE - Duration: 8:19.
Summer is right around the corner baby, which means it's time for boat parties, fun in
the sun, beaches, and more importantly, BEACHES .
Summer is prime time for getting girls, so to hook you guys up, I'm gonna tell you
the 5 summer style secrets you NEED to know, to help you stand out.
#1 Use a blister block stick.
Summer is basically synonymous with sockless.
Whether you're wearing loafers, driving shoes, or vans, going sockless is an easy
way to look more stylish.
This is simple shit... you guys know this.
Since you know this, you know that going sockless or even wearing no-show socks can cause blisters,
especially around your heel.
To prevent this, use a blister block stick aka an anti blister balm, which is basically
lube,, you rub it onto the back of your heels to prevent friction, so you don't get those
nasty blisters.
I had no idea this existed until last summer, when my mom showed me and it's been a game-changer.
You can also try getting a blister gel guard, which is basically a gel piece you stick to
your heel to block any rubbing.
So while all the other guys are too scared and too blistered to go sockless this summer,
your heels will be free of blisters and your outfits will look even sleeker without socks.
And if you're into wearing no-show socks then those work too, I'll break that option
down later.
#2 Use an antiperspirant spray on your back.
Aside from clear skies and abundant sunshine, the most common sight you'll see during
the summer is dudes in gray with a sweaty slide of sweat dripping down their back.
This is SO common that many guys actually avoid wearing gray during the summer because
they KNOW they're gonna be sweating and they're gonna have a puddle of sweat on
their back.
And if you're wearing a backpack, forget about it!
All you gotta do is, get a high quality antiperspirant spray to spray onto your back to prevent sweating
and perspiration and boom, you'll drastically reduce the amount of back sweat you get AND
you can leave the house without looking like a caveman.
You're welcome.
#3 Don't wear underwear underneath your bathing suit.
Oh my fucking god.
I will never understand why guys do this.
Like seriously, it's so fucking uncomfortable, who would willingly wear soaking wet underwear???
Let me explain something to you guys, you know the net that exists inside of bathing
suits?
That exists to hold your junk together in place so you DON'T have to wear underwear
when you put on a bathing suit.
If you wear underwear while also wearing a bathing suit it's the same shit as wearing
two pairs of underwear, which is something you would never do.
And besides, having underwear or boxers popping out of the top of your bathing suit just looks
really goofy so DON'T do it.
And I feel like I shouldn't have to say this, but I will, because so many guys do
this, but please wear an ACTUAL bathing suit.
Don't just throw on a pair of basketball shorts and think that counts because NEWSFLASH
- iit doesn't.
It makes you look like dude who just escaped from jail and just ran straight to the beach
which is probably not the vibe you wanna give off if you're trying to look high status.
#4 Wear breathable fabrics to keep you cool.
Breathable fabrics are the shit like cotton, linen, and chambray.
Cotton is good because it allows air to circulate & move freely through the fabric, so it'll
keep air flowing and you'll feel cooler.
Linen is more expensive but it's extremely breathable and lightweight, so it's also
a really good option for the summertime.
Linen pants and linen shirts are awesome, the only thing is that they get SO MANY FUCKING
WRINKLES.
Like holy shit, you can just finish ironing a shirt, just to have it all wrinkled just
10 minutes later.
So be cautious with this fabric.
Chambray is also cotton but it has more threading in it so it's finer and can breathe really
well too.
Cotton is the best bang for your buck in terms of breathability, price and not having to
deal with fucking wrinkles.
So if you're looking to get some dope cotton pieces for the summer, then I recommend checking
out The Tie Bar.
The Tie Bar has been featured in GQ and Esquire plenty of times because they provide luxurious
menswear at super affordable prices.
Which brings me to tip #5
#5 Lose the board shorts and flip flops.
You can still look fresh as fuck without sweating your nuts off.
Our partner, The Tie Bar has dress shirts and button downs specifically designed for
summer that come in lighter and softer cotton fabrics to make sure your clothes are breathable
and soft, like linen, without having to deal with those fucking wrinkles I was talking
about before.
And if you somehow start sweating, they have pocket squares for just 10 bucks so you can
wipe that shit right off baby.
They also hook you up with dress pants that are partially made up of spandex so they're
stretchy and comfortable, which is essential during the heat.
Their pants come in a trim or athletic fit so if you've been maxing out at the squat
rack lately, then they got you covered there too, so you don't have to worry about busting
through your pants like the Hulk.
Unless of course you want to.
Both of the fits are modern and tailored, not baggy and boxy, like most guys wear when
they have to dress up even a little.
Their spandex pants are also good for rocking on casual dates, going out at night, chillin
at the resort or any occasion really, because their athletic and trim fits make them super
versatile.
I'll have The Tie Bar linked below for you guys to check out, they're doing a crazy
deal right now, where you can get a dress shirt for just $55 bucks or 3 for $140 which
is ridiculously cheap for dress shirts.
They also have a bunch of affordable accessories, like no show socks, ties starting at 19 bucks
and tie bars at $15, so they fit right into any budget.
So if you need to go to a wedding, a sweet 16, or even just a nice dinner this summer,
definitely check them out.
#6 Wear sunglasses with mirrored lenses.
First of all, sunglasses with mirrored lenses are cool as hell.
Facts.
And secondly, they help reflect the sun away from your face, making your face sweat less
and attract less heat.
You could also invest in a big ass mirror and hold it in front of your body at all times
but somehow mirrored sunglasses seem like the more practical option.
They're a good way to stay stylish and cool at the same time, especially since most guys
can't pull off mirrored lenses.
So once you start rocking them, you'll really stand out.
Not to mention, you can get them pretty much anywhere, that sells sunglasses so you can
get them for relatively cheap.
Hashtag money team baby.
#7 Skip coffee.
I actually didn't know this, but after doing some thorough godly research in the secret
Olympian library of the gods located in a crypt beneath the mountains, I discovered
that since coffee stimulates your body to keep you awake, it also activates your sweat
glands.
And if your sweat glands are activated, then that means you're gonna be more likely to
sweat.
I've recommended this before, but I typically skip coffee on most days to avoid needing
it to feel energized during the day, especially in the morning.
If you are gonna drink it, then like I've recommended in the past, only drink one cup
and sip on it over a longer period of time, so you get the alertness from the caffeine
without the crash or crazy spike in energy.
#8 Wear a button down with your bathing suit.
Instead of wearing a typical t-shirt or tank top, like most guys do, when they go to the
beach or the pool, you can easily separate yourself by wearing a nice lightweight button
down.
It makes you look a lot cooler and you'll stay a lot cooler, since button downs are
typically more breathable than t-shirts.
And since you're on the beach or by the pool, it's perfectly acceptable to unbutton
all the buttons and show off your gains while still allowing for some airflow so you don't
sweat too much.
This is such an easy thing that all of you guys can do it, to make yourselves look a
lot more attractive and important, since only rich guys typically do this.
So once you throw one of these on by the pool, you'll look a lot more luxurious and all
the gold-diggers will have their eyes glued to you.
And that's it.
In summary:
Use a blister block stick Use an antiperspirant spray for your back
Don't wear underwear with your bathing suits Wear breathable fabrics
Lose the boardshorts and flip flops Wear shades with mirrored lenses
Skip coffee And wear a button down with your bathing suit
Be sure to check out TheTieBar for their shirts, pants, ties, and all their dope accessories
by checking out the link below.
-------------------------------------------
Amazing Chocolate Cake Decorating Ideas - How To Make Easy Holiday Gift Chocolate Cake Decorating - Duration: 11:00.
How To Make Easy Holiday Gift Chocolate Cake Decorating
Không có nhận xét nào:
Đăng nhận xét