please like and share
please subscribe
-------------------------------------------
How to Make (Count Back) Change Tutorial 2018 - Duration: 5:02.
Today we're having a garage sale look at all this great stuff I have to offer
well I don't have a cash register how am I gonna know how much change to give
customers when they give me more money than what their items cost stick around
and I'll teach you how
often at garage sales customers will give you the correct change when they
purchase items because the cost is kind of low but if they load up on lots and
lots of your wonderful merchandise sometimes it gets a little tricky to
figure out how much change you owe them when the items add up to save four
dollars and fifty cents and the custom customer gives me a twenty dollar bill
what am I going to do then I don't have a digital readout on a cash register to
help me figure that out old-fashioned cash registers would act
as adding machines and add up prices for the cashier but there was no way to put
in how much money that customer gave you and figure out how much change was owed
to them so there was this method that was called counting back change that
people used to use it's still very helpful today when you're running a
garage sale or just to figure out how much change the cashier should be giving
you basically what you do is take the cost of the item let's see it's three
dollars and seventy five cents the customer gives you a twenty dollar bill
you are having a hard time subtracting three dollars and seventy five cents
from twenty dollars in your head but you don't have to subtract at all when you
count their change
here's a sample of some merchandise that a customer may buy from me at my sale
there is a hat for 75 cents a little dish for another 75 cents so that's a
dollar 50 a cute little snowman dish for a dollar so that brings the total to 250
a nice little pitcher for $2 350 450 and an Oreo mug for 10 cents so their total
is four dollars and sixty cents your item one to four dollars and sixty cents
I do okay twenty four dollars and sixty cents
okay well here's a dime that makes it for 74 75 five dollars
and another five makes it ten and ten makes it 20 thank you okay notice what I
did the first amount I said was the 460 that she owed me and then I kept adding
on money till I got up to the $20 that she had given me so for 60 plus 40 cents
made it $5 another $5 bill made at ten and another $10 bill made it the 20 that
she gave me let's try it again okay this customer has brought up this merchandise
to buy a little snow suit for $2 a set of Christmas placemats for three dollars
so that's five dollars and three of these little stuffed toys which I'm
selling for 25 cents each so their total comes to to plus three is five plus
seventy five cents is five dollars and seventy five cents yam your amount comes
to four dollars and seventy five cents
it's okay I can make change all right $10 your amount is 475 so I'll give you
a quarter that makes it five and $5 makes it the ten you gave me thanks so
much for shopping at my garage sale I hope that this has been a helpful little
tutorial for you on how to count back change
beginning with the amount the customer owes you and then adding on money till
you get up to the denomination or the total amount that was given to you by
the customer down below and subscribe they're gonna tell your friends because
we want you to never stop learning
you
-------------------------------------------
Mini World: Block Art - How To Make Advance Elevator (Multiple Floor) - Duration: 21:20.
Down Stair Button on the right, and Up Stair Button on the left :D
-------------------------------------------
#FilmwitHcrochet How to make knit Bob Marley Slouch Hat Tutorial #CrochetGeek - Duration: 26:04.
this tutorial is going to be a crochet slouch cap we will be using 4-ply medium
weight yarn this is the 9 to 12 wraps per inch a size i 5.5 millimeter crochet
hook the estimate for the opening is going to be approximately 27 inches
around I am going to show the first few rounds with this lighter color and then
this is dark it's going to blend in with my background and then I will continue
with the yarn that I'm using to make the cap we will start by attaching a slip
knot to the crochet hook take the loose end wrap it over the main strand now you
have a loop take the loop wrap it over the main strand put your hook below the
center strand back up the opposite side this creates the slip knot work a chain
5 1 2 3 4 5 join with the beginning chain joining is putting your hook right
through the first chain wrap the yarn over pull through pull through the loop
on your hook you have joined the chain into a ring work a chain 3 this will
count as the first half double crochet with a chain 1 we will have a total of
10 half double crochet to work a half double crochet you wrap the yarn over
your hook once put it through the ring pick up the yarn on the back side pull
it through there are three loops on your hook wrap the yarn over pull through all
three loops chain one wrap the yarn around your hook put it through the ring
pick the yarn up on the back side pull it through there are three loops on your
hook wrap the yarn around your hook pull through all three loops chain 1 we have
completed three half double crochet
you
for
you
five
six
seven
eight
9
10 and I did crochet over my beginning tail this does save some time sewing
entails later and if you'd like to pull the beginning shut you can also do this
if you want a smaller hole at the beginning round 2 is going to be an
increase round I'm going to work in the continual round and that is what I have
done with this one I have completed round 2 on this one we are working two
half double crochet in each space for a total of 20 half double crochet with a
chain one between each half double crochet I'm going to work in the
continual round so I'm going to go right between the space like this working the
first half double crochet like that chain one work the second half double
crochet in the same space space is a generic term and can be used in many
different ways chain one working in the next space we
will work two half double crochet there will be a chain one between each half
double crochet working in the next space we are working two half double crochet
you will continue around to the beginning working to half double crochet
in each space I'm going to switch and use this one which I've completed I have
worked all 20 half double crochet for round 2 I'm going to attach a scrap
piece of yarn this is so I know where the beginning stitch is at and I'm
wrapping it over my hook pulling it around the stitch like that wrap the two
strands over pull through and then this secures them right there I can move it
every few rounds round three will be one half double crochet in each stitch
around for a total of 20 that's 1 2 3 4
5 and you can see this is where we started I have completed 5 stitches you
will continue around to the beginning working one half double crochet chain
one in each space around for a total of 20 on round 3 we have completed round
three round four will be an individual half double crochet and then a half
double crochet increase we will have a total of 30 stitches on round 4 you will
work the first half double crochet chain one the next space will be two half
double crochet chain one the second half double crochet chain one you can see we
have one two half double crochet there's a chain one between each half double
crochet the first space is an individual half double crochet this is what we will
work the whole round all the way around
one half double crochet chain one two half double crochet in the same space
one half double crochet in the next space chain one two in the next space
and if you get around to the beginning and you don't have enough stitches don't
worry about ripping back out to the beginning or anything like that that's
never a reason to rip out if you have to just go on ahead and work a second set
of increased stitches like this and it's going to blend right in
nobody will even know it's there in a few weeks you won't even know it's there
and it will be challenging to find if your numbers aren't matching up just add
an extra stitch or two but continue around to the beginning working one half
double crochet chain one and two half double crochet in the same space with a
chain one between I have completed round four round five will be thirty half
double crochet there will be one half double crochet in each space around we
are still working the chain one between and well throughout the whole pattern
working one half double crochet chain one half double crochet chain one half
double crochet chain one continue around to the beginning for a total of 30 on
round five I have completed round five with thirty half double crochet and I'm
going to move my yarn marker and moving it up here around the stitch
round six will be an individual half double crochet in each of the next two
stitches two in the next stitch for the increase an individual half double
crochet in each of the next two stitches
two in the next for the increase there
will be a total of forty half double crochet chain one around six
you will continue around to the beginning round seven will be one half
double crochet in each stitch around for a total of 40
round eight will be one half double crochet in each of the next three
stitches two half double crochet in the next stitch we are still working the
chain one between each half double crochet one half double crochet chain
one in each of the next three stitches
two half double crochet in the next stitch there will be a total of 50 half
double crochet chain one on round eight
this is what it looks like through round 8 we have 50 half double crochet we have
just completed the increase round round 9 will be one half double crochet chain
one in each stitch around for a total of 50
I'm going to change my yarn marker again move it on up here
work a chain one work one half double crochet in each of the next four
stitches work two in the next stitch for the increase work one half double
crochet in each of the next four stitches
work to in the next for the increase you will continue around to the beginning
and I will show you right here we have one two three four individual stitches
two in the next stitch for the increase we will have a total of sixty half
double crochet on round ten we have completed round ten with sixty half
double crochet chain one between each stitch round eleven will be one half
double crochet chain one in each stitch around
you will continue around to the beginning working one half double
crochet chain one in each stitch around for a total of 60 this will be round 11
this is what we have completed through round 11 we have a total of 60 half
double crochet with a chain one between each stitch around 12 will be one half
double crochet chain one in each of the next five stitches that's number two
three four five the next stitch will be a half double crochet chain one half
double crochet in the same stitch for the increase you can see the two
stitches work in the same stitch work an individual half double crochet in each
of the next five stitches one two three
for five there will be an increase in the next stitch which is a half double
crochet chain one half double crochet chain one we will have a total of
seventy half double crochet with a chain one between around 12 rounds 13 through
17 will be one half double crochet in each stitch around for a total of 70 and
the sides will start to form in a few more rounds round 18 is going to be one
half double crochet in each of the next five stitches that's one two three four
five the next stitch will be a half double crochet decrease wrap the yarn
over your hook put it through the stitch wrap the yarn over pull through leave
the loops on the hook wrap the yarn over put your hook through the next stitch
wrap the yarn over pull through wrap the yarn over pull through all five loops
we've completed the decrease chain one work one half double crochet in each of
the next five stitches that's number two
three four
five we will work a half double crochet decrease this is joining two stitches
down to one
you
round 18 will have a total of 60 stitches
one half double crochet in each of the next five stitches two three four five
chain one and a half double crochet decrease chain one you will continue
around to the beginning I have completed round eighteen the decrease round with
sixty half double crochet and you can see how the edges are forming and
curling up which is what they are supposed to be doing rounds nineteen
twenty and twenty one will be one half double crochet chain one in each stitch
around for a total of sixty rounds 19 through 21 we are working the half
double crochet chain one half double crochet chain one in each stitch around
round 22 will be a decrease round we will be working one half double crochet
chain one in each of the next four stitches two three four we will work a
half double crochet decrease chain one one half double crochet chain one in
each of the next four stitches two three four
chain one then a half double crochet decrease chain one continue around to
the beginning there will be a total of fifty half double crochet on round
twenty-two I have completed the decrease round with fifty half double crochet
rounds 23 through 27 will be one half double crochet chain one in each stitch
around for a total of 50
this is how the hat is folding up at this point like this the sides are
falling to the inside is we are decreasing with each round we have
completed round 27 we are starting on round 28 this will be a decrease round
we will work one half double crochet chain one in each of the next three
stitches the next stitch will be a decrease one half double crochet in each
of the next three stitches that's number two number three a half double crochet
decrease we will continue around to the beginning there will be a total of 40
stitches on round 28 we have completed around 28 with the 40 half double
crochet chain one between this is a very generous opening if you find that you
need to continue decreasing you would evenly work decrease stitches around the
next round round 29 and 30 will be one half double crochet chain one in each
stitch around for a total of forty half double crochet with a chain one between
each stitch
rounds 29 and 30 I have completed round 30 what I'm going to do is work a slip
stitch through this stitch to even off the round like that I'm going to work a
chain one we will be working two single crochet in each space around and this is
what I'm calling a space which is the chain one and I'm working two single
crochet in each space
this is going to be the band you will continue around for four more rounds or
as many rounds as you need to make your band you can make it longer shorter if
you find that you need to decrease some you can work one single crochet and then
two single crochet in the next space and this is going to reduce the size of the
band if you find that you need a smaller opening so that's up to you I am back
around to the beginning continuing I'm working in the continual round working
right through the top of the stitch and I'll show that again this is where we
ended and I'm going to keep working right through the top of the previous
single crochet
this is how you will end with the continual round you can see here there
is a ridge right here since we've been working in the continual round we want
to even that off you will put your hook through the next stitch wrap the yarn
over pull through pull through the loop on the hook that evens off the round
you'll wrap the yarn over pull through I have already cut the yarn I have
threaded my needle and I'm working on the inside putting the needle below the
loops like this and then I'm weaving the tail between the loops of each stitch
when we flip it over you don't see the needle we flip it back around you don't
see it on the inside then you pull it through like that
and then continue threading it between the stitches like that then I like to go
over a loop you can see we came up right here through this loop you'll go over
back in the opposite direction for a little bit more security like that
and then you can cut off a little bit like this now what I'm going to do is
take and pull the strands apart and this is a little trick for adding a little
extra security to the tail it may be a little challenging to get the strands
apart but they will come apart eventually unwind them like that and now
I'm going to take two of the strands and then pull them through with my hook just
like this and I'm going to make a knot
keep in mind this is on the inside still just like that
and then sometimes you can just pull it and it'll pull back between the stitches
I have threaded my needle again and I'm going to weave back in this direction
not very far we do have a pretty secure tail right now and then just pull the
knot back in like that and then cut off the extra tails we have completed the
Hat
-------------------------------------------
How To Make Chocolate CUPCAKE Decorating Video 2018! Amazing Chocolate Cupcake & Cake IDeas Video - Duration: 1:11.
-------------------------------------------
Pati Jinich - How to Make Natilla - Duration: 1:30.
Natilla
is a very popular Mexican desert
it's like a very light
puffy
and creamy
pudding
this is how you make it
you pour 4 cups of milk
into a saucepan
add little bit of vanilla
I go for a teaspoon
and set it over medium heat
until you see a thin film
cover the milk
that's actually called "nata"
where the name Natilla comes from
then you turn it off
you don't want the milk to boil
in a separate bowl
whisk 5 egg yolks
add a 1/2 cup of granulated sugar
and mix that up
and then you're gonna add
1 can of evaporated milk
2 tablespoons cornstarch
and then
whisk that
just making sure that
there are no bubbles or lumps
little by little
ladle that hot milk
into the egg yolks
what that does
is help you not to scramble the eggs
then you're gonna pour it
back into the saucepan
cook it over low-medium heat
for another 5 to 8 minutes
don't let it boil
and you have to whisk constantly
once it thickens
gently ladle into ramekins
and sprinkle canela on top
let cool
and serve at room temperature
or refrigerate them for later
-------------------------------------------
How To Make Beaded Tissue Box Part-1/পুতির টিস্যু বক্স পার্ট-১/मनके ऊतक बॉक्स - Duration: 32:41.
Beaded Tissue box Making Tutirial
Assalamu Alaikum Viewers
How R you
Today I am showing Tissue Box Making Tutorial
need For Making
300gram of white color. mokmol kamranga beads
300 gram of firoza color beads
80 no wire 2 piece
so viewers lets start
-------------------------------------------
How To Make Money On Instagram | Part 2 Make $100 PER DAY - Duration: 14:27.
how to make money on instagram, how to make money on instagram 2018, how to make money on instagram with affiliate products, how to make money on instagram with ads, how to make money on instagram step by step, how to make money on instagram by posting, how to make money on instagram with cpa marketing
how to make money on instagram, how to make money on instagram 2018, how to make money on instagram with affiliate products, how to make money on instagram with ads, how to make money on instagram step by step, how to make money on instagram by posting, how to make money on instagram with cpa marketing
how to make money on instagram, how to make money on instagram 2018, how to make money on instagram with affiliate products, how to make money on instagram with ads, how to make money on instagram step by step, how to make money on instagram by posting, how to make money on instagram with cpa marketing
-------------------------------------------
How To Make AMAZING CHOCOLATE EGG Cake Decorating Video! Top 10 Cakes Step by Step Tutorials 2018 - Duration: 11:01.
-------------------------------------------
How To Make A CHOCOLATE CUPCAKE DECORATING 2018! 15+ Cupcake & 10 Chocolate Cake Decorating Idea 2 - Duration: 12:08.
-------------------------------------------
Major tries to make friends/Major próbuje się zaprzyjaźnić - Duration: 4:22.
You have a problem to my dog, you have a problem to me
Be happy, that you're behind fence, oh be happy
What a crazies Major
Where's she?
Is there your friend Golden?
Probably isn't here, she's probably at home
It rained earlier, now it's sunny
A perfect weather for a walk, right Major?
He don't like you
He's defensive Major
You're defending your area too by barking
Oh right, let's go
Will they like each other, or not?
You have 5 months Major & you're bigger than him
But not stronger
Come, we're going here
Someone's watching us
Some pretty German Shepherd
Not so pretty as my, but always something
Major let's go, we're going here
Major, come, let's go
Impossible, is it the same German Shepherd?
We walked here twice
Every time he barked like crazy. But now?
Hi
-------------------------------------------
How To Make Chocolate Cake Decorating Tutorials ! Amazing Chocolate Cake Decorating Tutorials 2018 - Duration: 10:39.
Thanks for watching
Hope you have a great time
Please, like, comment and subscribe for more!!
-------------------------------------------
How Polar Team Pro helps Sydney FC to make objective decisions in training - Duration: 1:38.
I'm Andrew Clark, Head of High Performance at Sydney FC.
I'm responsible for integrating the medical team to the club's coaching philosophy –
– to ensure that Sydney FC has the best in sports medicine, sports science –
– and strength and conditioning.
We strive to create an independent culture where players are educated –
– and responsible for their own performance.
The Polar Team Pro system guides and supports our coaches –
– and sports science staff in making decisions in training sessions.
Every day we have targets for the total distance that a player is running, –
– the amount of high speed running, sprints, the amount of time spent in heart rate zones –
– and Polar Team Pro helps us hit those targets every day.
We use the system to guide us with GPS data, acceleration data and heart rate data –
– both during the session live on an iPad or after the session by downloading the raw data.
The thing that makes the Polar Team Pro system so great is the simplicity of it.
They've had a long history in heart rate monitors –
– and when they brought in the Polar Team Pro system –
– they've included GPS in a single device it was an easy decision for me.
Polar is a trusted name, it's simple and easy-to-use for the players –
– and the information that it gives to coaches and medical staff is simple and clear.
-------------------------------------------
How to Make Money Online | $5,000 Month! - Duration: 2:03. For more infomation >> How to Make Money Online | $5,000 Month! - Duration: 2:03.
 -------------------------------------------
DIY How To Make Decorative Jar - How To Paint On Glass - How To Paint Glass Jar - Duration: 12:27.
I mix turquoise acrylic paint with white acrylic paint
I'm diluting and mixing the pink acrylic paints that are about to run out
Gray Green Acrylic Paint
Water
Water
Lace Pieces
Lace Pieces
I paint with acrylic spray paints
Hessian Clothes
Hessian Clothes
Stencil
Black Acrylic Paint
Any glue that is transparent when dry ( like mod podge)
Transparent glue again
Sea shells
Transparent glue again
Small pebbles I gather from the sea
-------------------------------------------
How To Make AMAZING CHOCOLATE EGG Cake Decorating Video! Top 10 Cakes Step by Step Tutorials 2018 - Duration: 10:59.
-------------------------------------------
How To Make Pepper Garnish Flower - Duration: 1:05.
Welcome to my kitchen! My name is Gala.
Today I am going to share with you
how to make flower from bell pepper.
With the same technique we can make flower from other peppers as well.
We can make flowers from cili and habanero as well
I am making vertical cuts with paring knife
We can make pettals with kitchen shires
to make pettals
very important when you create flower
remove everything inside (septum)
so our pepper flowers
open up without any problems
flower from bell pepper
stays fresh so well
because it has moisture inside
Thank you so much for watching my video!
Please subscribe to my chanell!
So you never miss my new video!
-------------------------------------------
How to Make Chocolate Chip Cookie Cake | The Stay At Home Chef - Duration: 3:33.
Today on The Stay At Home Chef
I'm showing you how to make a
Chocolate Chip Cookie Cake
This cake is super fun and super easy to make.
Start by preheating your oven to 350 degrees Fahrenheit
and lightly grease a 10 inch cake pan
and line the bottom with parchment paper
Then plop 3/4 of a cup of softened butter into a bowl
and add in 3/4 cup of brown sugar
and 2/3 of a cup of regular sugar
and cream this all together
After about 1 minute of mixing you'll add in
1 whole egg plus 1 egg yolk
and pour those in along with
1 teaspoon of vanilla extract and beat this in
It only takes about 20 seconds of mixing
to get a nice creamy mixture on that
Next we're going to add in our dry ingredients
We'll start with 1 1/2 teaspoons of cornstarch
1/2 teaspoon of baking powder
and 3/4 teaspoon of salt
Give this a quick mix
Then we'll add in our flour
You'll need 2 cups of all-purpose flour
We'll start adding that in and mixing it in
in between additions
It'll look a little bit crumbly at first but if you keep on mixing
the dough will come together
Then we're going to turn off our hand mixer
because we're done with that
And sprinkle in 1 cup of chocolate chips
and 2 tablespoons of sprinkles
and stir those in
Once you get it into a nice big dough ball
we're going to transfer this to our 10 inch pan
and press it into the bottom
It takes a second to press it down and get it spread out
through the whole pan
but after a couple minutes you'll end up with a giant cookie
and you want it to be as flat and even as possible
It's a giant cookie with sprinkles and that's just so much fun!
We're going to bake this in the 350 degree oven
for about 30 minutes
Or until the edges of the cookie turn golden brown
Once the cookie is finished baking you'll want to
remove it from the oven and transfer it to a wire rack
to cool completely
In the meantime we're going to make our frosting
Start with 1/2 cup of salted softened butter in a mixing bowl
and cream it with a hand mixer
You want to beat some air in there and get the butter
light and fluffy so give it a good minute or two of mixing
Then we're going to add in the powdered sugar
You'll need 1 1/2 cups total but I like to add it in
about 1/2 a cup at a time
Once you get all of the powdered sugar mixed in
it should be pretty thick but don't worry
we've still got a couple more things to add
because this is actually going to be a chocolate frosting
You'll need 1/4 cup of unsweetened cocoa powder
and then also add in 1/2 teaspoon of vanilla extract
which will help thin this out
And if it's still too thick add in 1 to 2 teaspoons of milk
and mix that in
Transfer this all to a piping bag and we're going to pipe
it on to our cooled cake
Give it some pretty swirls of chocolate frosting around the edges
and then I like to add a little bit of sprinkles
on top of each little swirl
And that's it!
A fun little cookie cake
You're ready to slice and serve
Thanks for watching!
You can find the full written recipe in the video description.
Be sure to subscribe, like, and follow
and check out the rest of my videos
where you can find hundreds of
restaurant quality recipes you can easily make at home.
See you later!
-------------------------------------------
Soft Chapati | How to make soft Chapati at home| Indian Wheat Bread By Jai Padhu - Duration: 4:55. For more infomation >> Soft Chapati | How to make soft Chapati at home| Indian Wheat Bread By Jai Padhu - Duration: 4:55.
 -------------------------------------------
How to Make a Poop Emoji Pencil | Sophie's World - Duration: 4:53.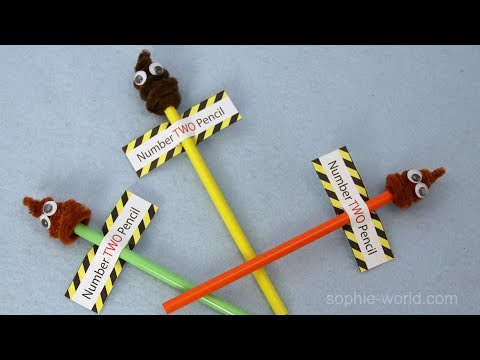
hi I'm Sophie and welcome to my world well I just recently did an emoji party
and one of the crafts that we did was a poop emoji pencil and I'm gonna show you
how to make one right now for this project you'll need a pencil glue dots
Brown pipe cleaners googly eyes scissors the number two pencil template from my
website x-acto knife cutting surface and hot glue gun so first thing first
you're going to cut out one of these number two pencil tags and I have
created a template for you and you can download that from my website
www.sophie-world.com there's a link down below you just cut out the template there you go
and then all you need to do is take an exacto knife be very careful with this
but just cut right in the middle right over the number two so that you make two
little slits and that's so you can slide your pencil in so we're gonna put that
off to the side now if you happen to have fuzzy fuzzy pipe cleaners so these
are like pretty thin pipe cleaners that's why I need three of them if you
end up using a fuzzy pipe cleaner like this one that's a lot thicker you can
get away with just doing two and I'll show you that's what it ends up looking
like when you do two see if you can see that there and those are the fuzzies so
you only need two of the fuzzies but in this case my Browns only came in these
thin pipe cleaners and so I'm gonna be using three so the first thing you want
to do is just take two of the pipe cleaners and cross them over kind of
like the top of a teepee and you wanna twist each in the opposite direction so
that you're basically making one big long pipe cleaner so it has a little
lump in the middle there and then we're gonna do the same thing here cross in
the middle and just twist and you're twisting that around a couple times not
too much you don't need too much it's about probably about a half an inch
there okay that's gonna give me one big long
pipe cleaner now I'm gonna take my pencil and I need my glue dots so I'm
gonna cover the whole top part here with glue dots so I found that three sort of
is a good number just put those on there now I'm gonna take my pipe cleaner and
I'm sticking it right down to the bottom where I first have my glue dots and I'm
going to just start wrapping and I'm gonna literally wrap two pipe cleaners
worth so there's one and here comes the second one so you can see I'm making
like a big kind of like a big ball or an innertube around there now when I've got
my little donut inner tube shape there I'm gonna start moving it up to make the
rest of the poop emoji so now I'm at that second spot where I joined them
together and I'm moving it on up and
then when you get to the top here you're just gonna wrap it around and give it a
little swirly-q right at the top there like that just give it a little swirly=q
see that there's your little poop now you're just going to take your glue gun
and put two little bloops of glue and then pop an eyeball on and pop another
eyeball on there you go and you can kind of push that up there to make sure
that you got your poop shape happening and then take your number two that you
cut before and slide it down from the top behind the word two through that
second slit and there you have your poop emoji and there you have it
that's all you need to make your very own number
two pencil if you liked the video make sure to give us a thumbs up and share us
with your friends cuz you know emojis should be shared for more great
ideas check us out at sophie-world.com
Không có nhận xét nào:
Đăng nhận xét